Give Customers Access to SuiteCommerce in Bulk
Essentially, what we are doing is checking these two checkboxes for all the customers we want to give access. This will automatically send an email to each customer inviting them to create a password.
- Date
- January 22, 2026
- Read
- 7 min

To provide access to customers so they can login to the Customer Center or your SuiteCommerce website, you can either edit each customer record manually, or you can update many customers at once using a CSV import. This tutorial shows you how to update many at once.
Trying to give one person, such as a sales rep, access to multiple customer accounts in SuiteCommerce? Check out our Single Login Customer Swapping and Child Customer "Impersonation" extensions for SuiteCommerce.
The Basic Process: CSV Import
Essentially, what we are doing in this tutorial is using a CSV import to mark two checkbox fields on the customer record for all the customers we want to give access:
- "Give Access"
- "Send New Access Notification Email"
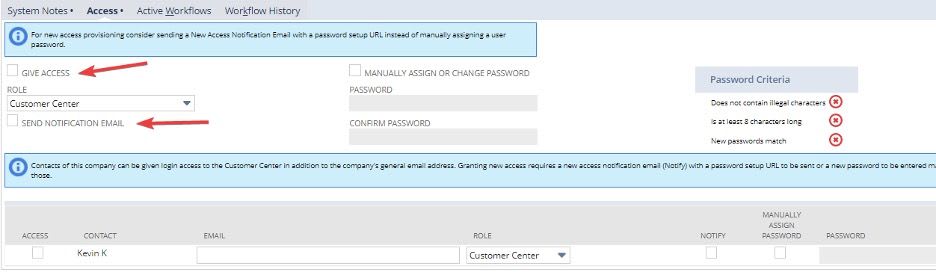
This will automatically send an email to each customer inviting them to create a password, and they will then be able to log in to your website.
If you have experience performing CSV imports with NetSuite's Import Assistant, you can probably complete this import process on your own now that you know what fields need to be updated on the customer record. But, if you need a little more assistance, we've outlined the step-by-step details of granting bulk customer access below.
Create a CSV File
Create a CSV file with all the customers you want to provide access to as lines. Your document will need the following columns:
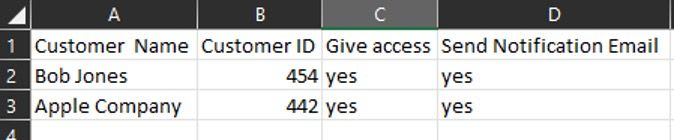
Note: The Customer Name column is optional and won’t be mapped; it is sometimes handy to have as a reference.
Get File from a Saved Search
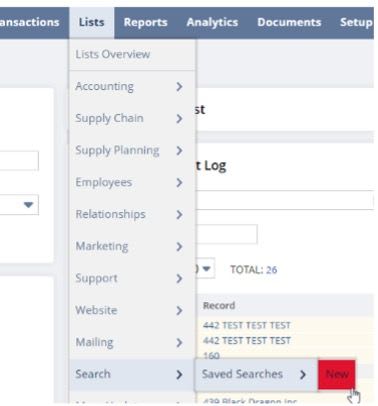
One way to generate this file is from the results of a saved search in NetSuite.
Step 1: Go to Lists > Searches > Saved Searches > New.
Step 2: Choose Customer as search type.

Step 3: Use criteria if needed to restrict the results to whichever subset of customers you want to work with.
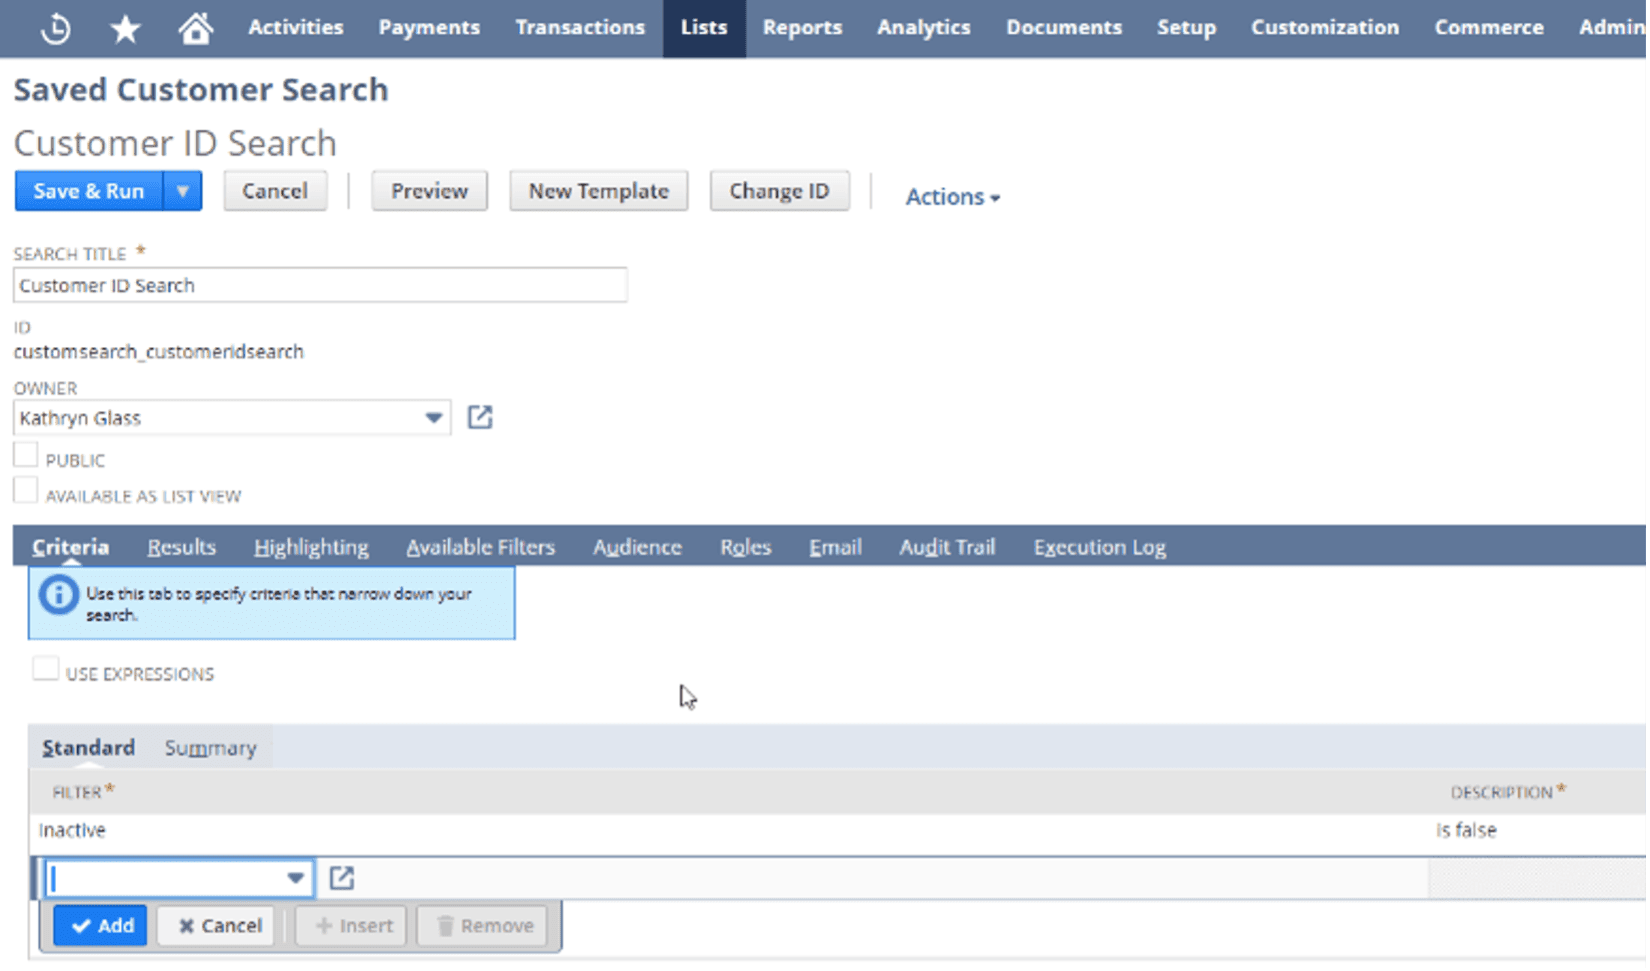
Step 4: Set Name and Internal ID as the two results columns.
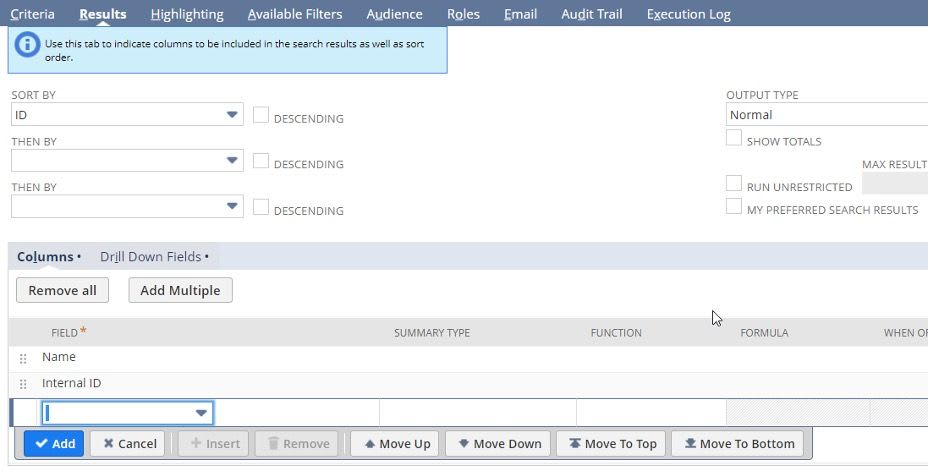
Step 5: Click Save and Run.
Step 6: Click the little document images to export the results as a CSV file.

Create CSV Import
Go to Setup > Import/Export > Import CSV Records.

Scan & Upload CSV File
On the first page of the Import Assistant (Step 1: Scan & Upload CSV File):
- Click Relationships under the import type.
- Click Customers only under the record type.
- Click the Select button and navigate to the desired file, then click open.
- Click Next.

Import Options
On the second page of the Import Assistant (Step 2: Import Options):
- Click UPDATE, since the goal is to update a customer already in NetSuite.
- Click Next.

File Mapping
On the second page of the Import Assistant (Step 3: File Mapping):
- Double-check your import options. (You likely won't need to adjust these.)
- Upload the csv import file that you created.
Field Mapping
On the second page of the Import Assistant (Step 4: Field Mapping):
- Follow the screenshots below to map the fields from your CSV import to fields in your NetSuite account.
- When you are finished mapping all the fields, click Next.
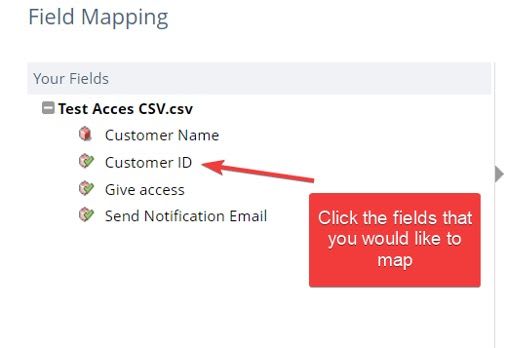
Note: Remember to select the appropriate line in the form on the field mapping page (pictured below) before clicking on the NetSuite field you wish to map.
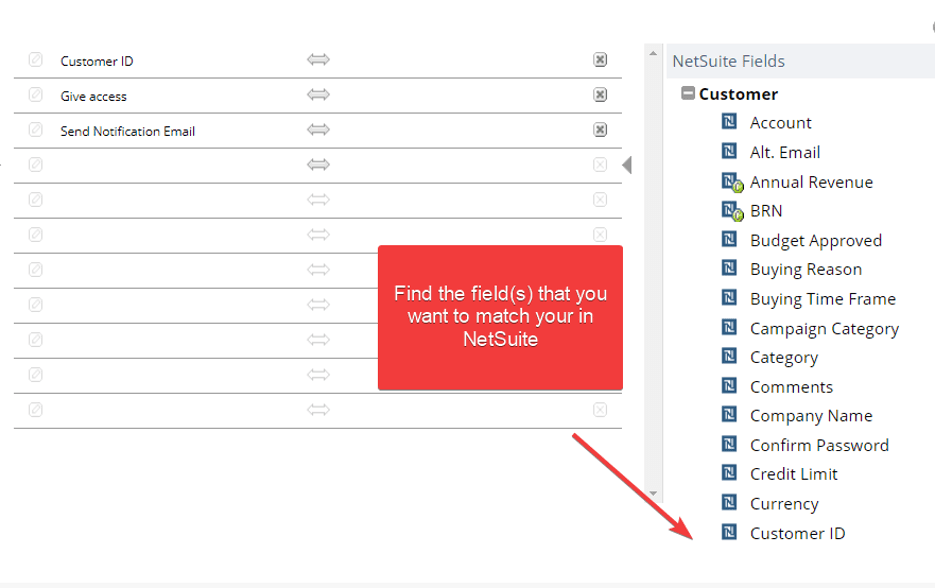
Be sure to include the following access-related NetSuite fields among any others required for your Field Mapping:
- Customer ID
- Email (if not already on the customer record)
- Give Access
- Assigned Web Site
- Role
- Send New Access Notification Email (if not assigning password manually)
- Manually Assign or Change Password (if assigning manually)
- Password* (if assigning manually)
- Confirm Password* (if assigning manually)
*Remember to follow NetSuite's Password Criteria if you are assigning passwords manually from columns in your CSV file.
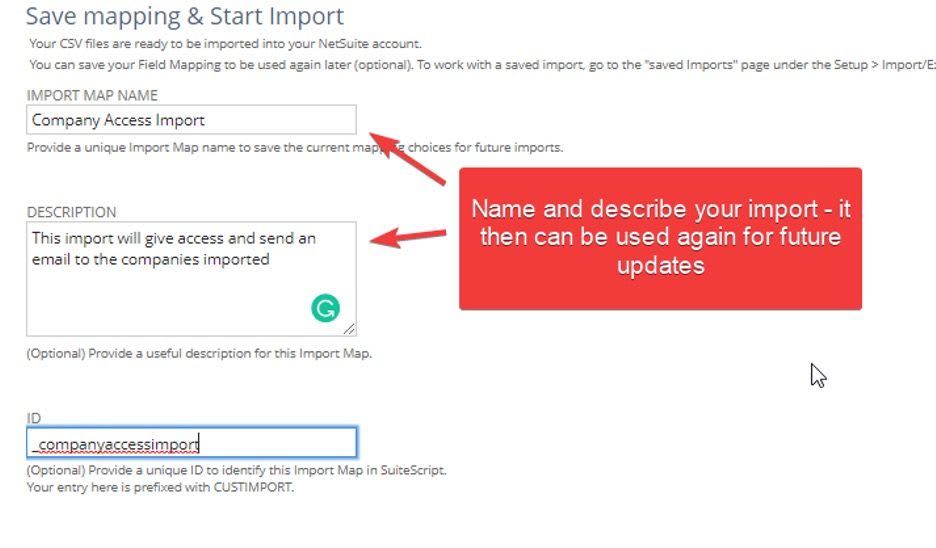
Import Assistant page 5: Save Mapping and Start
- Enter a name for your import under Import Map Name.
- Enter a description for your import under Description.
- Enter an id import under ID. If you do not enter one, NetSuite will create one.
- Click Next.
- Click Save & Run.
Checking the Results of Your Import
- After you click Save & Run, it will display a confirmation.
- Click Import Job Status
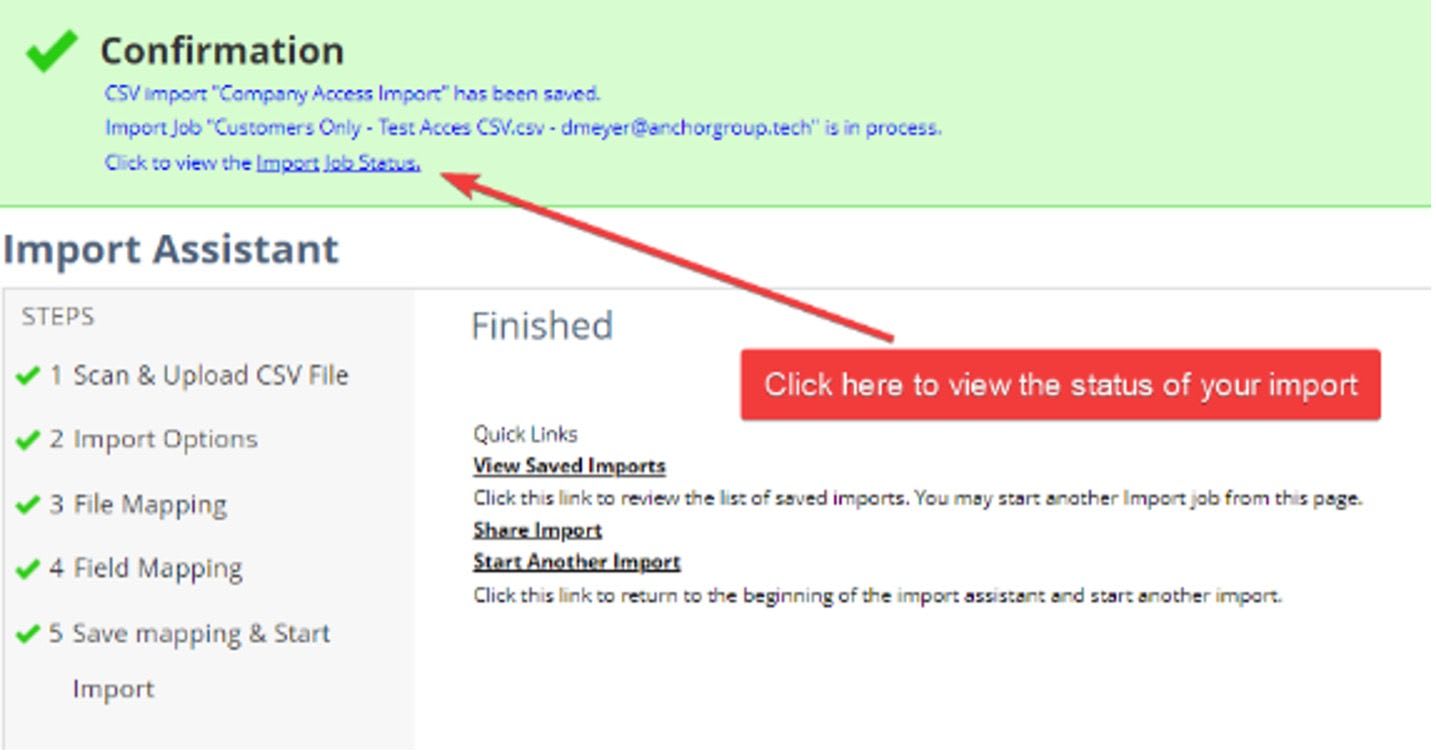
Note: NetSuite will bring you to a results page. You can click on CSV Response to see if any errors happened during the import.

Interested in optimizing your SuiteCommerce Login/Registration page? Check out the SuiteCommerce Login/Register Page QA Checklist.
Fixing Errors
- If there are any errors, you can use the error messages to fix them.
- Once you fix the errored lines on your CSV file, save it as a new file with only the lines that failed last time.
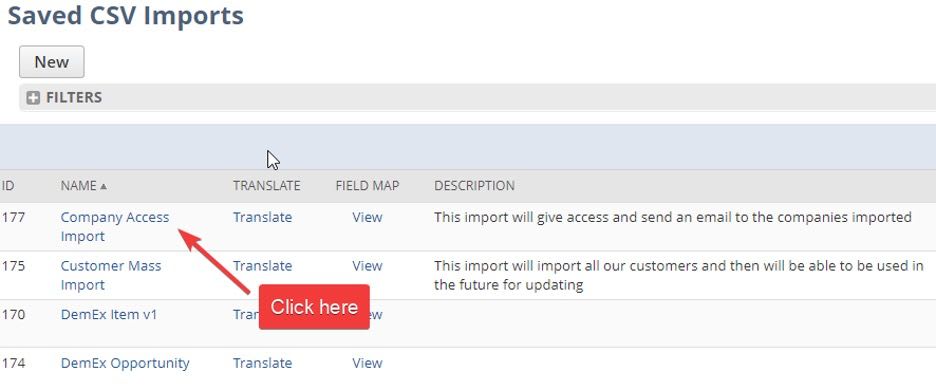
- You can then reuse the import template you created before. Go to Setup > Import/Export > Saved CSV Records.
That's it. Pat yourself on the back for a job well done.
Hopefully, this post helped you set up your SuiteCommerce website and become more useful to customers. If you have any questions, feel free to contact our team at Anchor Group.
Related Article
- Customer Unable to Log In to SuiteCommerce (Access Given)
- SuiteCommerce MyAccount Forgot Password Expiry Settings
- SuiteCommerce Initial Customer Access Options | NetSuite Emails
- Force Reset ALL Web User's Passwords | NetSuite SuiteCommerce
- Setting Up Auto-Approval for Advanced Signup | SuiteCommerce
- Customer or Contact Accessing Multiple Websites
Get stuck in a step during this article?
We like to update our blogs and articles to make sure they help resolve any troubleshooting difficulties you are having. Sometimes there is a related feature to enable or field to fill out that we miss during the instructions. If this article didn't resolve the issue, please use the chat and let us know so that we can update this article.
Oracle NetSuite Alliance Partner & Commerce Partner
If you have general questions about SuiteCommerce or more specific questions about how our team can support your business as you implement NetSuite or SuiteCommerce, feel free to contact us anytime. Anchor Group is a certified Oracle NetSuite Alliance Partner and Commerce Partner equipped to handle all kinds of NetSuite and SuiteCommerce projects, large or small.
We are a premium SuiteCommerce agency that creates powerful customer portals. Unlike our competitors, we have already solved your problems.
FREE SuiteCommerce Book for Continued Learning.
Want a free paperback copy of this NetSuite e-commerce book? We even pay for shipping... Order the free SuiteCommerce book today.
Tagged with Training