Product Comparison SuiteCommerce Bundle Configuration
NetSuite provides a free SuiteCommerce bundle that compares and contrasts different products on the Product List Page. This article will walk you through how this extension is configured.
- Date
- December 3, 2025
- Read
- 5 min

One of our SuiteCommerce customers has very similar products, and wanted to highlight the minor differences. This would help customers better understand the product they are purchasing, while reducing returns (RMAs) and increasing the customer satisfaction. Thankfully, NetSuite already provides a free SuiteCommerce bundle that compares and contrasts different products on the Product List Page (PDP). This article will walk you through how to configure this extension.
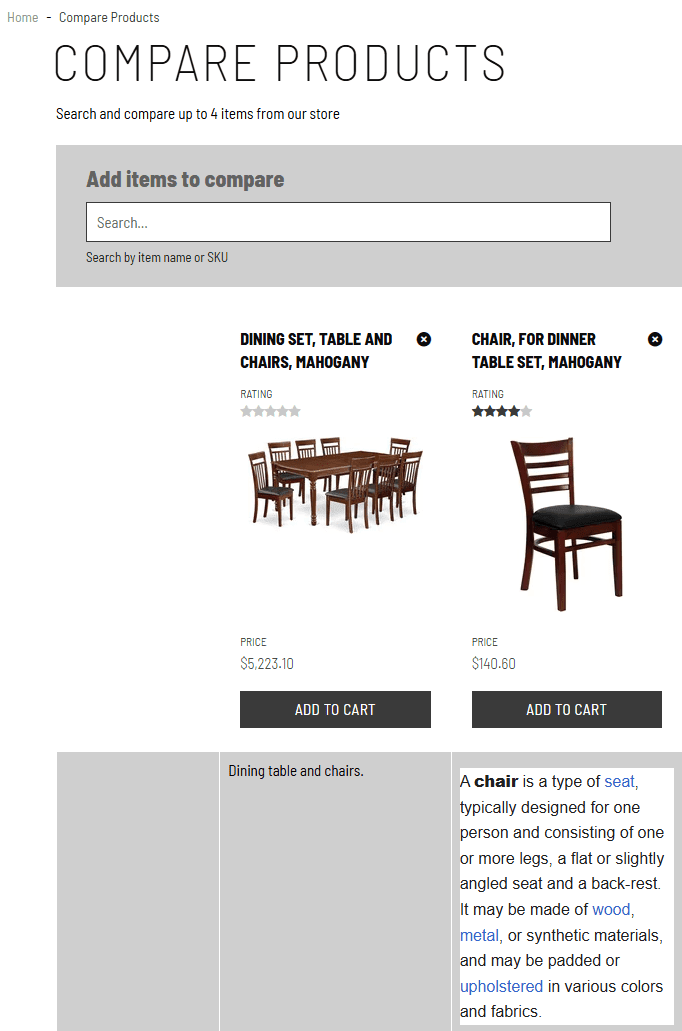
Product Comparison Page
Install & Activate the SuiteCommerce Bundle
The first step to adding this extension to the SuiteCommerce store is to install the extension.
Step 1: Search for the SC Product Comparison bundle.

Step 2: Next, activate the extension manager and the Featured Products extension.
Step 3: Check the checkbox next to the Product Comparison in the Extensions tab.
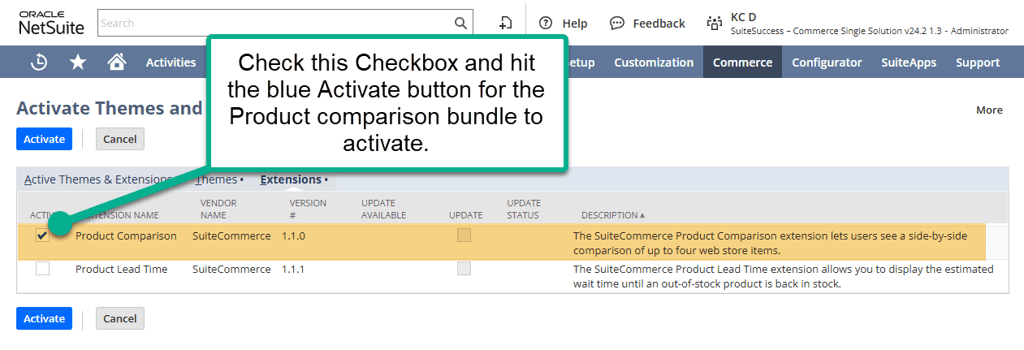
After the eight step activation process is completed, the Featured Product extension should be installed and activated.
Configure the Extension from the Configuration Record
There are two pages that this bundle connects to: the Product List Page (PLP), where you can select the items to compare, and the Comparison page, which highlights the details between items.
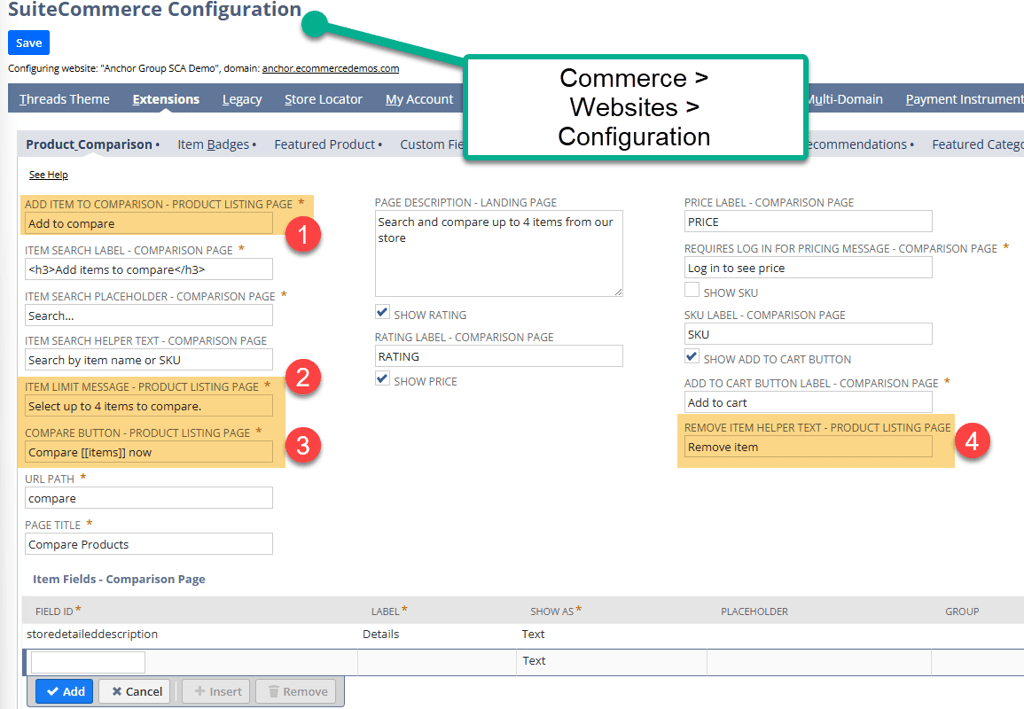
The configuration record & NetSuite documentation jumble these fields together, making it difficult to navigate in the Configuration Record (Commerce > Websites > Configuration). The section below organizes the fields based on these two pages.
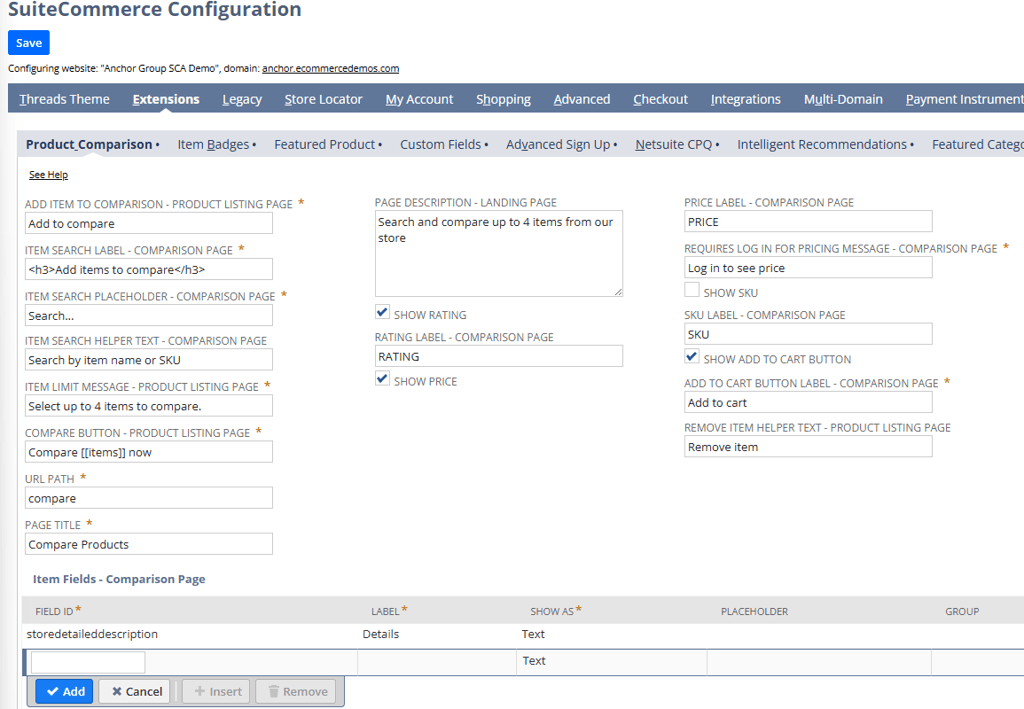
Product Display Page Fields
Configuration Record View
- Add Item to Comparison – PLP: This field sets the label for the Add to Compare box.
- Item Limit Message – PLP: This is how many items can be compared at one time.
- Compare Button – PLP: This sets the label for the Compare button on the PLP.
- Remove Item Helper Text – PLP: This is the description for the option to remove the item from comparison.
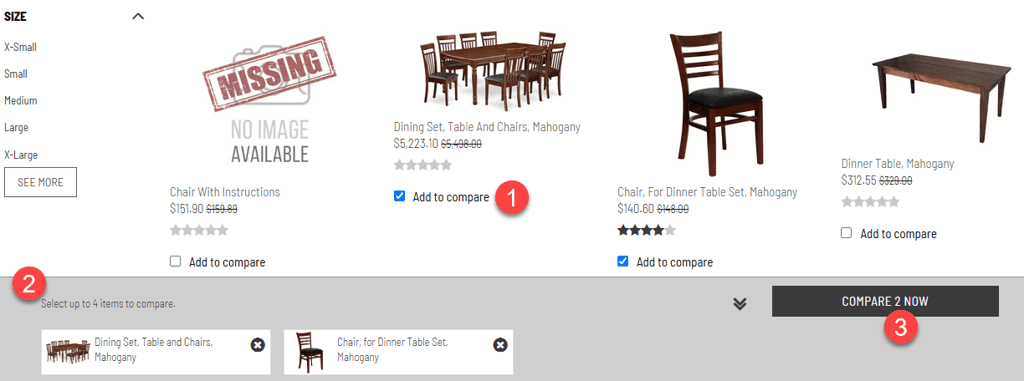
Product List Page View
Comparison Page Fields
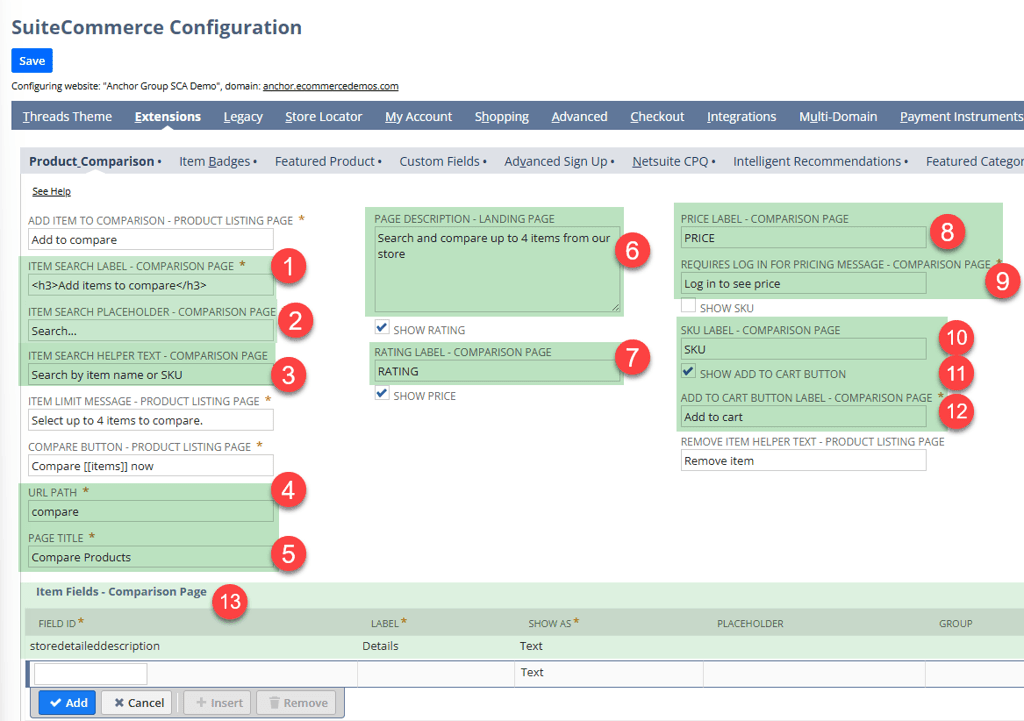
- Item Search Label: This is the HTML supported label for the search input.
- Item Search Placeholder: This is the placeholder text for the search bar.
- Item Search Helper Text: These are the instructions to use the search bar.
- URL Path: This is the URL path for the product comparison landing page.
- Page Title: This is the URL path for the product comparison landing page.
- Page Description: This is the description of the Product Comparison page that supports HTML text.
- Rating Label: If the Show Rating checkbox is checked, then this label surfaces to explain the ratings.
- Price Label: If the Show Pricing checkbox is checked, then this label surfaces to explain the ratings.
- Requires Login for Pricing Message: This defines the label for the link to the login page. This only surfaces if you have the Require Login for Pricing Field checked.
This field is found on the Shipping tab and the Shopping Basics subtab on the Website Setup Record.
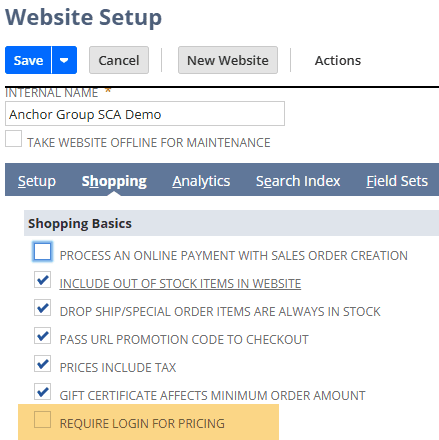
Commerce > Websites > Website List
- SKU Label: This determines the label for the SKU section of the Comparison table.
- Show Add to Cart Button: If checked, adds the Add to Cart button to the Comparison chart.
- Add to Cart Button Label: Sets the label for the Add to Cart button in the Comparison table.
- Item Fields Comparison Page: Underneath the image thumbnail, this is the section where you can include additional fields to compare different products. Here, you can see the Store Detailed Description displayed as an example label of Details.
This link highlights many options for configuring the array. For instance, you could add color swatches, dates, text, checkboxes, or group categories together.

Update the Field Sets in the Website Setup Record
In order for this bundle to be fully configured, the Admin needs to go to the Website Setup Record and modify the Field Sets.
Step 1: Navigate to the Field Sets tab in the Website Setup Record (Commerce > Websites > Website List – Field Sets Tab).
Step 2: Find the Details field set and verify that all fields listed on the table from the Item Fields Comparison page are added to the Details field set.
Step 3: Save the Website Setup Record.
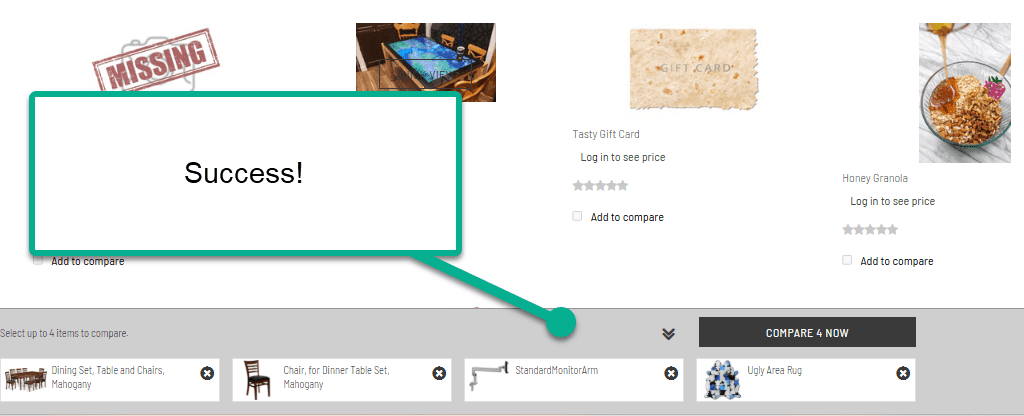
Step 4: Perform a cache invalidation request.
Return to any PLP on the webstore, and you should see the product comparison surface on the site.
Related Articles:
Tagged with Training