SuiteCommerce InStore (SCIS) is NetSuite’s in-store Point-of-Sale product that connects to the backend of NetSuite. There are many configuration differences between SCIS and SuiteCommerce (SC) sites and little documentation on the SCIS product. This document will walk through the extra configuration steps to provide customers access to an SCIS storefront, assigning the customer to a ‘Customer Group’ and finally attaching customers to an order from the SCIS site.
Prerequisite:
The field SCIS Customer Group {field id:custentity_ns_pos_customergroup} needs to be added to the Sales Order tab. To learn more about customizing forms, read this article on Moving Tabs Within Custom Entry Forms.
Customer Access on the Customer Record
This process is similar to the SuiteCommerce process in that it gives customers access, with one caveat on the SCIS Customer Settings.
Step 1: The SuiteCommerce process to provide Customer ‘Access’ is outlined in this article on Enabling the Customer Access Feature. (This step is optional, and it allows the store customer access to NetSuite.)
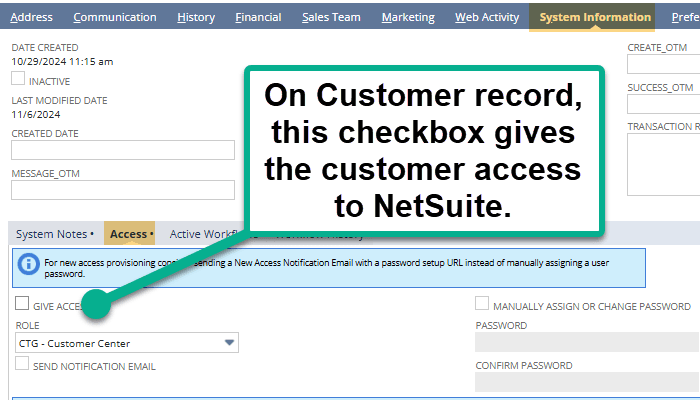
Step 2: To configure the SCIS Customer Settings, the user must navigate to Commerce > InStore > (Global Settings) Settings and Edit the existing SCIS Settings record you want to change.
Step 3: Navigate to the Customer Tab.
- Click the “Give Access” Checkbox to give customers access to a SuiteCommerce MyAccount page for their customer account.
- Notice the Default Customer Group, which will described in further detail in the next section.
Step 4: Save the SCIS Settings Record.

Check the Give Access Checkbox
Customer Groups

Add a New Customer on the Right
SCIS requires a customer record for each transaction. On the above right (orange highlight), the store associate can create a new customer from the SCIS storefront. Returning customers are automatically segmented into the defaulted Customer Group from the SCIS Settings Record.
To define the Default Customer Group, follow these steps:
Step 1: Navigate to Commerce > InStore > (Global Settings) Settings and Edit the existing SCIS Settings record you want to change.
Step 2: Find the “Default Customer Group” field and select the Group you would like as default for new customers or if a customer does not already have a customer group at the time of checkout.
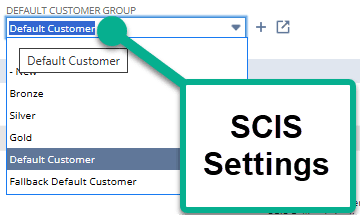
Note: It is recommended keeping the “Default Customer Group” selected here. Additional configuration might be needed if another group is selected.
Step 3: To configure your SCIS Customer Groups, follow this click path:
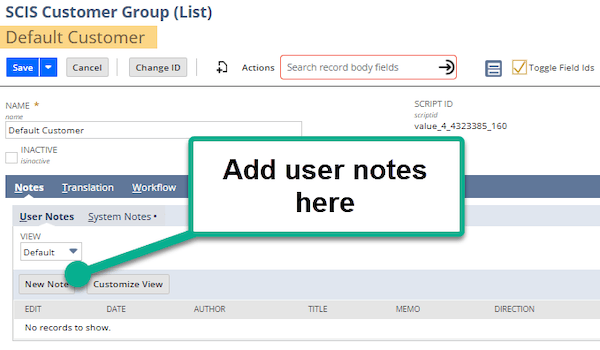
- Customization > Lists, Records, & Fields > Record Types – Select “SCIS Customer Group (List)”
- Select ‘Edit’ on the Customer Group, and you can add user notes for the customer group.
Step 4: From a customer level, you can configure the user’s SCIS Customer Group.
- Navigate to the Customer Record > Sales Team tab.
- Select the desired ‘SCIS Customer Group’ from the available dropdown. This field is specific for each unique customer and overrides the default value set on the SCIS Settings record from step #2.

Important Call Out: If using a custom form for your Customer Record, you may need to add SCIS Customer Group {field id:custentity_ns_pos_customergroup} as a field. Natively, it can be found on the Sales Order tab. To learn more about customizing forms, check out Moving Tabs in NetSuite Custom Entry Forms.
Creating a New Customer from the SCIS Storefront
When logged into NetSuite SCIS, the Admin or Store Clerk can “Add New Customer” and automatically attach a customer to the order. To do so, follow this click path:

SCIS Store View
Step 1: Enter the SCIS Storefront with the Admin’s credentials and search for a customer via the Global Search Bar.
Step 2: In the Top Right Corner (highlighted orange), click 'Add a New Customer.'
This pop up surfaces to add the customer as an Individual or Company.
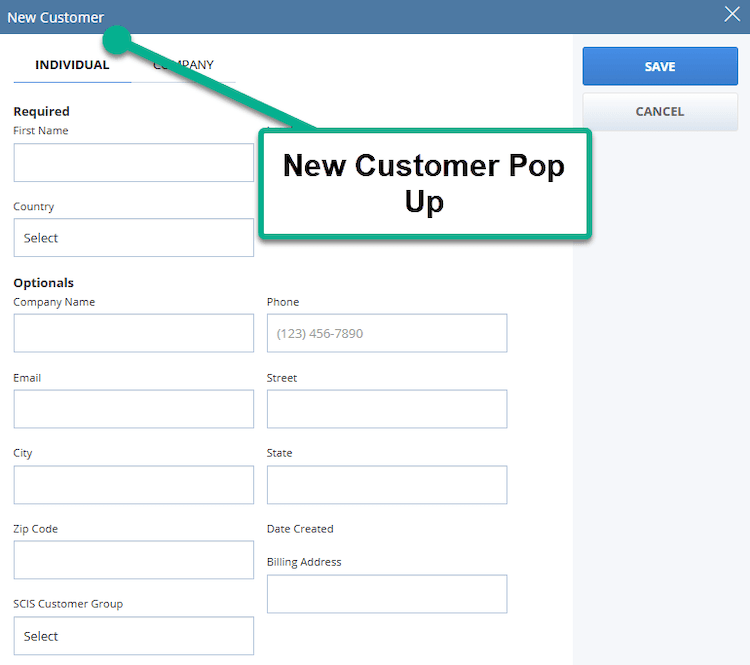
- Add the required information and select “Save”.
Step 3: This should automatically attach the Customer to the SCIS order. This also relates to the “Send Notification Email” checkbox on the Customer Record in NetSuite and sends the entered email address a ‘Welcome to the Store’ Email.
Attaching Customers to an Order
To attach a customer to an order in SuiteCommerce InStore, follow this click path as an Administrator:
Step 1: In the Global Search Bar at the top of the screen, search the customer’s name and hit enter.
Step 2: Select the Customer by selecting the value on the “Customer” or by selecting the “Add to Order” button.

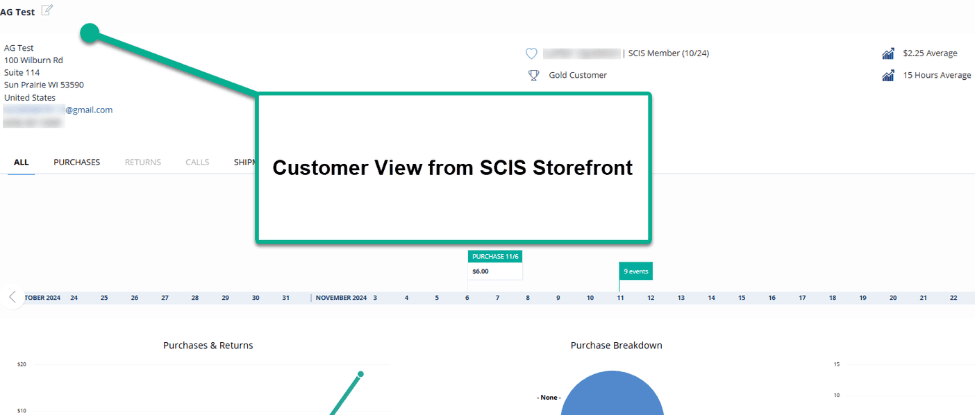
Step 3: If you select the customer record, the Admin or SCIS Clerk can view the customer information, purchase history, last visit, and customer default group. Once you are ready, select the Add to Order button in the top right corner.
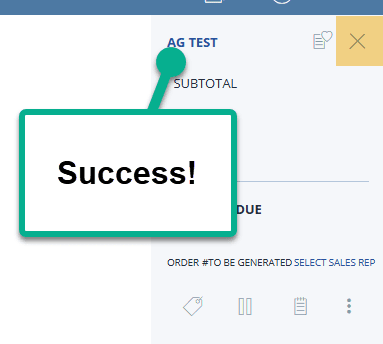
Step 4: This should assign the customer to the order, as shown below. If you want to remove the customer from the order, select the “X” button highlighted in orange at the top right corner.
Step 5: Continue to add items to the order as a normal SCIS transaction.
Got stuck on a step in this article?
We like to update our blogs and articles to make sure they help resolve any troubleshooting difficulties you are having. Sometimes, there is a related feature to enable or a field to fill out that we miss during the instructions. If this article didn't resolve the issue, please use the chat and let us know so that we can update this article!
FREE SuiteCommerce Book
If you liked this article, you'll LOVE our book on SuiteCommerce! Order the free SuiteCommerce book today, and we'll even pay for shipping!
Oracle NetSuite Alliance Partner & Commerce Partner
If you have questions about how our team can support your business as you implement NetSuite or SuiteCommerce, feel free to contact us anytime. Anchor Group is a certified Oracle NetSuite Alliance Partner and Commerce Partner equipped to handle all kinds of NetSuite and SuiteCommerce projects, large or small!

We are a premium SuiteCommerce agency that creates powerful customer portals. Unlike our competitors, we have already solved your problems.
Tagged with Training
