SuiteCloud Development Framework Setup for NetSuite
The SuiteCloud Development Framework (SDF) is a software development framework that provides tools and best practices for building and managing customizations for NetSuite.
Date
November 20, 2026
Read
9 min
What Is the SuiteCloud Development Framework (SDF)?
The SuiteCloud Development Framework (SDF) is a software development framework that provides tools and best practices for building and managing customizations for NetSuite. It enables developers to create, test, and deploy custom scripts, configurations, and integrations in a structured and version-controlled way.
Traditionally, SDF was accessed via a Java command line interface (CLI), but in recent years NetSuite introduced a Node.js-based SuiteCloud CLI, offering a more modern and streamlined experience for JavaScript developers.
Used in conjunction with a source control tool like Git and an IDE like VS Code, the SDF is a powerful tool for controlled and efficient NetSuite development.
Why Use SDF?
SDF allows developers to:
Back up NetSuite customizations and configuration settings to a source control system like Git.
Search across all custom NetSuite objects using an IDE like VS Code.
Develop customizations in line with NetSuite best practices, and with purpose-built tools from NetSuite.
Deploy projects to multiple NetSuite accounts.
Automate deployment and testing workflows.
Improve collaboration between developers.
What Can You Build with SDF?
With SDF, you can manage and deploy a wide variety of NetSuite artifacts, such as:
SuiteScript files (1.0, 2.0, and 2.1)
Custom records and fields
Saved searches, dashboards, and forms
Roles, permissions, and users
SuiteApps
Getting Started with the Node.js SuiteCloud CLI
The Node.js version of the SuiteCloud SDK is designed for JavaScript developers and integrates naturally into Node environments. Below are the steps to get started with a basic SDF project.
Step 1: Prerequisites
Ensure you have the following installed:
Java (Oracle JDK v17 or v21)
Node.js (v22)
npm.
Suitecloud Extension for Visual Studio Code (optional)
A valid NetSuite account with a SuiteCloud-enabled role (Administrator or Developer role) and the SuiteCloud Development Framework and OAuth 2.0 features enabled
If there is already a Git repository for your client, simply open your project in VS Code and checkout a new branch. It is best to start with a clean branch, so you should base your new branch off the initial commit in your repo, or delete all contents of your new branch after it’s been checked out. Any customizations to your client will be re-downloaded when running the SuiteCloud commands in subsequent steps.
Note: If this is the first time you are cloning this particular repo, you will likely see this warning. This key is not known by any other names. Are you sure you want to continue connecting (yes/no/[fingerprint])? Just say “yes”
Run the following command to checkout a new branch (optional):
git checkout -b <branch-name>
If the branch you want already exists, omit the “-b” tag.
Step 4: Create a New SDF Project
With your branch checked out, run the following command to create a new SuiteCloud project:
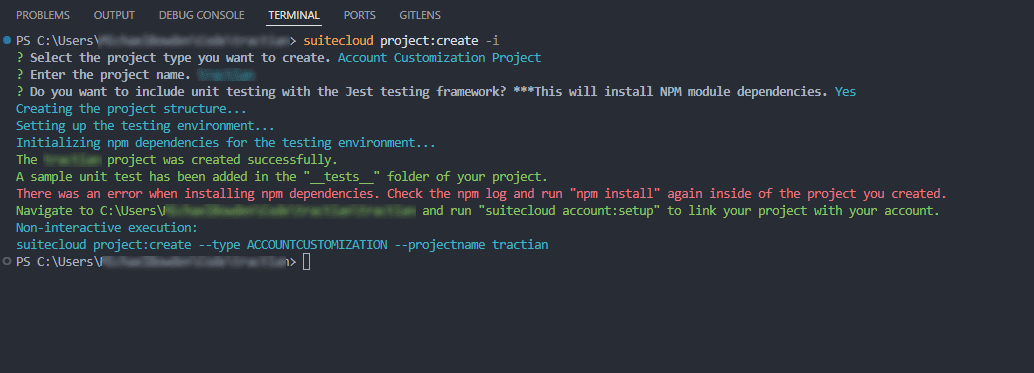
suitecloud project:create -i
The -i option runs the command in interactive mode. Use the arrow keys and “Enter” to select options. For project type, select “Account Customization Project”, then give your project a name when prompted. You can choose to add unit testing if you want (unit testing is not covered in this guide).
Example:
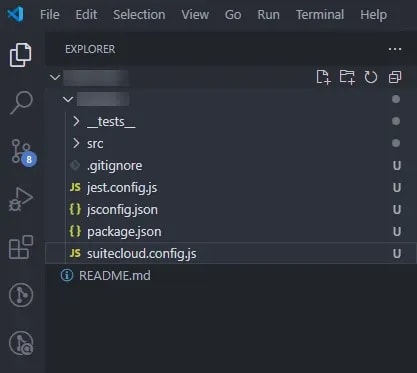
This generates a project directory with the following structure:
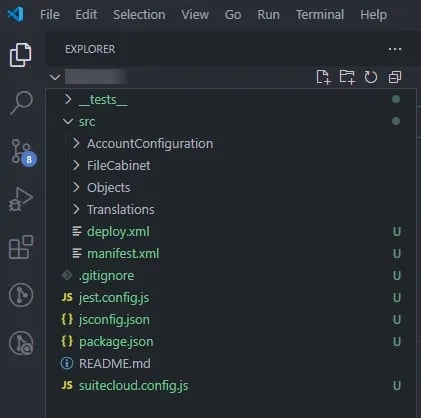
Inside the src folder you will find the following structure:
AccountConfiguration/ – This will hold the list of enabled features for your NetSuite account.
FileCabinet/ – This will hold SuiteScript and static files (similar to the NetSuite File Cabinet)
Objects/ – This will contain XML definitions of custom objects (e.g., custom records, forms, saved searches, reports, etc.)
Translations/ – This will hold custom translations for your account.
deploy.xml – This declares the deployment instructions for a SuiteApp. This will not be covered in this guide.
manifest.xml – This declares the contents of a SuiteApp. The uses of the Manifest.xml will not be covered in this guide.
suitecloud.config.js – This file stores SuiteCloud project settings.
Next, copy the contents of the project folder up to the root level of your repository, then delete the empty project folder. This will make it easier to work in your repository and run commands in subsequent steps. You should be left with the following folder structure:
If you chose to add unit tests during project setup, you will need to install additional node packages. From the project root directory, run the command:
npm install
At this stage, you may want to save your work and commit the project structure to the repo.
Next, you need to authenticate in order to connect your SuiteCloud project to the actual client NetSuite account. From the project root directory, run the command:
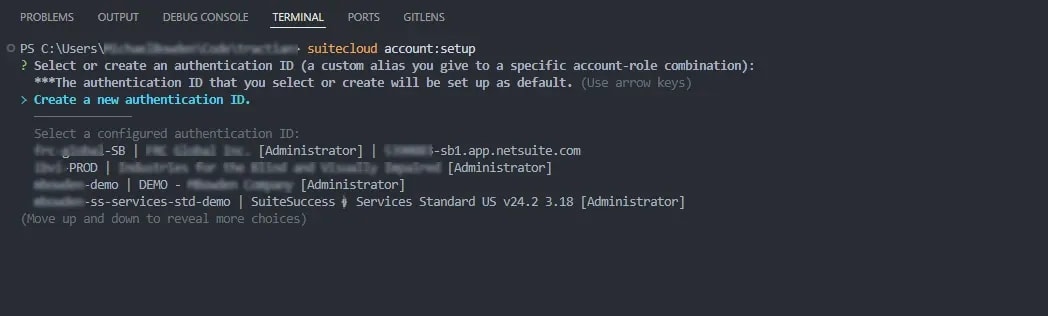
suitecloud account:setup
This command walks you through connecting to your NetSuite account. If you have already done this step for another client, you will see a list of other accounts you have connected to previously. In order to connect to a new account, select “Create a new authentication ID.” You will be prompted to provide a name – this name is arbitrary, and it is only to help you select the right account ID in the future. Therefore, it is recommended that you pick a name which easily indicates the client and the environment this authentication pertains to. For example “ClientName-PROD” for a production account, or “ClientName-SB” for a sandbox.
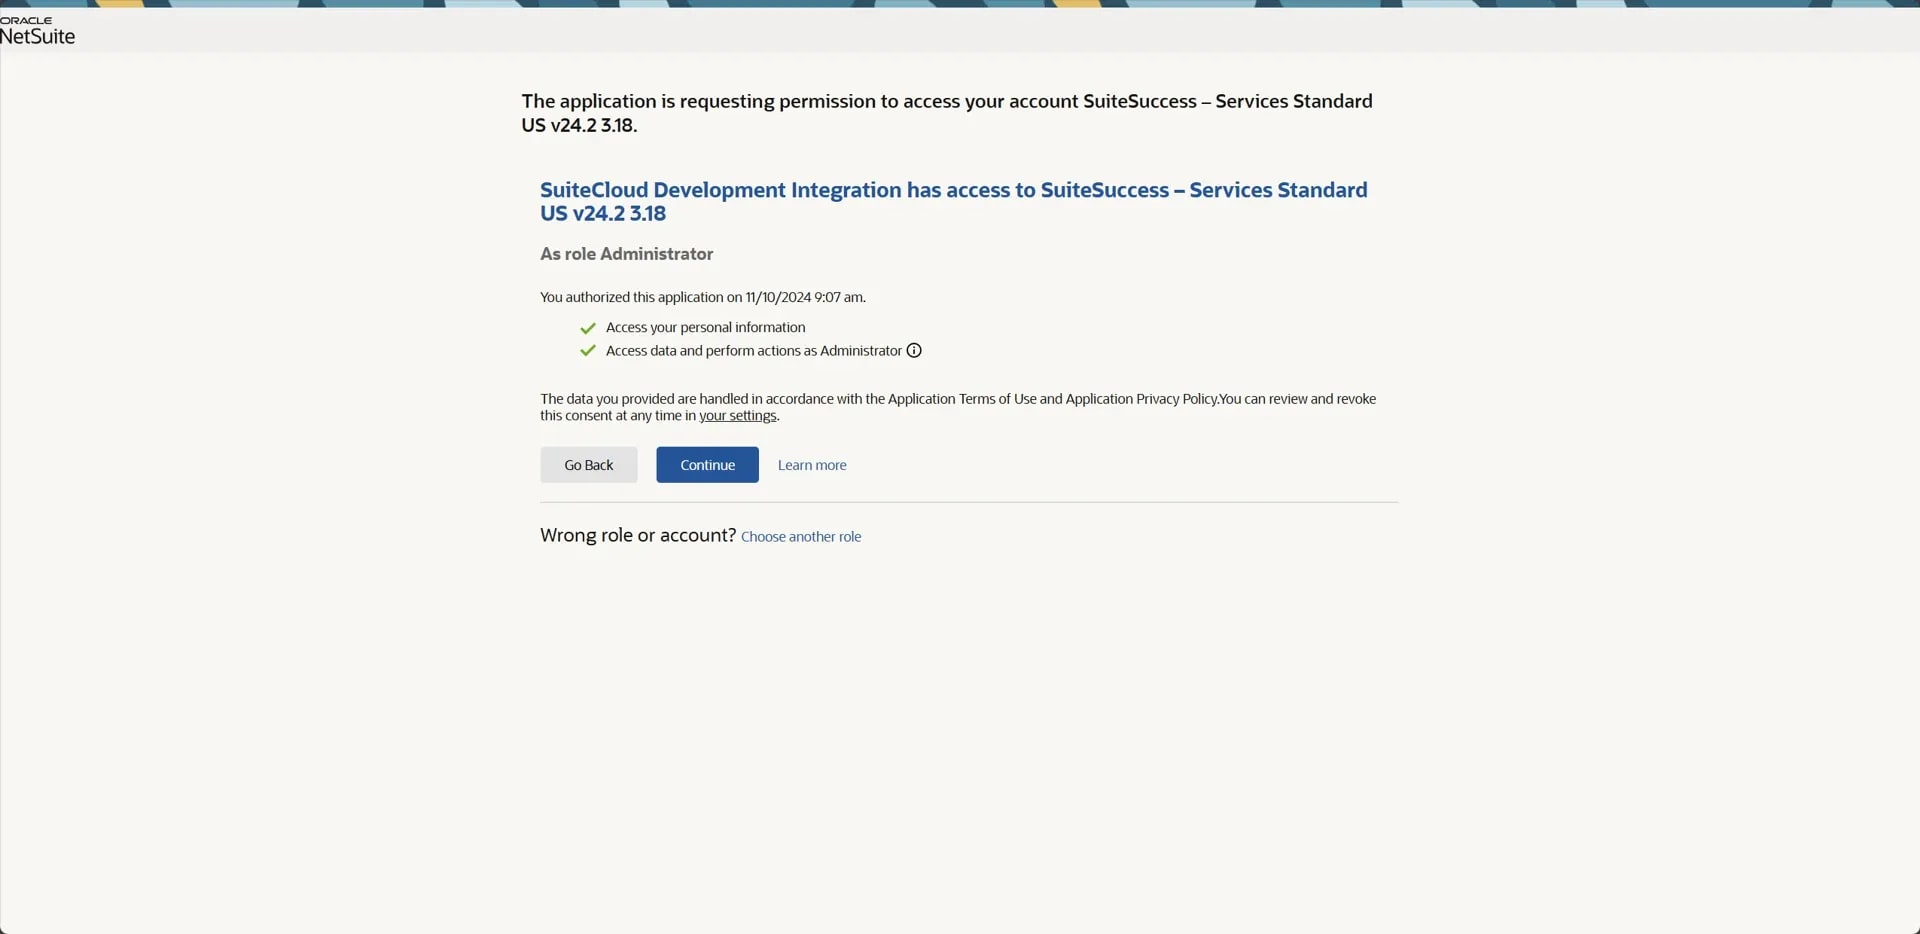
After clicking Enter, you should be taken to your last open browser window. You will now be prompted to allow SuiteCloud Development to connect to your NetSuite account.
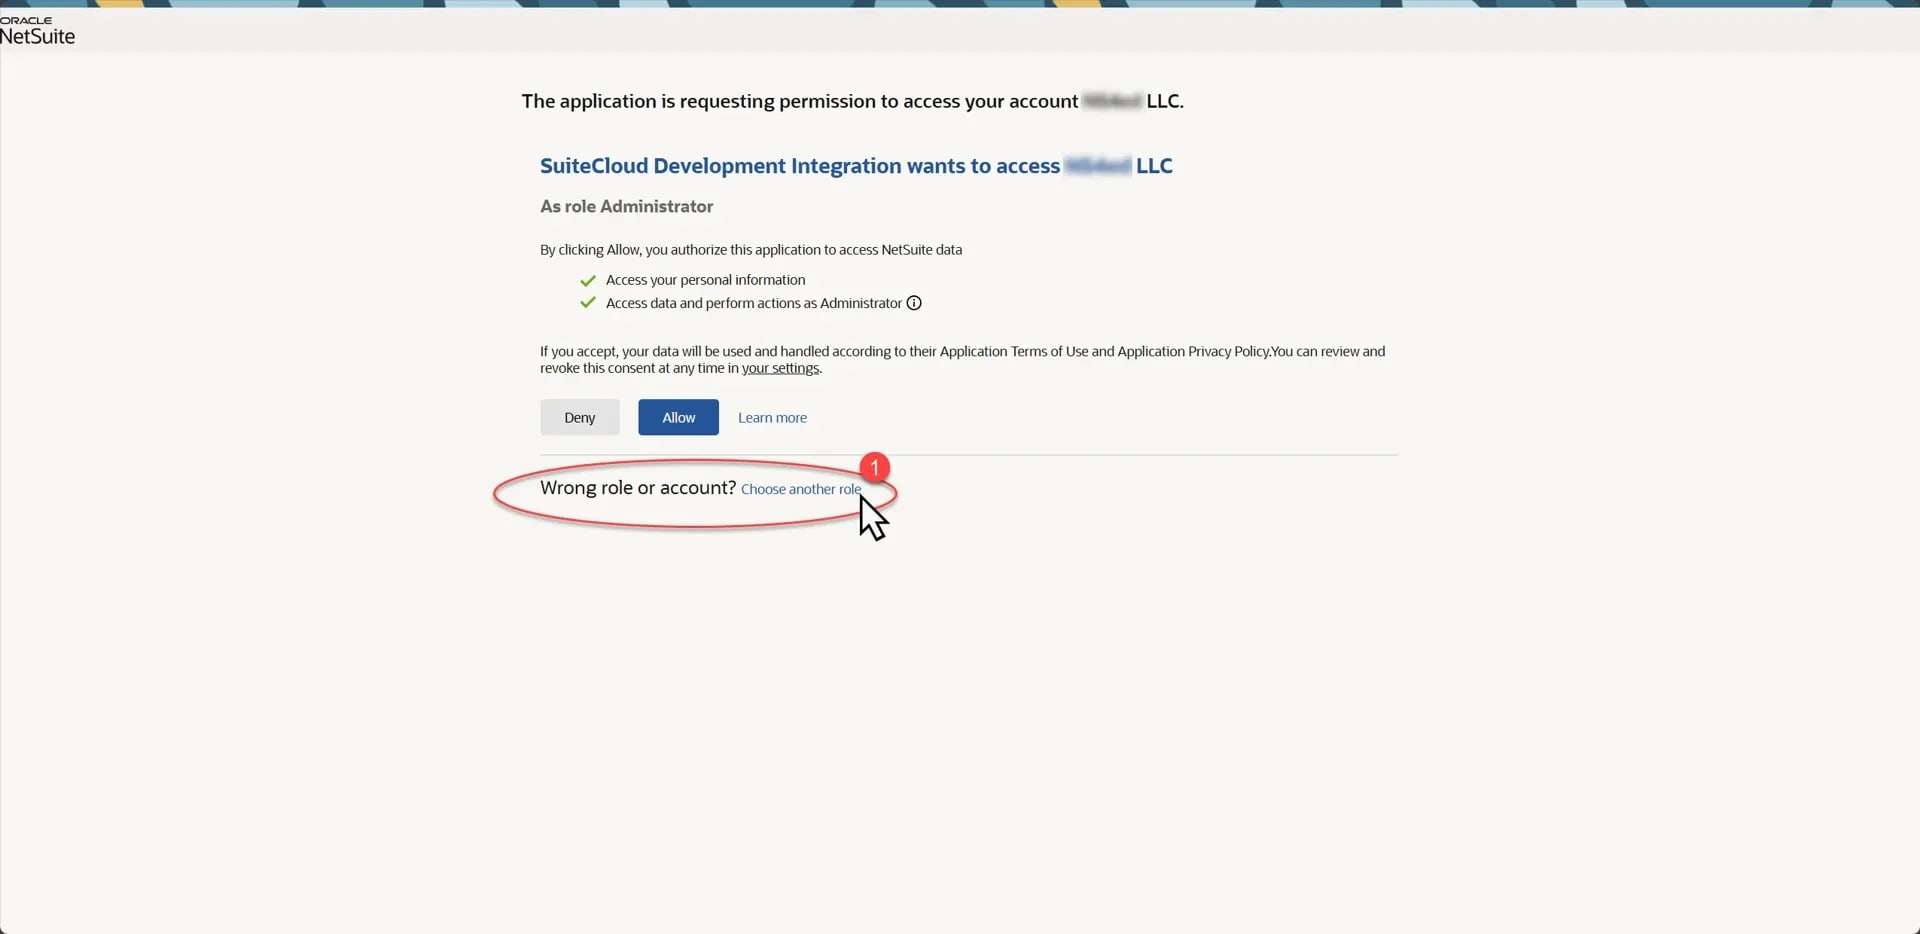
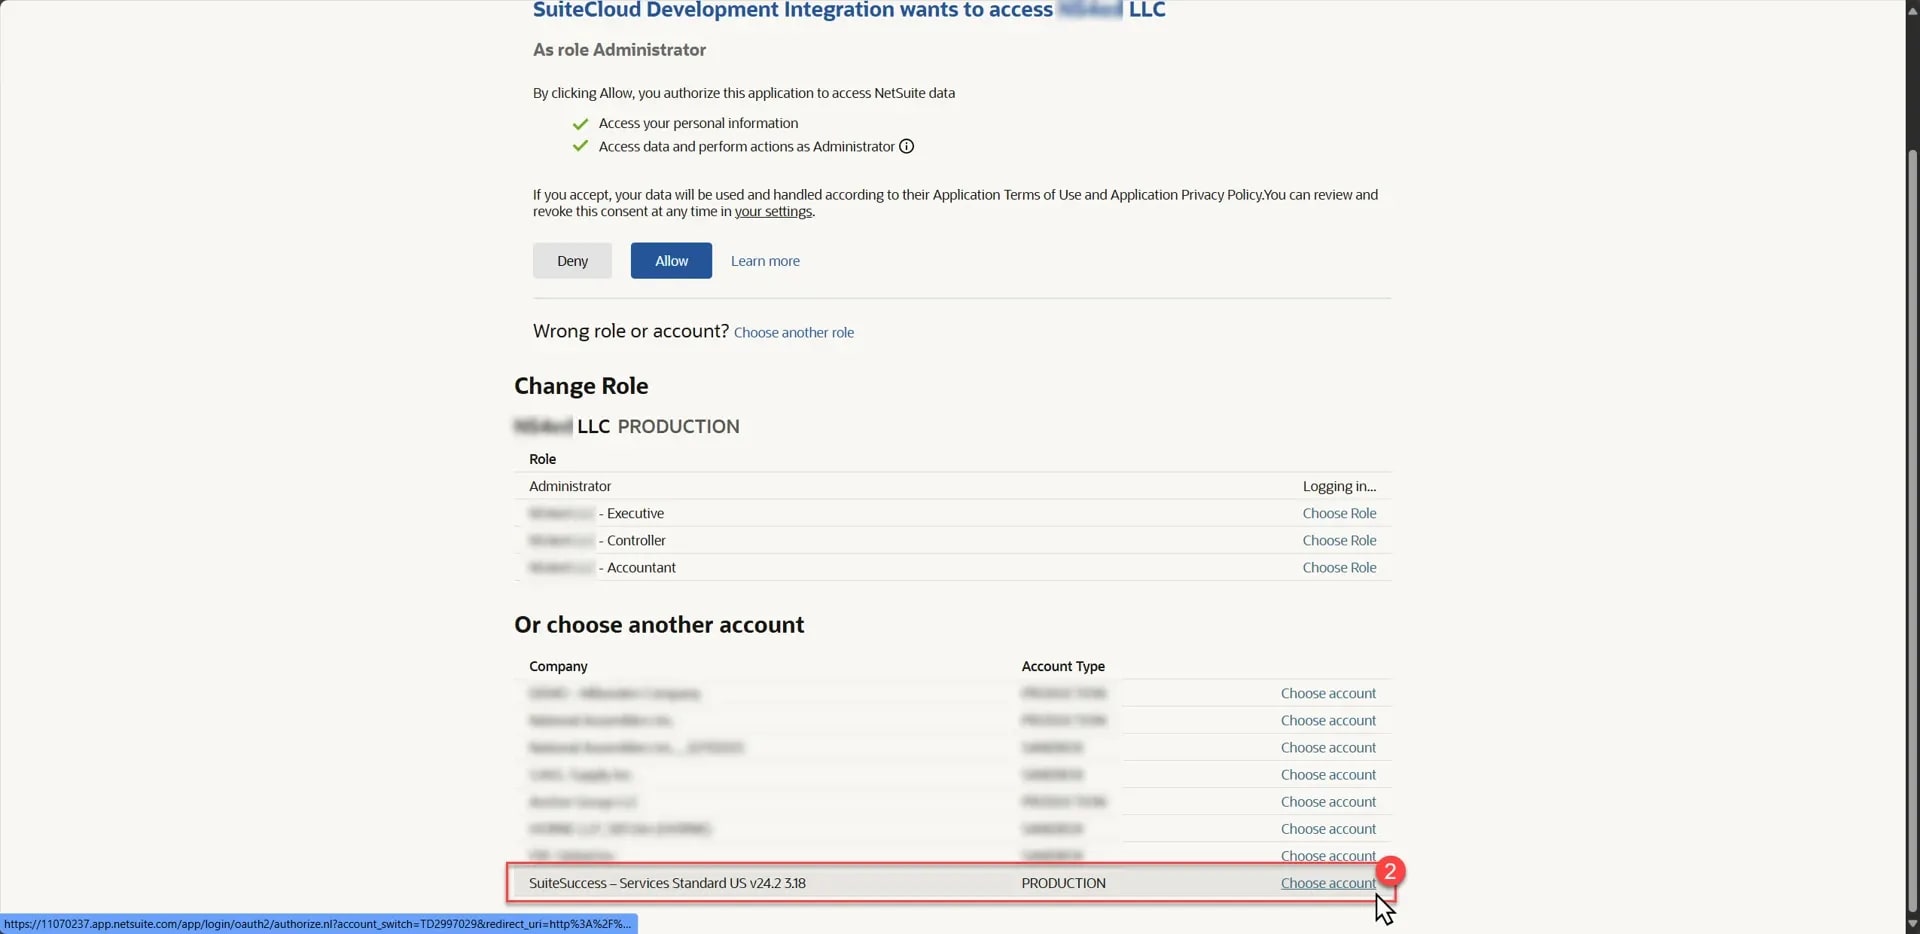
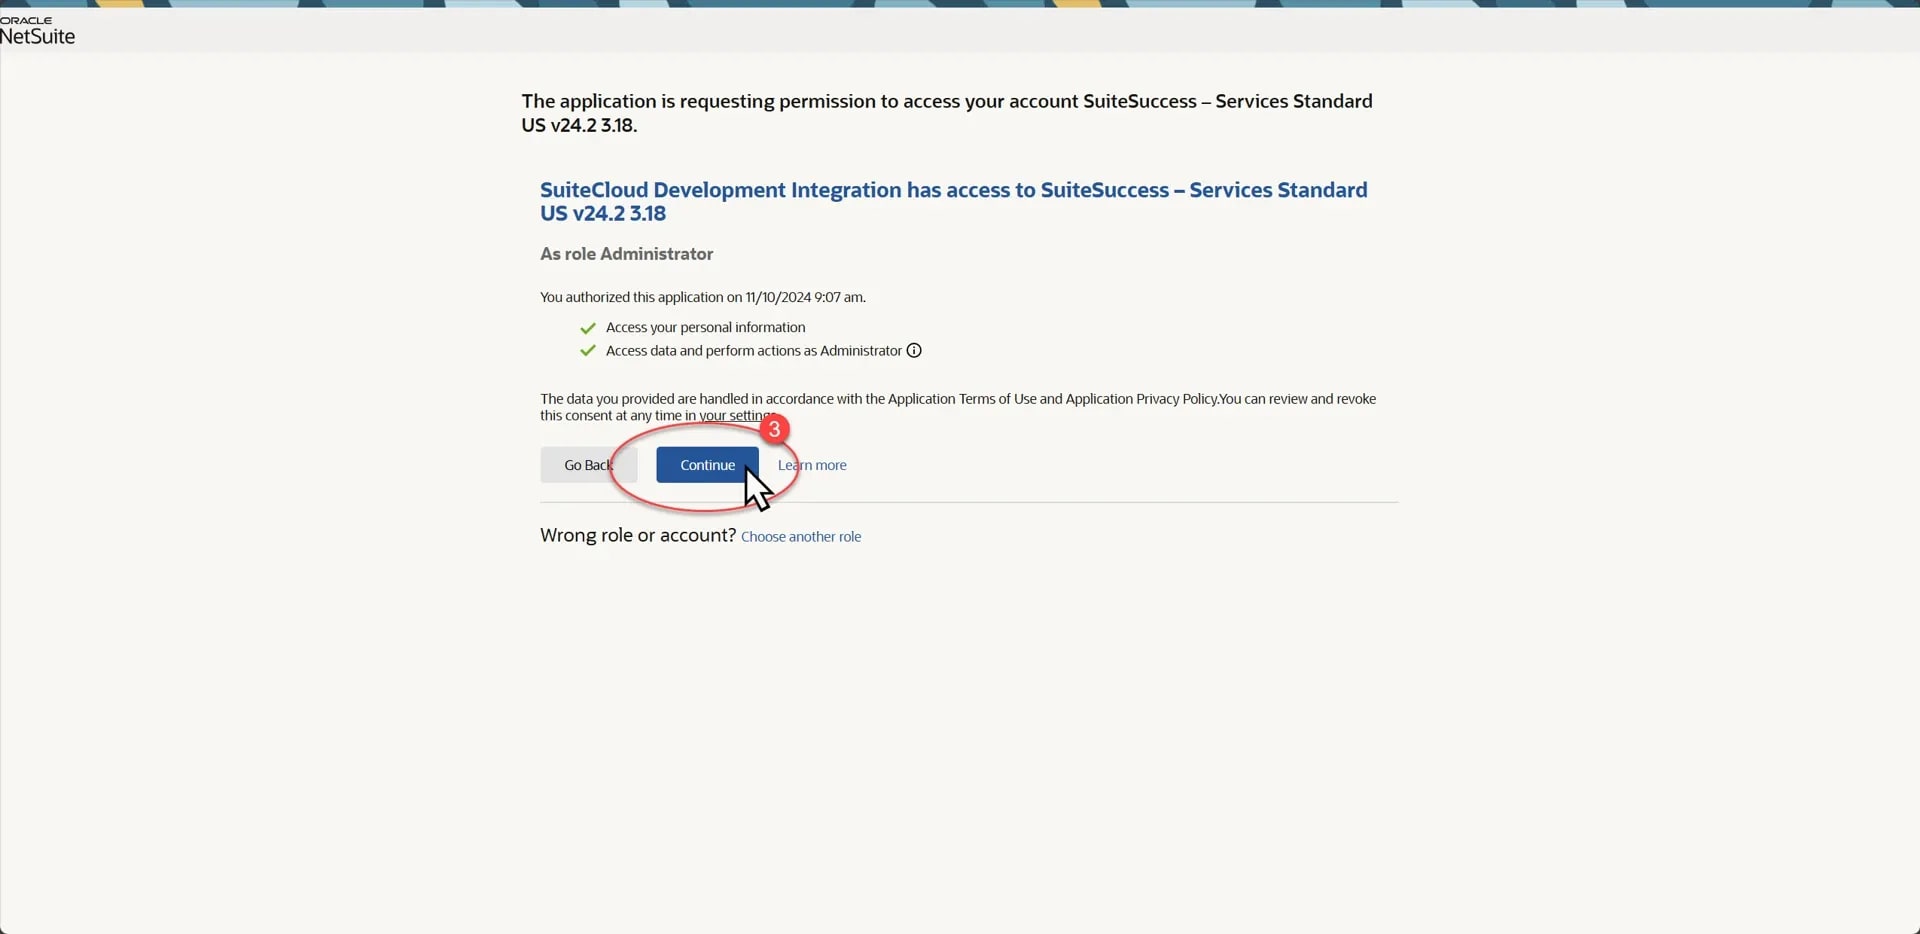
Note: Make sure you are connecting to the right account. You may be prompted to connect to the NetSuite environment currently logged-in on this browser. If this is not the environment you are setting up a project for, perform the following steps to connect with the correct environment:
After clicking continue, you should be presented with this screen:
You may now return to VSCode. You should see the following in your command terminal:
Step 6: Add or Import Customizations
You now have an SDF project connected to your NetSuite account. At this point, there are many commands you can run to import, package, and deploy code to and from your NetSuite account. You can find a complete reference here: SuiteCloud CLI for Node.js Reference
For example, the basic command to import objects from NetSuite to your SDF project is:
suitecloud object:import -i
You can run this command to selectively grab custom objects and code from NetSuite to back them up and modify them in your SDF Project.
Import All Custom Objects to Your SDF Project:
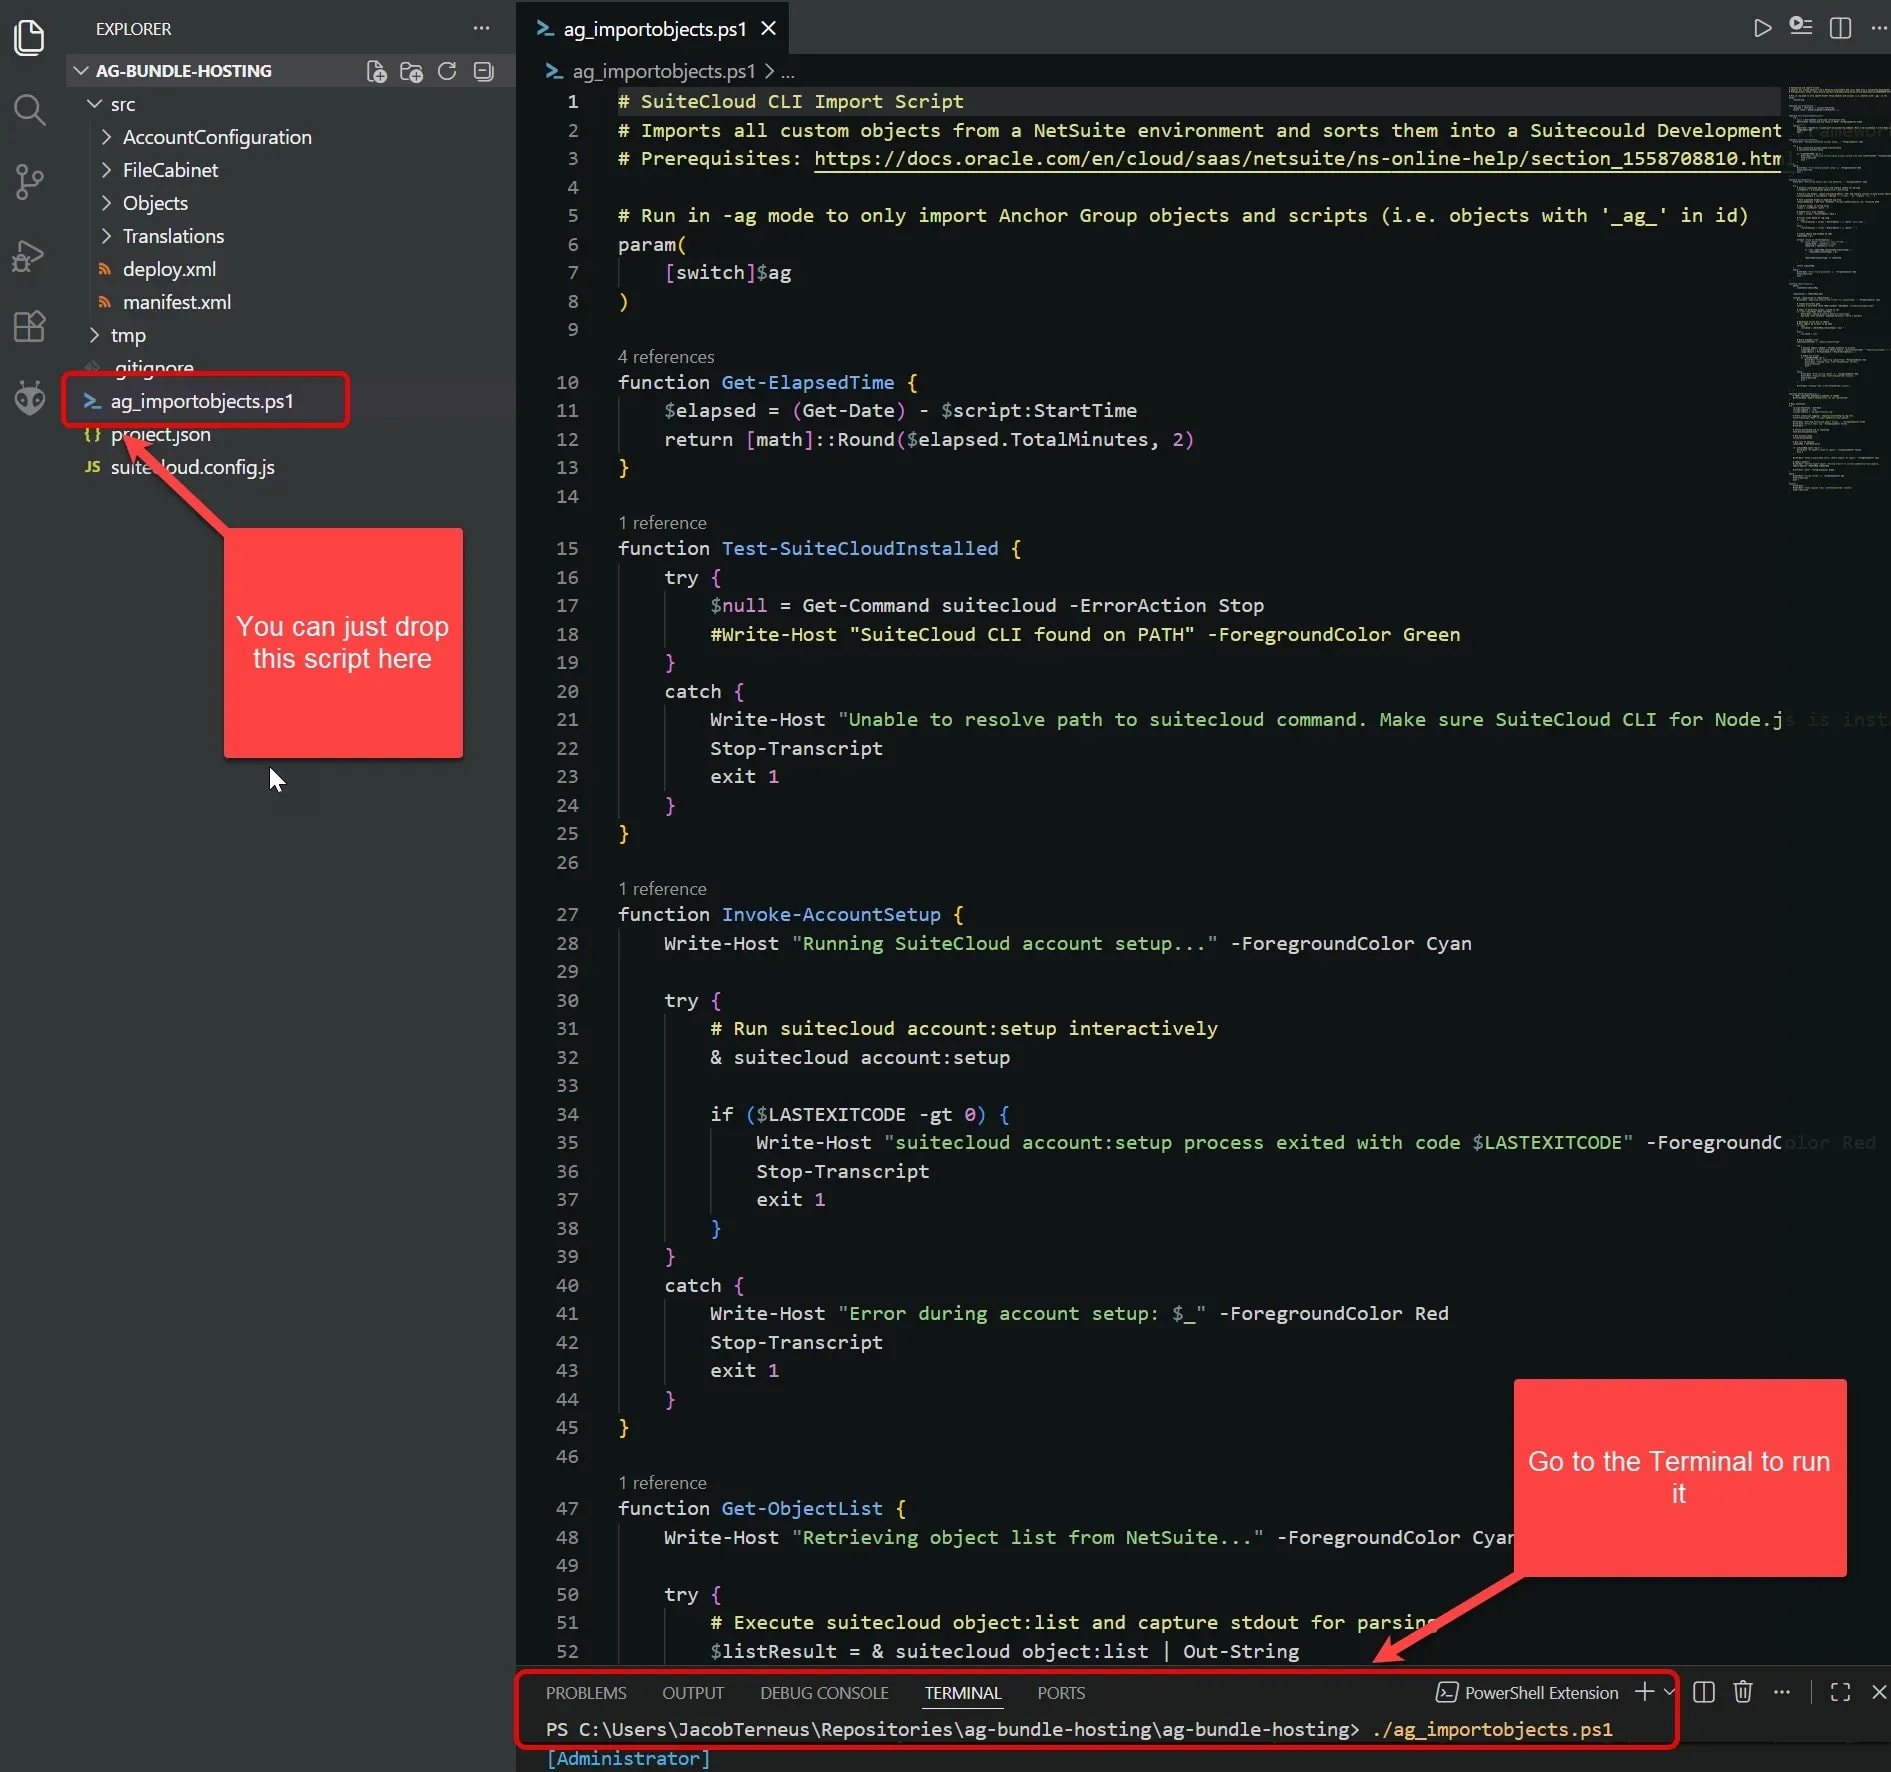
For convenience, I have created a Powershell script that can be executed from a command line to pull all objects automatically and sort them into a useful folder structure.
ag_importobjects.ps1
Next, open a terminal at the root directory level, then run the following command:
./ag_importobjects.ps1
If you are doing this straight in VSCode, it can look like this:
If you only want to import objects created by Anchor Group (i.e. with “_ag_” in the ID), add the parameter -ag:
./ag_importobjects.ps1 -ag
Note: Of course, this Anchor Group only option depends on us having always used consistent naming conventions everywhere, which might be unreliable. In most cases, I would expect to not add the “-ag” tag and just grab everything. Because for most use cases you want to understand the whole account, not just the stuff we added.
You will first be prompted to select an authentication ID. Choose the id you created in Step 5 above and hit Enter. The ag_importobjects script will now begin pulling all custom objects from your NetSuite environment and sorting them into folders based on object type. Any SuiteScripts will be pulled as well and sorted into the FileCabinet folder. A full log of the script can be found in the /tmp directory of the SDF project, along with a copy of the full list of custom objects in the environment.
The import will take approximately 5-10 minutes to complete. For highly customized environments, it may take as long as 30+ minutes to import all objects to your local machine.
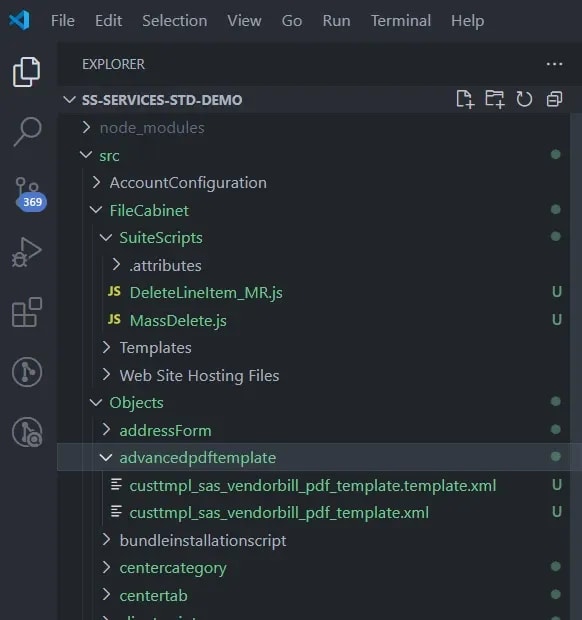
After the import completes, you should be left with the following folder structure:
Comprehensive data compiled from industry research on NetSuite platform growth, developer community engagement, and SuiteCloud tool adoption trends.
Organizations leveraging NetSuite's developer tools through experienced implementation partners achieve dramatically better outcomes. The platform's ecosystem—spanning SuiteScript, SuiteQL, workflows, and REST APIs—enables businesses to customize NetSuite functionality. Some ERP research suggests implementation success rates are significantly higher when organizations work with experienced consultants, expert guidance creates sustained business growth.
Your business doesn't need another experimental AI pilot program—you need AI systems that deliver measurable results. With AI adoption growing and 55% of organizations now using AI in at least one business function, the window for competitive advantage is closing. Organizations that integrate AI strategically into their ERP automation workflows achieve significant operational improvements—but only if they choose the right development approach.
Your NetSuite investment isn't delivering its promised value because standard configurations can't handle your unique business requirements. When NetSuite ERP services reach their out-of-the-box limits, professional development unlocks automation capabilities that transform backend systems into growth drivers, but only if you choose the right approach for your complexity level.
Medical Innovations built the operational foundation to scale without adding headcount—and they're using automation, integrations, and AI to move faster than competitors hundreds of times their size. (Yes, really.)