SuiteCommerce InStore (SCIS) is NetSuite’s in store Point-of-Service product that connects to the backend of NetSuite. There are many configuration differences between SCIS and SuiteCommerce (SC) sites, and little documentation exists on the SCIS product. This document will walk you through updating your employee records and the SCIS User Settings to have access to operate within the SCIS Storefront.
This documentation is created to teach how to configure SCIS employees.

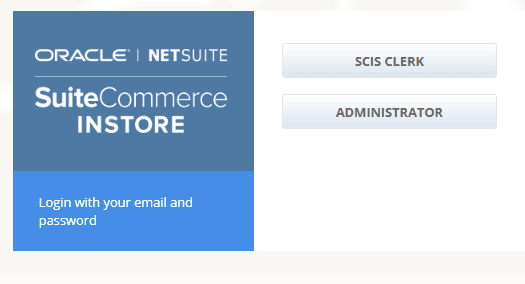
Login View of the SCIS Storefront
Note: Utilizing the Standard Employee Form is recommended for the below process. The SCIS Access Code field is added to the Standard Form upon installation and is an extra step to add this field to a custom form. To learn more about customizing forms, read Moving Tabs within Custom Entry Forms.
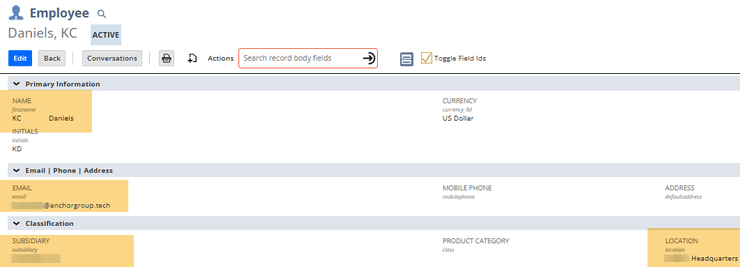
Required Fields on the NetSuite Employee Record
To add a new SCIS Employee record, follow this click path:
Step 1: Navigate to Lists > Relationships > Employees and click ‘New’ or ‘Edit’ an existing Employee Record. The remainder of this list below will be for New employees, as existing employees will have the required information such as Name and Email
Step 2: For all Employee records, enter the Name and Email {field id: name and email} for your new employee.
Step 3: Specific to SCIS, choose the Subsidiary and Location {field id: subsidiary and location}.

Sample Employee Record Mainline
Step 4: Unique to SCIS, click the “Custom” subtab and enter a value in the SCIS Access Code field.
When using a custom form, you may need to add this field to the custom form. See the note above. The SCIS Access Code is used for the employee to authorize restricted transactions. A NetSuite Administrator must define authorized roles on SCIS Permission custom records. More information can be found on the SCIS Clerk Permissions in the section below.
Step 5: Also, on the Custom subtab, click all the “SCIS Locations” that this employee will be working on.

Custom Tab of the Employee Record
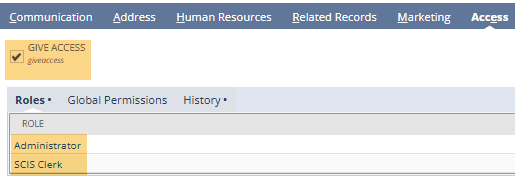
Step 6: Click the “Access” subtab and check the “Give Access” Checkbox. Then, check the “Send Notification Email” or “Manually Assign Password” box and communicate the employee’s password.
Step 7: On the Roles column, assign at least the SCIS Clerk role.

Note: Though the SCIS Clerk Role is recommended by NetSuite, we found the most success with the Admin role.
Step 8 (Optional): As an optional step, click the “Human Resources” subtab and change the Sales Rep box.
Step 9: Save the Employee Record.
SCIS User Settings
Upon entry to the SCIS Interface, an SCIS User Settings Custom Record is automatically created for each employee after they log in to SCIS. The SCIS User Settings Record links the employee record to critical SCIS transactions like an employee’s cash drawer or account.
To view this record:
Step 1: Go to Customization > Lists, Records, & Fields > Record Types, find SCIS User Settings, and click List in that row.

Step 2: Click View next to a name on the list of employees to confirm the settings. If you want to change or update settings, click Edit.
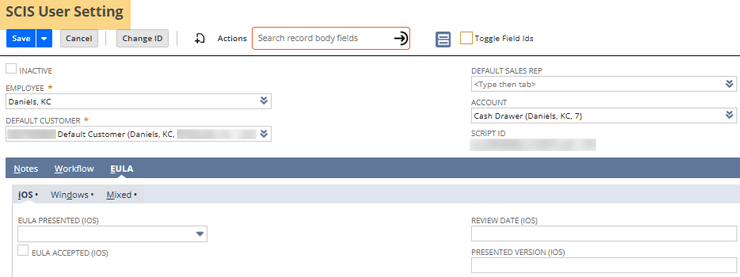
Step 3: Note the following user settings:
- Employee – Shows the employee's name. This field is automatically populated and linked to the employee record.
- Default Customer – Shows the default customer record associated with the employee.
- Default Sales Rep – Defines the default sales rep for the employee.
- Account – Defines the cash drawer account assigned to the employee.
- EULA Version Presented – This shows the ID of the latest version presented to the user. This field is automatically updated each time a new version of the EULA is displayed in SCIS.
- EULA Review Date – Shows the date and time when the user accepted the terms of the EULA.
- EULA Acceptance – This check box indicates whether the SCIS user has accepted the EULA terms. If the box is cleared, the SCIS user has not accepted the EULA.
Step 4: Click Save.

SCIS User Setting
Related Article: SCIS Standard Cash Drawer Operations | SuiteCommerce InStore
Got stuck on a step in this article?
We like to update our blogs and articles to make sure they help resolve any troubleshooting difficulties you are having. Sometimes, there is a related feature to enable or a field to fill out that we miss during the instructions. If this article didn't resolve the issue, please use the chat and let us know so that we can update this article!
FREE SuiteCommerce Book
If you liked this article, you'll LOVE our book on SuiteCommerce! Order the free SuiteCommerce book today, and we'll even pay for shipping!

Oracle NetSuite Alliance Partner & Commerce Partner
If you have general questions about SuiteCommerce or more specific questions about how our team can support your business as you implement NetSuite or SuiteCommerce, feel free to contact us anytime. Anchor Group is a certified Oracle NetSuite Alliance Partner and Commerce Partner equipped to handle all kinds of NetSuite and SuiteCommerce projects, large or small!

We are a premium SuiteCommerce agency that creates powerful customer portals. Unlike our competitors, we have already solved your problems.
Tagged with Training
