SuiteCommerce Website Translation Modification & Control
Learn how to manage SuiteCommerce website translations for items, categories, content, and domains to deliver multi-language customer experiences.
- Date
- December 15, 2025
- Read
- 6 min

Occasionally, website owners want to cater to the native language of their users but don’t want to build a completely separate website to do so. NetSuite’s SuiteCommerce has a built-in method for offering the same website in different language translations.
Once set up (see this article: How to Set Up Multiple Languages in SuiteCommerce), additional modifications and control may be desired.
What Translations Can Be Modified?
NetSuite automatically translates NetSuite Administration Interfaces, Commerce Transactional Applications, and Extensions. Everything else is up to the website owner: item information, commerce categories, landing pages, website content, & SEO metadata.
How Do You Specify/Modify The Translations You’re Able To?
There are four main areas where a website owner is responsible for specifying translations.
1. NetSuite Commerce Category Manager
To access this, go to Commerce > Content Management > Commerce Categories and edit the commerce category you want to work with.
Once in the commerce category, click on the “System Information” tab and go to the “translations” sub-tab.
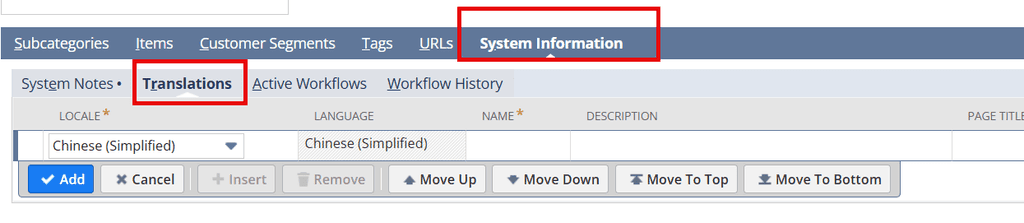
Within this screen, you specify the location where you want a translation (the language is automatically set). Then you enter the translation desired in the Name field. The rest of the fields are optional. Repeat this process for each language desired on each commerce category.
Alternate Method - CSV Import
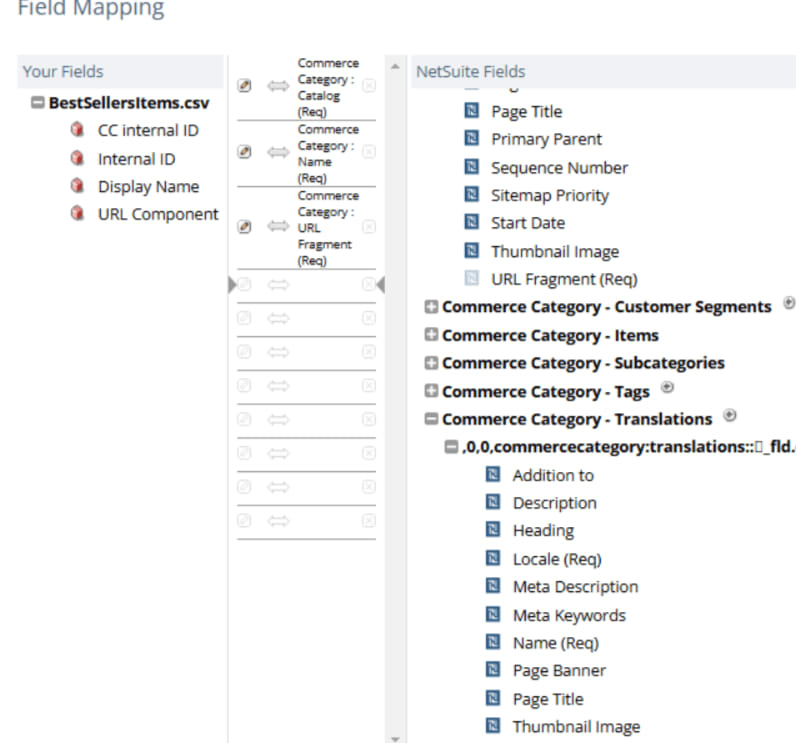
You can also upload your commerce category translations with a NetSuite CSV import. Choose the import type of “website” and record type of “commerce category”, and select the applicable fields on the field mapping screen.
2. NetSuite Item Records
To access this, go to Lists > Accounting > Items and edit the item record you want to work with.
Once in the item record, click on the “System Information” tab and go to the “translations” sub-tab.
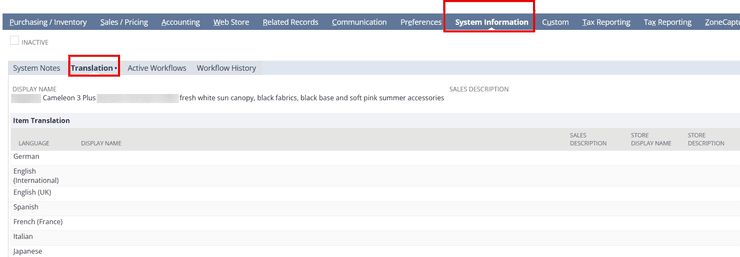
Within this screen, you specify the item fields where you want a translation in the row for each translation desired. All of the fields in each row are optional, but only ones with the translated data will display when choosing the other language on the site. Repeat this process for each language desired on each item record.
Alternate Method - CSV Import
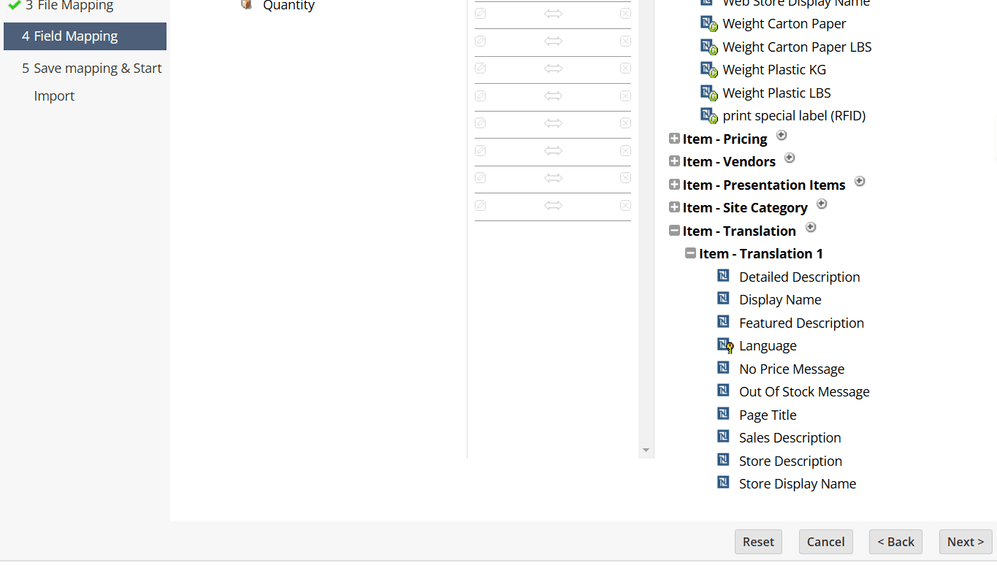
You can also upload your item record translations with a CSV import. Choose the import type of “items” and record type of the item records you are updating (i.e., inventory item or assembly item, etc.), and select the applicable fields on the field mapping screen.
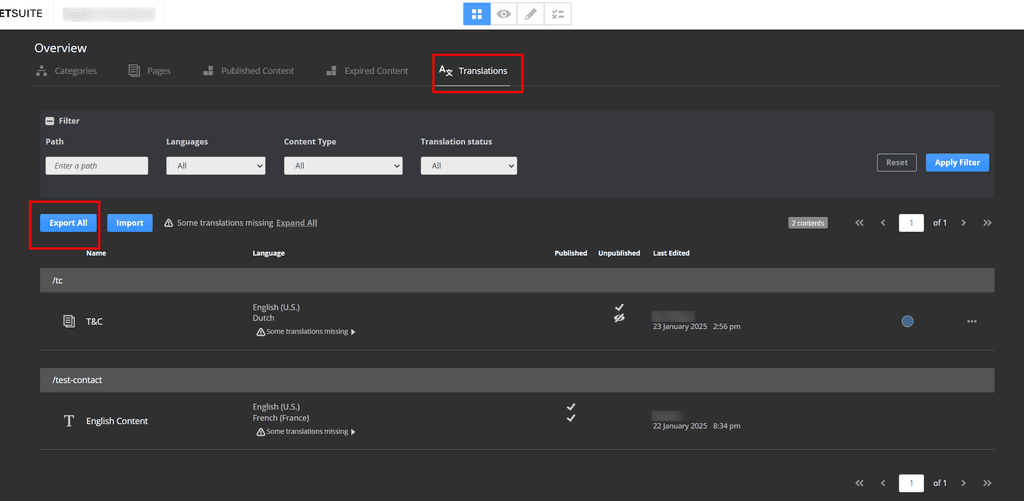
3. Site Management Tools (SMT)
The Site Management Tools (SMT) are where website translations for CMS landing pages or other website content not handled in NetSuite are configured. To access, log in to SMT by clicking “Esc” on the home page & logging in with your NetSuite credentials.
In the overview mode (4 square icon at the top of the SMT tools) is a section called “Translations”. Here you will see the status of any translations created via SMT tools and can modify them here as you would any other SMT modifications.
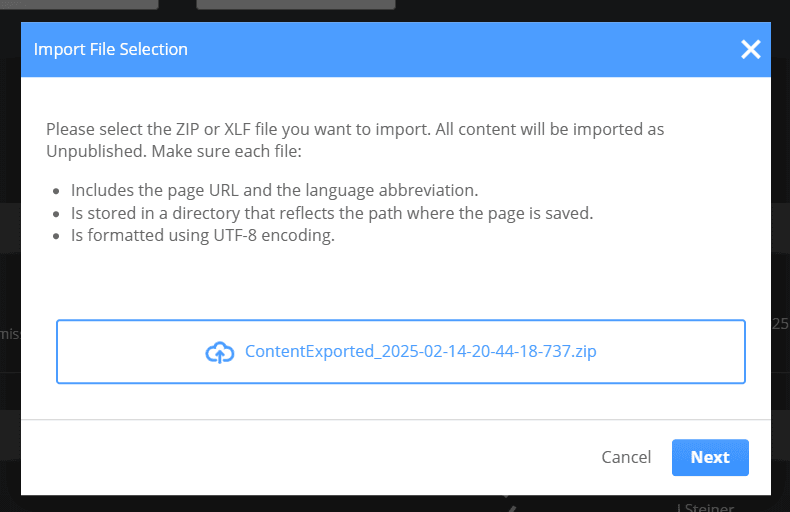
Alternate Method - CSV Export then Import
You can also export your SMT translations, modify them, and then re-import them. To do so, click the “Export All” button and select the desired language.
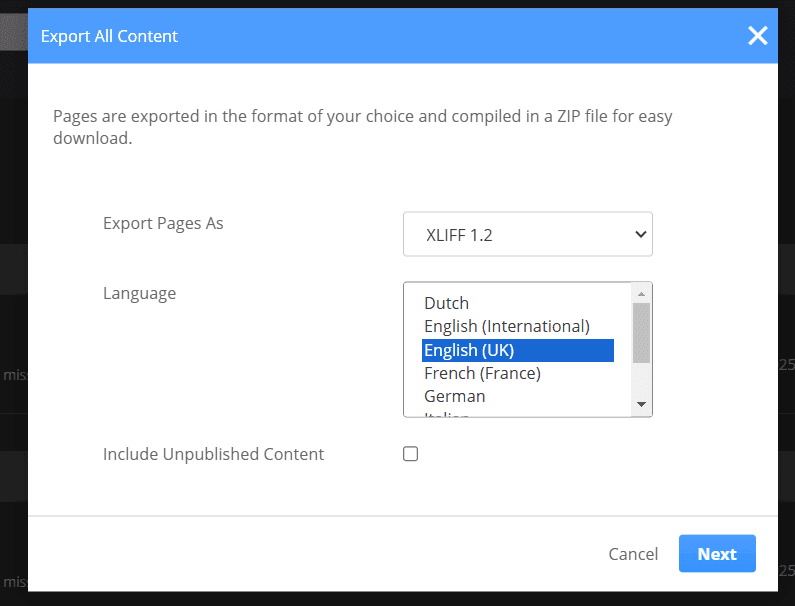
Once modified, you can then import the updated file in the same way, but clicking “Import” instead of “Export All”.
4. Multi-Domain Tab of Configuration Record
To access this, go to Commerce > Websites > Configuration, choose the website and domain, then click “Configure”.
Once in the configuration record, click on the “Multi-Domain” tab and go to the “Translations” sub-tab.
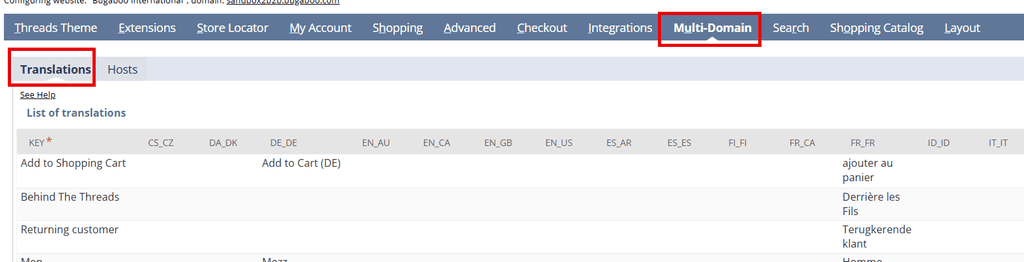
Within this screen, you specify the text phrase found on the website where you want a translation. Then you enter the translation desired under the column for the applicable language code. Only languages with translations specified for that phrase will translate that phrase.
Repeat this process for each phrase desiring a translation that is not already handled elsewhere.
Alternate Method - CSV Import
I have not found a way to update this section of the configuration via CSV import, so unfortunately, this option is not available. In theory, there should only be a limited number of phrases specified in the multi-domain tab of the configuration record if translations are fully set up elsewhere.
Summary
There are a lot of places and things to consider when setting up translations for a SuiteCommerce website. Managing website translations without direction can be a web of confusion, trying to navigate to all the different screens and views. With a little prep work and knowledge, the mystery can be unraveled, and your website can function in any language supported.
Related Article: Configure Multi-Language in NetSuite SuiteCommerce
Got stuck on a step in this article?
We like to update our blogs and articles to make sure they help resolve any troubleshooting difficulties you are having. Sometimes, there is a related feature to enable or a field to fill out that we miss during the instructions. If this article didn't resolve the issue, please use the chat and let us know so that we can update this article.
FREE SuiteCommerce Book
If you liked this article, you'll LOVE our book on SuiteCommerce. Order the free SuiteCommerce book today, and we'll even pay for shipping.

Oracle NetSuite Alliance Partner & Commerce Partner
If you have general questions about SuiteCommerce or more specific questions about how our team can support your business as you implement NetSuite or SuiteCommerce, feel free to contact us anytime. Anchor Group is a certified Oracle NetSuite Alliance Partner and Commerce Partner equipped to handle all kinds of NetSuite and SuiteCommerce projects, large or small.
![]()
We are a premium SuiteCommerce agency that creates powerful customer portals. Unlike our competitors, we have already solved your problems.
Tagged with Training