Everything You Wish You Knew About Merchandising Zones
Let's take a look at how to create functional NetSuite merchandising zones for your SuiteCommerce Site.
- Date
- March 24, 2026
- Read
- 6 min

Let's look at how to create functional merchandising zones for your SuiteCommerce Site.
Getting Started with Merchandising Zones
1. The updated Core Content Type Extension should be activated.
2. The 'Best Sellers' bundle should be installed if you want to use sales data as sort criteria.
3. You should logically think through the rules that will be used in that zone. For example, "This zone should display only items that have > 2 stock level, and it should be sorted by best sellers over the last 365 days."
4. Any necessary 'Filter' criteria should be added as Facets in Website Setup. These Facet(s) need not be configured to actually display in the webstore.
Need a refresher on facets? Check out this tutorial on setting up SuiteCommerce Facet Fields.
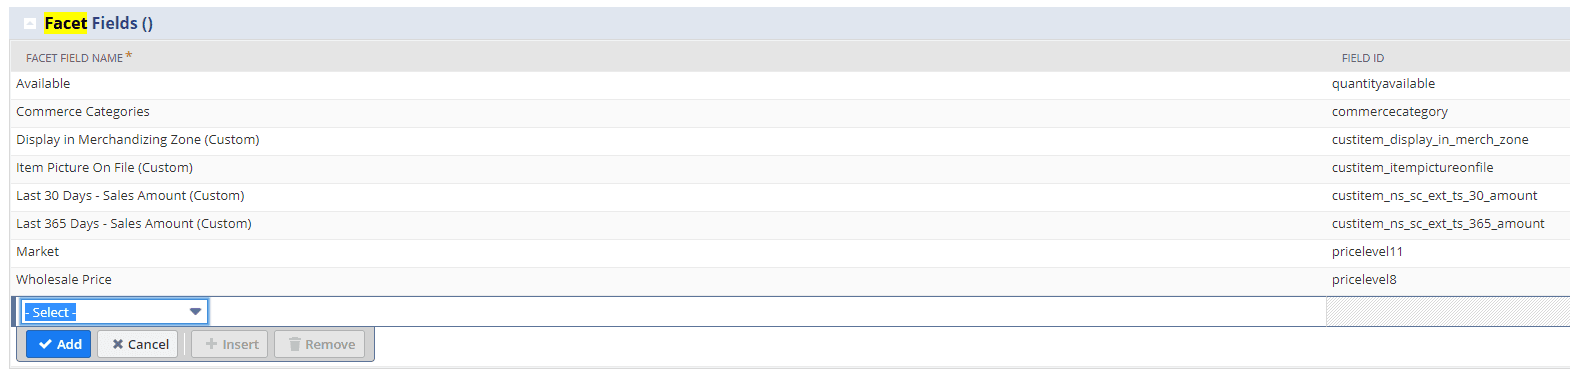
5. Similarly, you should add your Sort Criteria in Website Setup.
Need a refresher on how to configure sort fields? Check out this tutorial on Sorting Items in SuiteCommerce.

6. You must ensure that the above fields are included in the Fieldset you intend to use for the merchandising zone.
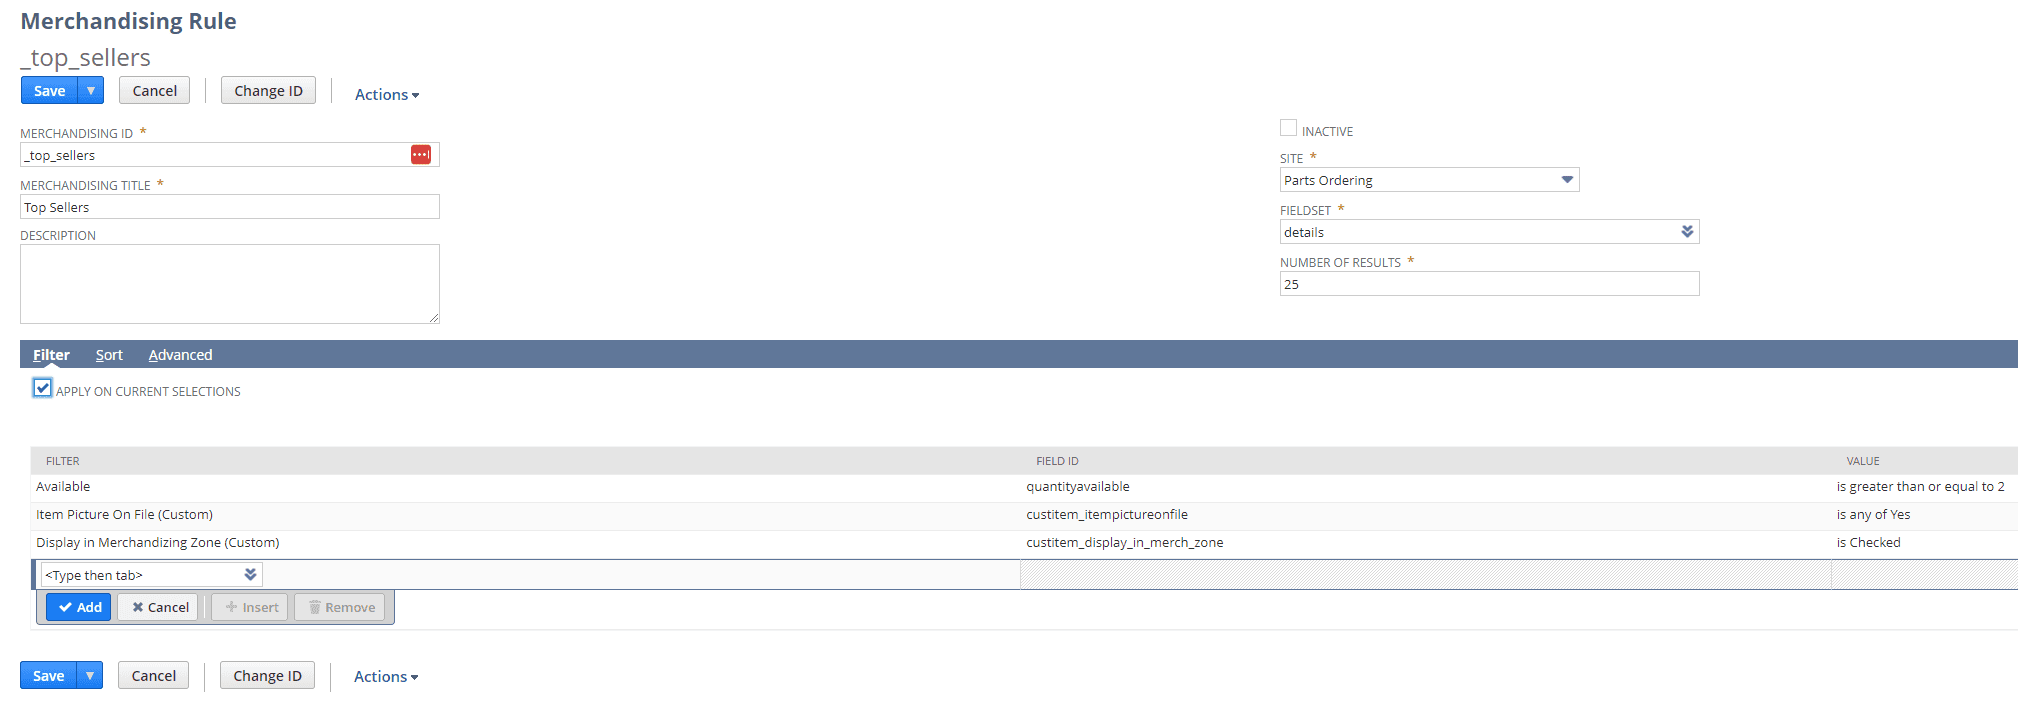
7. Then, you should try to create your Merchandising Rule. In the end, it will look something like this:
8. Finally, you will add the Merchandising Zone through SMT, pick the display option (Grid vs. Slider), and select the Merchandising Rule.
A Few Common Merchandizing Zone Issues
1. Your newly added Filter/Sort options might be inexplicably missing from the list (this could also happen with your Fieldset selector)
If you run into this problem, do the following:
- Click the dropdown selector on the merchandising rule a few times
- Navigate to Customization > Lists, Records, and Fields > Record Types, find Website Fieldsets, Website Filters, and/or Website Sorts in the record list, and click List.

- Find the Fieldset/Filter/Sort you are looking for and click Edit
![]()
- Ensure that the Site Name field matches the Internal Name of the site you are trying to do this setup for on your Website Setup Record. If it doesn't, update the site name on the Fieldset/Filter/Sort record in question.

After completing that step, the Fieldset/Filter/Sort should be available on the Merchandising Rule.
2. After getting your Fieldset/Filter/Sort issues figured out, you might get a few results/errors in your console
Suppose you get a console error about the item.image.url and get no/few results in your Merchandising Zone. In that case, it is because the Merchandising Zone is trying to display an item that does not have an Associated Image. In some cases, this will totally prevent any items from displaying; in others, it may display a few—but much less than it ought to. You have two options to resolve this problem:
- Add associated images for all items (best). (Check out our associated images SuiteCommerce bundle for easier image management.)
- Add a checkbox on the item record called 'Eligible for Merchandising Zone' (or something like that), identify which items have images that should be eligible for display in the zone based on the filter rules, check that checkbox on the corresponding item records, and apply that checkbox as a filter. This will exclude all non-imaged items from breaking the zone.

3. After getting your errors fixed, you might get a view like this
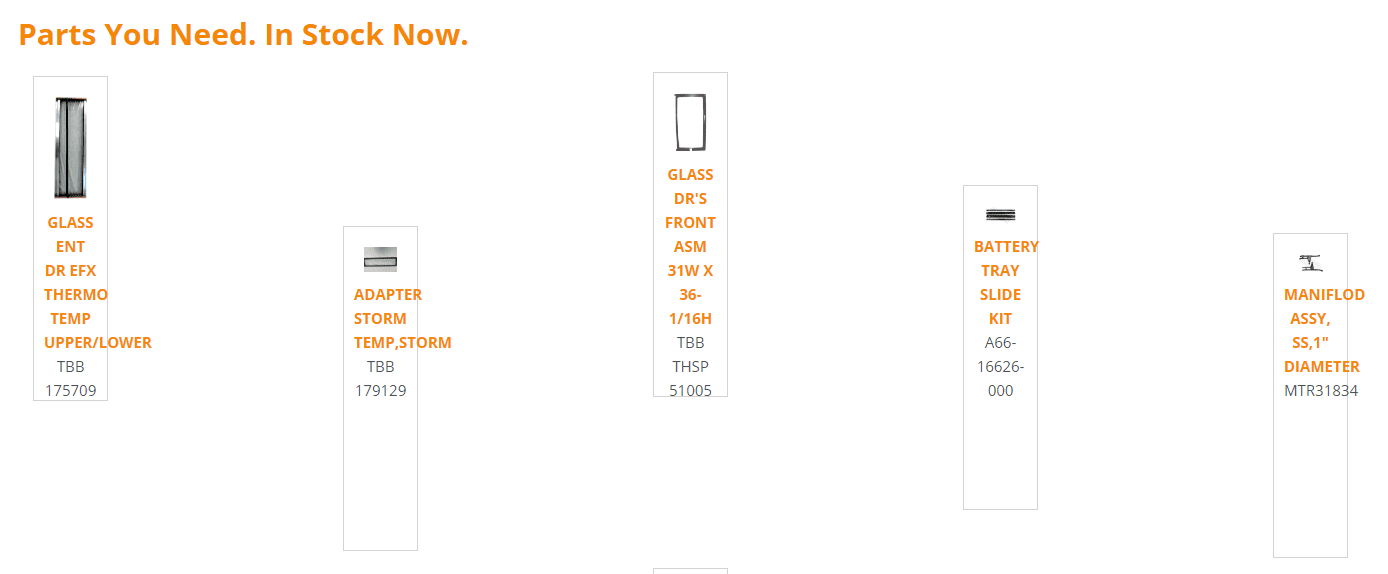
This is because your template/CSS files need to be updated. Hurrah. To do this, you will need to find the appropriate files at SuiteScripts: extensions : CXExtensibility: CoreContent @ 1.0.5
Related Article: What is SuiteScript?
While it might look like the template and CSS files are set up appropriately, they likely are not. In Chrome, you should begin to inspect elements and mess with the CSS to get the view you are looking for.
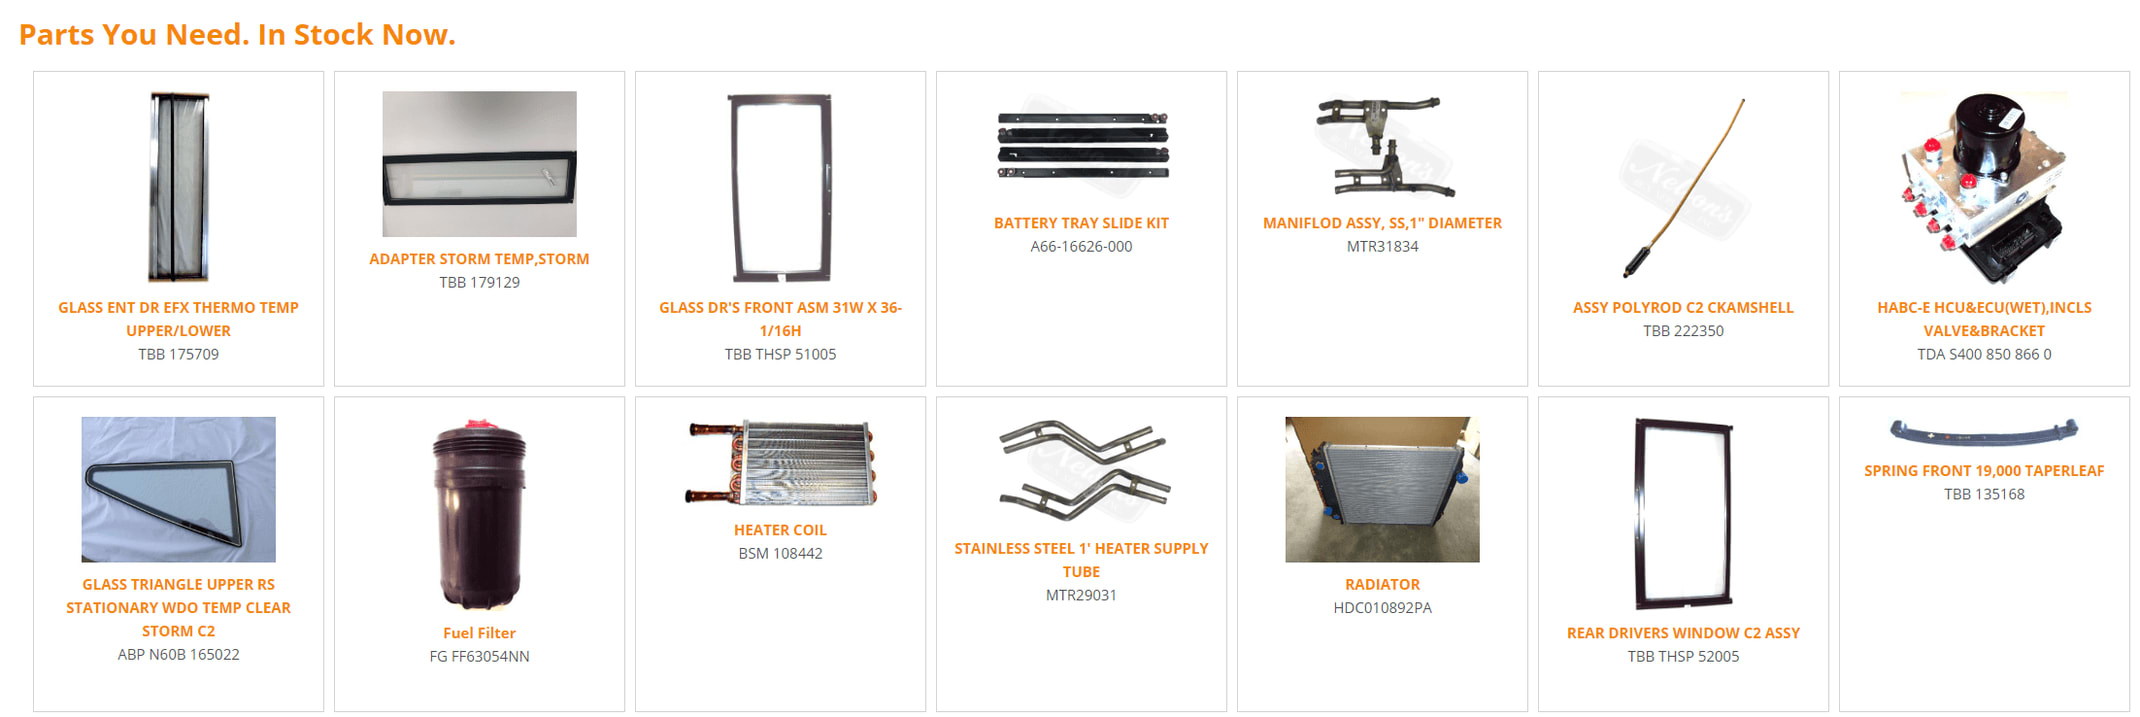
For example, with a few tweaks you could produce a Merchandising Zone that looks like this:
Similarly, if you need to expose another field in the merchandising zone (SKU, for example), you can do this by editing the JS file and tpl files directly. You will need to edit the CMSMerchzoneCCT.View.js file and add something like this:

Then, you will need to call out this new class in your tpl file like this:

After making these changes, you will need to re-activate your Core Content Extension and run a cache invalidation to see if they worked.
4. After fixing your CSS, tpl, and JS files, your styling might STILL be off
If styling for your merchandising zone is still not what you are hoping for, identify which piece of CSS did not 'take' from the CSS file change and add it as an override in SMT.

After you have solved all of the issues listed above, you should have a working merchandising zone that looks great.
Got Stuck on a Step in this Article?
Our team loves to hear feedback on how we can improve our instructions or add enhancements to our solutions. Please reach out to our team through our contact page with any suggestions on how we can improve our documentation.
Oracle NetSuite Alliance Partner & Commerce Partner
If you have general questions about SuiteCommerce or more specific questions about how our team can support your business as you implement NetSuite or SuiteCommerce, feel free to contact us anytime. Anchor Group is a certified Oracle NetSuite Alliance Partner and Commerce Partner equipped to handle all kinds of NetSuite and SuiteCommerce projects, large or small.
![]()
We are a premium SuiteCommerce agency that creates powerful customer portals. Unlike our competitors, we have already solved your problems.
Get a Free Copy of Our SuiteCommerce Book
If you haven't yet, make sure to snag a free copy of our SuiteCommerce book, which we will ship for free to any address in the United States mainland.

Tagged with Training