Is your company looking to add ACH (Automated Clearing House) transactions to your MyAccount Page on your webstore as a way to pay invoices? Some reasons a company might want this functionality are to make paying invoices more effective or because it is what all of their competitors are doing.
The ACH Payments feature lets your Commerce website users perform the following actions:
- Pay an invoice using an ACH transaction
- Pay a sales order during the checkout flow
- Add, edit, or remove an ACH payment instrument

Whatever your reason for wanting ACH as part of your payment process, it is possible to implement ACH into NetSuite MyAccount, SuiteCommerce, or SuiteCommerce Advanced as a payment method. Please be aware of the limitations listed later in this article.
Prerequisites for ACH Payments
You will need to complete the following Order Management tasks before you set up ACH Payments for your Commerce website:
- Create a Payment Method
- Create a Payment Processing Profile
If you need a refresher on how to complete these processes, check out this tutorial article on Setting Up a Payment Method and Payment Processing Profile for SuiteCommerce.
Create a Payment Method
Follow the steps to create a payment method. However, to make ACH payments work on your Commerce website, you must perform the following extra steps:
Create a Payment Processing Profile
You must create an ACH payment processing profile to support processing ACH payment methods on your Commerce website. To create an ACH payment processing profile:
Step 1: Enable ACH as a supported payment instrument on your NetSuite account by having your NetSuite account administrator install a third-party SuiteApp that supports ACH payment processing. The Payment Instrument feature must be enabled to create ACH payment methods and for ACH payments to work on your Commerce website. (Setup > Company > Enable Features > Transactions)
Step 2: To make ACH payments work on your Commerce website, you must perform the following extra steps:
- In the Payment Information area, under Supported Payment Methods, select your ACH payment method.
- In the Payment Information area, under Gateway Request Types, select Authorization and Capture Authorization.
How to Set Up an Alternative Payment Method Processing Profile
To set up an alternative payment method, first, you must create a new gateway processing profile. Then, you can create alternative payment methods and associate this gateway profile with them.
To set up a new gateway profile for an alternative payment method:
Step 1: Go to Setup > Accounting > Financial Statements > Payment Processing Profiles > New.
Step 2: Click the Add Profile button to add a gateway profile for the alternative payment method SuiteApp you have installed.
Step 3: Click Install if you have not installed the SuiteApp yet.
Step 4: In the Primary section, complete the information as appropriate.
Step 5: In the Authentication Credentials section, enter the account information provided by the payment service provider.
Step 6: Under Payment Information, select the payment methods you want to process with this profile.
Step 7: In the Gateway Request Types section, select the requests this profile supports.
Step 8: If the payment method does not support authorization, make sure the Authorizations box is blank and the Sales box is checked.
Step 9: Click Save.
Now, you can create as many alternative payment methods as you need for your web store and associate this processing profile with them. For more information on setting up alternative payment methods, see Alternative Payment Methods.
Set Up ACH Payments
To set up ACH payments on your Commerce website, complete the following tasks:
- Create a Payment Instrument
- Enable ACH Payments
Note: In addition to these tasks, if you want to use ACH Payments in the Checkout flow, you must also enable the Allow non-credit card payment methods during checkout feature (Commerce > Websites > Website List > [your website] > Shopping tab > Payments Page).
Create a Payment Instrument
Payment instruments are created in the following ways:
- You create a payment instrument using the Order Management feature in NetSuite.
- Your customer creates a payment instrument on your Commerce website. See User Experience.
Note: To create a payment instrument, you must first enable the Payment Instruments feature (Setup > Company > Enable Features > Transactions > Payment Processing).
Follow the steps outlined in the Order Management help topic Payment Instruments to create a payment instrument in NetSuite. However, to make ACH payments work on your Commerce website, you must perform the following extra steps:
Step 1: Go to the Financial tab and the Payment Instruments subtab.
Step 2: Click New ACH.
Step 3: Fill out the following fields on the ACH payment instrument page:
Step 4: Type — Select ACH.
Step 5: Payment Method — Select your ACH payment method.
Step 6: Limit — Enter the limit per transaction for this account.
Step 7: Bank Account Number — Enter the bank account number, up to 20 digits.
Step 8: Account Type — Select Checking, Corporate Checking, or Savings.
Step 9: Routing Number — Enter the nine-digit routing number.
Step 10: Bank Name—Enter the bank's name. The Bank Name field is not displayed as a required field in NetSuite, but it is required for your Commerce website.
Step 11: Account Owner Name — Enter the name of the account owner.
Step 12: Customer Consent — Enter a customer consent message to be included with all ACH transmissions using this account.
Step 13: Click Save.
Enable ACH Payments
This topic explains how to configure ACH Payments for the My Account and Checkout flow in the SuiteCommerce Configuration record. In the Checkout flow, you can offer the ACH payment method for customers whose customer profile is set to Company or Individual.
See Configuration Properties Reference for detailed information about SuiteCommerce configuration.
To enable ACH payments for My Account:
Step 1: Go to Commerce > Websites > Configuration.
Step 2: Select your website and domain, and click Configure.
Step 3: Click to navigate to the My Account tab and the Payment Instrument ACH subtab.
Step 4: Check the Enable ACH Payments box.
Step 5: Click Save.
To enable ACH payments from Companies in the Checkout flow
Step 1: Go to Commerce > Websites > Configuration.
Step 2: Select your website and domain, and click Configure.
Step 3: Go to the Checkout tab, and check the ENABLE ACH PAYMENTS FROM COMPANIES box.
Step 4: Click Save.
To enable ACH payments from Individuals in the Checkout flow
Important: To enable ACH payments in the Checkout flow for your individual customers, ensure that the ENABLE ACH PAYMENTS FROM COMPANIES box is also checked.
Step 1: Go to Commerce > Websites > Configuration.
Step 2: Select your website and domain, and click Configure.
Step 3: Go to the Checkout tab.
Step 4: Check the ENABLE ACH PAYMENTS FROM COMPANIES and the ENABLE ACH PAYMENTS FROM INDIVIDUALS boxes.
Step 5: Click Save.
User Experience of ACH Payments
With ACH Payments enabled, Commerce website users can:
- Select an invoice and make a payment using an ACH transaction
- Add, edit, or remove an ACH payment instrument
Users can access ACH payments from the following areas on your Commerce website:
- User area > Settings
- My Account > Settings
- User area > Billing > Invoices > Make a Payment
- My Account > Billing > Invoices > Make a Payment
Users can add, edit, or remove ACH payment instruments in the following areas on your Commerce website:
- User area > Settings > ACH Payments
- My Account > Settings > ACH Payments
- User area > Billing > Invoices > Make a Payment
- My Account > Billing > Invoices > Make a Payment
Note: Users can only edit the Limit field when editing ACH payment instruments. To edit other fields, users need to remove and re-add the payment instrument.
ACH Payments Page
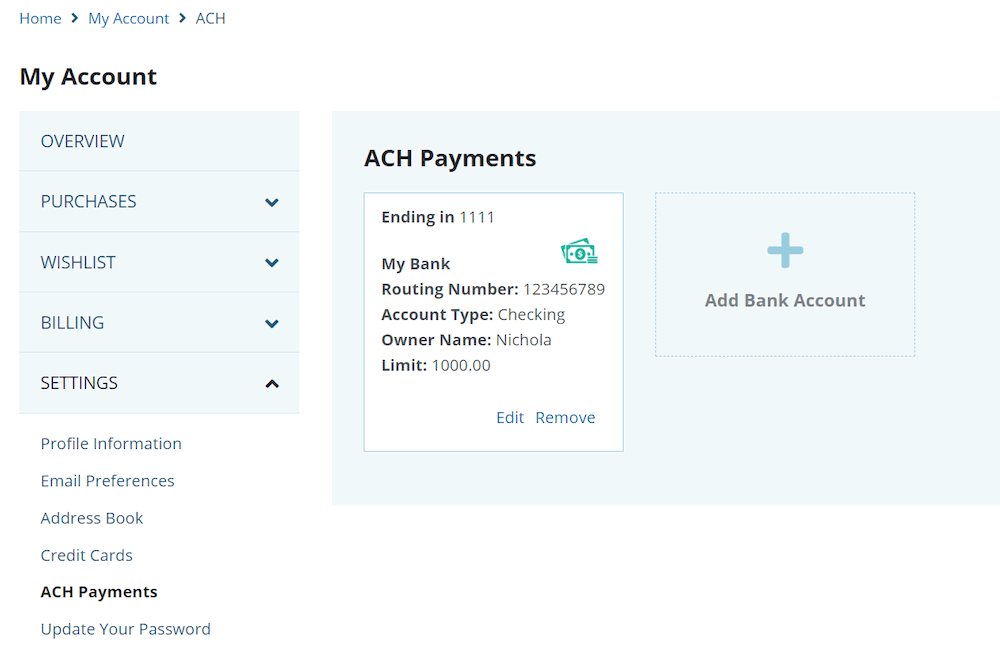
Users can add, edit, or remove ACH payment instruments. Click on 'Add Bank Account' in order to add a new ACH payment instrument. See the following sample ACH Payments page:
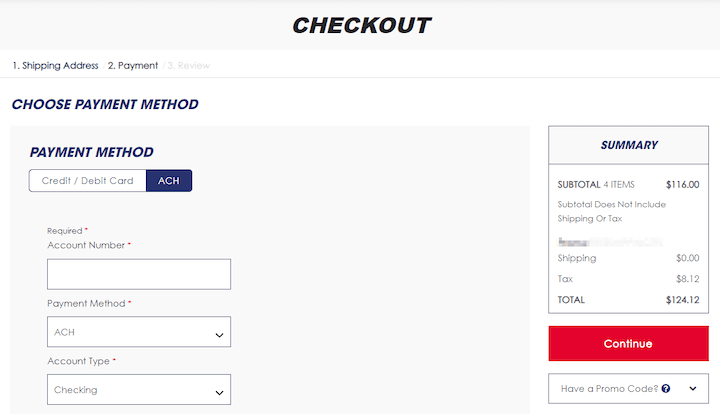
Add ACH Page
When users add ACH payment instruments, the payment method will be the ACH payment method you created in NetSuite. See the following sample Add ACH page:
Limitations that Apply to ACH Payments
The following limitations apply to the ACH Payments feature for Commerce websites:
- Processing financial transactions through the ACH network is available only for accounts in the United States. For information about electronic payment options for other countries, see Supported Payment Formats and Electronic Bank Payments.
- The ACH Payments feature for the checkout flow is not compatible with Site Builder or the 2022.2 release of SCA and earlier.
- The ACH Payments feature is not compatible with the 2022.2 release of the SuiteCommerce Base Theme and earlier.
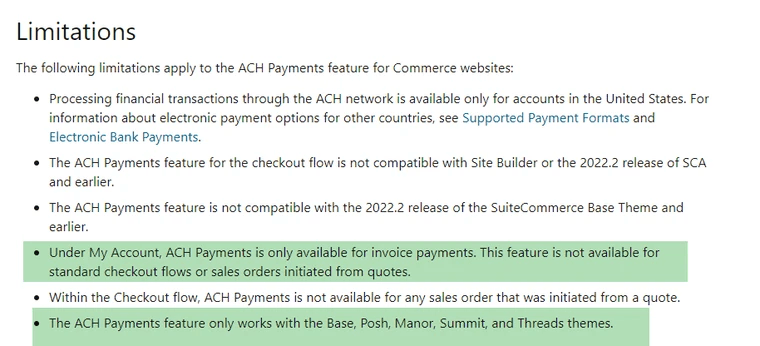
- Under My Account, ACH Payments is only available for invoice payments. This feature is not available for standard checkout flows or sales orders initiated from quotes.
- Within the Checkout flow, ACH Payments is not available for any sales order that was initiated from a quote.
- The ACH Payments feature only works with the Base, Posh, Manor, Summit, and Threads themes.
Findings from Our Team
- Bridge and Horizon "out-of-the-box" themes do not natively interact with ACH payments.
- Older versions of SCA and the SuiteCommerce Base Theme may not be compatible with ACH payments.
- ACH can be utilized to pay invoices, yet it is not available for standard checkout flows or sales orders from a quote.

- Payment visuals are required fields for uploading ACH, and the user needs to select which account the funds go towards. Don't forget to add your image files to the file cabinet and take the URL to load into the Payment Visual.

- Here is an image of the payment visuals required for the payment method.

ACH Visual Option
Get stuck in a step during this article?
We like to update our blogs and articles to make sure they help resolve any troubleshooting difficulties you are having. Sometimes, there is a related feature to enable or a field to fill out that we miss during the instructions. If this article didn't resolve the issue, please use the chat and let us know so that we can update this article.
FREE SuiteCommerce Book for Continued Learning!
Want a free paperback copy of this NetSuite e-commerce book? We even pay for shipping... Order the free SuiteCommerce book today!

Oracle NetSuite Alliance Partner & Commerce Partner
If you have general questions about SuiteCommerce or more specific questions about how our team can support your business as you implement NetSuite or SuiteCommerce, feel free to contact us anytime. Anchor Group is a certified Oracle NetSuite Alliance Partner and Commerce Partner equipped to handle all kinds of NetSuite and SuiteCommerce projects, large or small!

We are a premium SuiteCommerce agency that creates powerful customer portals. Unlike our competitors, we have already solved your problems.
Tagged with Solutions
