WRM - Warranty Term Inheritance
When a widget returns and you create a new sales order and invoice, NetSuite automatically creates a new Warranty Registration for the replacement widget. That can cause the problem of creating an infinite warranty loop, however. Thankfully, a relatively simple User Event script can solve this problem.
- Date
- November 3, 2025
- Read
- 5 min

Let’s say you sell a widget that includes a three-year warranty. If the customer returns the widget, you do your best to determine if it can be repaired; however, in this case it must be replaced. You follow the standard WRM process flow by opening a Warranty Case with the corresponding Warranty Registration Number and Item Serial Number, flagging the item for replacement. You then receive the defective item and create a new replacement Sales Order, fulfill the new widget, and create the replacement Invoice record. When you do so, NetSuite automatically creates a new Warranty Registration with a three-year term for the replacement widget, since it is a new widget with a new serial number.
NetSuite's automatic warranty creation is a problem, and creates an infinite warranty loop. The new replacement widget should only be in warranty for the original term from the original item, and the new Warranty Registration record should inherit the term dates from the original.
How do we solve this?
Thankfully, a relatively simple User Event script can fill this gap and replace the new term start and end dates to the original term start and end dates. This script first identifies the originating case for its original expiration date, if the action set on the warranty case is Replacement. Then, once the corresponding replacement flow completes, the script follows the transaction flow, identifies the new Invoice record (which links the Warranty Case together, and therefore the old Warranty Registration number to the new Warranty Registration record), pulls and sets the term dates from the original Warranty Term onto the new Warranty Registration record, and finally sets the original Warranty Registration record to Inactive. To better visualize this process, here is what these changes look like.
Highlighted are the original start and expiration dates of the warranty term, found on the original Warranty Registration record, as well as the Warranty Registration number in red.

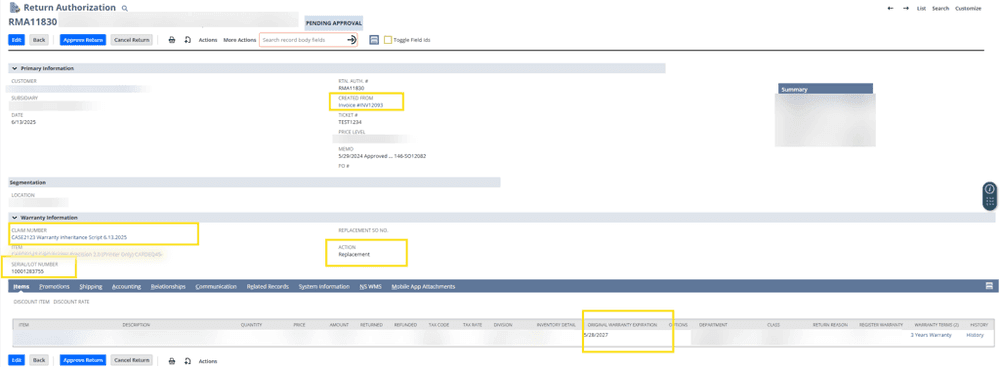
The user creates a Warranty claim on the item. The Warranty Claim record has the warranty term dates, as well as the Warranty Registration number, from above. The listed action is Replacement, highlighted in red, which is the trigger point for the script.

From the Warranty Claim, an RMA begins the process of receiving the defective item back. When the RMA is opened out of the Warranty Claim record, it will pull the relevant warranty information in.
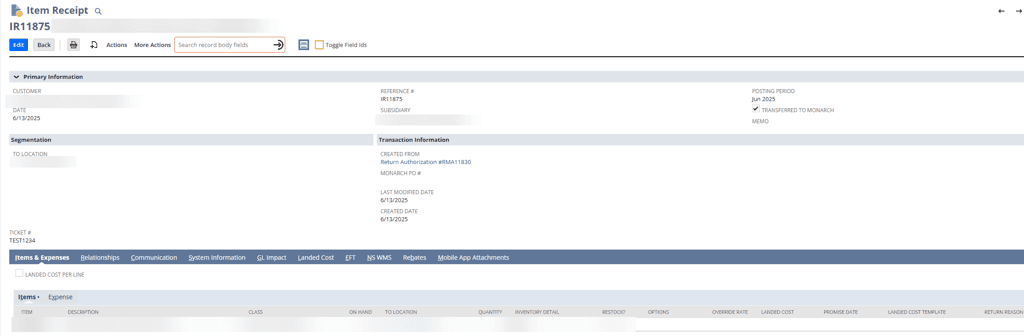
After the RMA is complete, receive the item back.
Returning to the Warranty Claim record, once the item is received back in, you may then open a new Sales Order from the RMA for the replacement item.
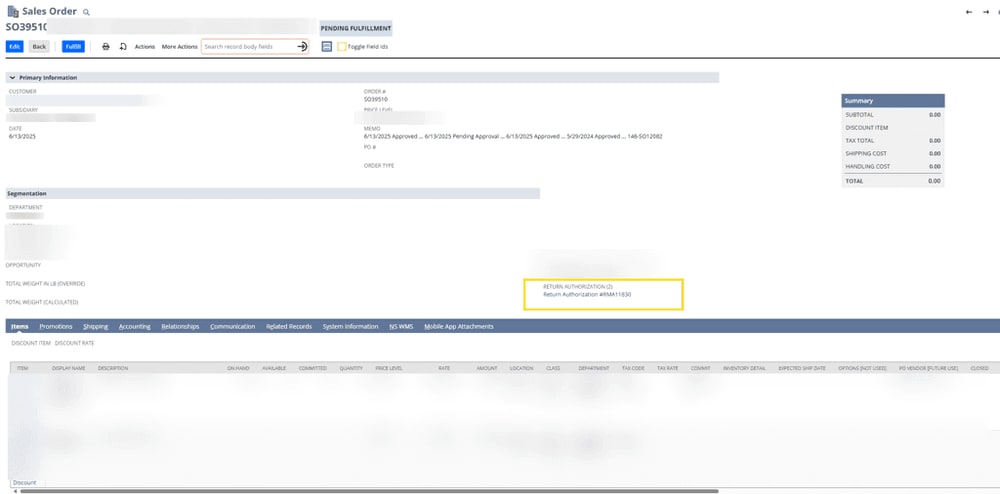
When you fulfill the replacement item from the Sales Order, you will naturally have to select a new serial number.

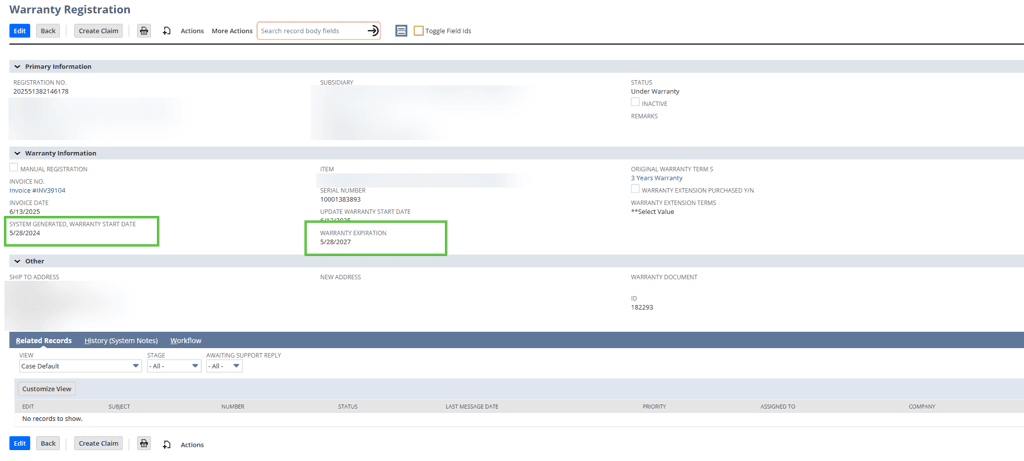
After fulfillment of the item, you will invoice the customer. This creates a new Warranty Registration number and record, while also applying the term starting on the date of the invoice (which the script will replace with the date from the original warranty).
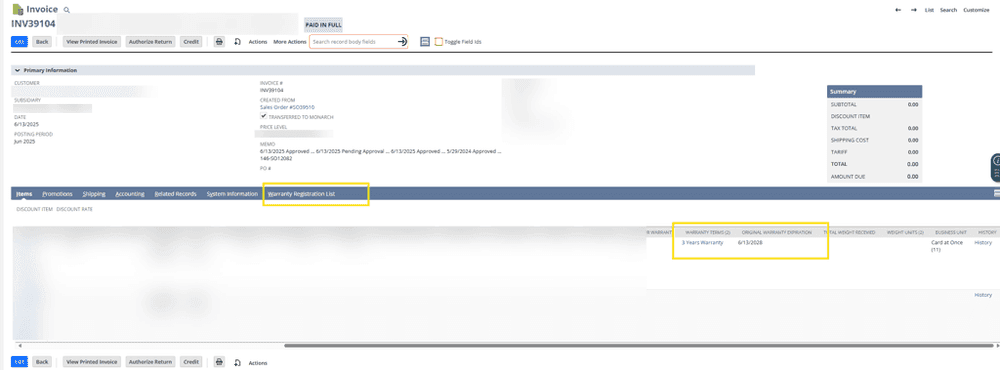
Finally, on the new Warranty Registration record, you will see the dates from the original warranty replace the warranty expiration date so that it ends in alignment with when the original item was purchased. These are highlighted in green below.
Related Articles:
Got stuck on a step in this article?
We like to update our blogs and articles to make sure they help resolve any troubleshooting difficulties you are having. Sometimes, there is a related feature to enable or a field to fill out that we miss during the instructions. If this article didn't resolve the issue, please use the chat and let us know so that we can update this article.
Oracle NetSuite Alliance Partner & Commerce Partner
If you have general questions about SuiteCommerce or more specific questions about how our team can support your business as you implement NetSuite or SuiteCommerce, feel free to contact us anytime. Anchor Group is a certified Oracle NetSuite Alliance Partner and Commerce Partner equipped to handle all kinds of NetSuite and SuiteCommerce projects, large or small.
![]()
Tagged with Training