How to Publish a Blog Post on SuiteCommerce | SMT
To create a new blog post, open up Site Management Tools, go into Overview Mode, navigate to the Blog tab, and then click 'New Blog Post'.
- Date
- December 23, 2025
- Read
- 9 min

If you have a SuiteCommerce website and would like to publish a blog post, you can do so using Site Management Tools (SMT).
Need help configuring or logging into SMT? Check out our full tutorial article on working with Site Management Tools.
To create a new blog post, open up Site Management Tools and navigate to Overview Mode (Window Icon) > Blog and then click 'New Blog Post'.

This will open up a new blog post in edit mode. From here, you can begin entering information about the specific blog post.
Blog Post Settings: General Tab
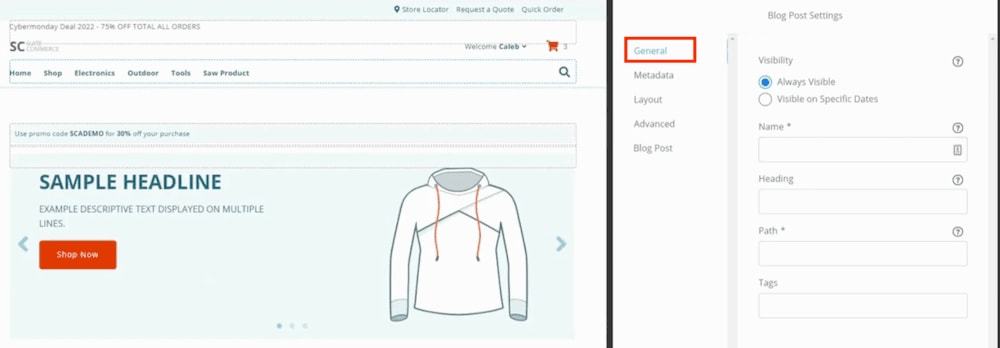
The only required fields on the General tab of the Blog Post Settings are the Name and Path fields for the post. However, you may also want to add details such as Visibility rules or Tags.
For our example, we will fill in the Name field with "Blog Post on Health and Beauty Plus Food". When we do, you will notice that the Heading field and the Path field both autofill to match the Blog Post Name.

This autofill feature speeds up the blog creation process since most blog authors choose to have these fields match or at least be quite similar. You can leave the fields as they are, or quickly make edits to the auto-filled fields to improve them for SEO purposes.
Blog Post Settings: Metadata Tab
Next, if you click down to the Metadata tab under the Blog Post Settings, you will find some very important fields. While these are not marked as mandatory fields, Metadata fields are important tools for SEO.

The Title and Meta Description fields dictate what gets displayed on a search result like this:

SEO experts debate the value of meta keywords when working to boost search rankings. But if nothing else, the Meta Keyword field can be an easy place to keep track of the search terms you are targeting in a given post (for your marketing team's own reference).
Want to learn more about Search Engine Optimization (SEO)? Check out these SEO Tips for NetSuite Ecommerce Sites.
Blog Post Settings: Layout Tab
Next is the layouts tab within the blog post settings.

Here, you will be able to see the current layout that you have in place, as well as any other available layouts.
Blog Post Settings: Advanced Tab
There is also an Advanced tab where you can add code to the page header if you would like.

In general, we recommend adding header content from the home page settings tab for the sake of consistency.
Blog Post Settings: Blog Post Tab
Finally, within the blog post settings, you will also see a Blog Post tab. While the categorization here may sound redundant, this is where you can access the settings and features that are specific to blog posts in SMT. All the settings previously described in this tutorial are also available for standard SMT landing pages.

Under the Blog Post tab, you can enter the following blog details:
- Publication Date (Required Field) - While you can use visibility controls from the general tab to determine when a blog post is visible on your site, you still need to set a specific publication date for each blog post.
- Category - Use this field to categorize your blog posts so that your website visitors can more easily find the content they are interested in.
- Author - This field is handy for quickly crediting your blog authors. To keep your author list from getting cluttered, you may want to create a couple of re-usable options for cases when the author is willing to remain more anonymous (ex. "Guest Author" or "Staff Writer"). Remember, you can always choose to credit authors within the body of the blog post (ex. by including their name, title, and a short bio as text at the end of the blog post).
- Subtitle - Use this field to easily add a subtitle to your blog post.
- Content - You can type the body of your blog post straight into this field as plain text, or you can choose to code it instead. You can leave this field blank and create a blog post using the same approach you use to create standard landing pages in SMT; by dragging and dropping individual HTML blocks onto the page. This approach allows you to write and style each blog post using HTML and CSS for more control over the page layout.
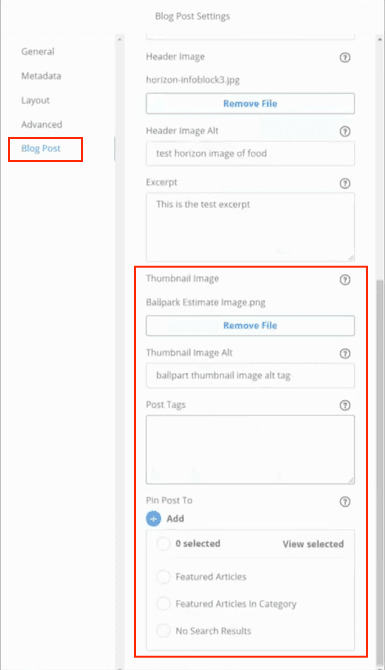
- Header Image & Header Image Alt - These fields allow you to quickly add a header image to your blog post and then provide the alt text describing the picture, which improves website accessibility and contributes to SEO.
- Excerpt - This will appear as preview text in blog feeds across your site, such as in a 'Featured Articles' section on your home page. The text that you enter for the Meta Description field on the General tab is often a good fit for this Excerpt field as well.
- Thumbnail Image & Thumbnail Image Alt - These fields allow you to quickly add a thumbnail image to your blog post and then provide the alt text describing the picture, which improves website accessibility and contributes to SEO. The thumbnail will display in search results and as the featured image on blog post previews across your site.
- Post Tags - You can create tags to be included at the end of your post, which then allows users to navigate to a list of articles with a given tag.
- Pin Post To - Use this field to pin blog post article previews to various sections across your site.
You will likely need to scroll to see all of the available fields on the blog post tab:
Having entered information in the fields outlined above, we can now click 'Save' on the blog post settings.
Publishing a Blog Post
Once the blog post is ready to be published, you can navigate to Review and Publish Changes, locate and select your blog post, then click 'Publish'.

Having published the blog post, it's always good to visit the URL to make sure that everything is working properly. If you navigate to your blog post URL and it says that it's a page not found, this is likely because you don't have the blog extension enabled yet.
Activating the Blog Extension
Bundles need to be installed and activated within your NetSuite Account in order to work. In our case, the blog extension bundle is already installed, so we simply need to activate it. So we will navigate to Commerce > Extensions > Extension Manager.

Then, from the Activate Themes and Extensions page, we can do a CTRL+F search to find the Blog extension in the list, check the box in the Activate column, and click 'Activate'.

If you did not find the Blog extension with your CTRL + F search on the Extensions tab list, this means that the bundle has not yet been installed in your account. If that is the case, you will need to search for and install the free blog extension bundle before you can activate it.
Need help with this step? Check out our SuiteBundler tutorial article to learn How to Search and Install Bundles in NetSuite.
Once the activation process is complete, you will see the SuiteCommerce blog feature working as it should.
Well, that's it for now. Hopefully, this post gives you something to work with while trying to understand NetSuite and what it can do for your business. If you have any questions and want some free consulting advice, feel free to contact our team at Anchor Group.
VIDEO: Full SMT Tutorial
#SuiteCommerce Training | Site Management Tools (CMS)
The content of this article is an expansion of key points from our tutorial video on working with Site Management Tools. Check out the full video.
Get stuck in a step during this article?
We like to update our blogs and articles to make sure they help resolve any troubleshooting difficulties you are having. Sometimes, there is a related feature to enable or a field to fill out that we miss during the instructions. If this article didn't resolve the issue, please use the chat and let us know so that we can update it.
Oracle NetSuite Alliance Partner & Commerce Partner
If you have general questions about SuiteCommerce or more specific questions about how our team can support your business as you implement NetSuite or SuiteCommerce, feel free to contact us anytime. Anchor Group is a certified Oracle NetSuite Alliance Partner and Commerce Partner equipped to handle all kinds of NetSuite and SuiteCommerce projects, large or small.
We are a premium SuiteCommerce agency that creates powerful customer portals. Unlike our competitors, we have already solved your problems.
Tagged with Training