If you have recently received fraudulent orders through your SuiteCommerce website, this tutorial will walk you through the installation process of Anchor Group's Google reCAPTCHA Bundle for SuiteCommerce.
SuiteCommerce Google reCAPTCHA | Installation and Configuration Demo
Note: Please follow the install guide text below to get the bundle ID needed as the video is out of date.
A bot attack on your SuiteCommerce website can cost you many thousands of dollars, either because of fraudulent purchases or because the high number of bad credit card requests can shut down your payment processor and prevent good orders from being placed. It is your responsibility to put measures in place to protect yourself. This simple solution is the industry standard in stopping fraudulent orders from bots attacking your website. After installing this solution, check out other SuiteCommerce apps & features built by Anchor Group.
Evaluating options for protecting your SuiteCommerce website? Check out the Email Verification Extension for SuiteCommerce, which requires email validation for registering customers & guest checkout!
Prerequisite: Request access to the bundle (7-day free trial)
Before you start the installation process, you must purchase the solution here, which has a 7-day free trial and can be canceled anytime.
You will need to provide your NetSuite Account ID when you request access. After you finish checking out and entering your payment information, you will be redirected to a form asking for your NetSuite Account ID. If you don't know where to find this, it is located in the URL of NetSuite when you are logged in. You can also find it by navigating to SETUP > COMPANY > COMPANY INFORMATION. This is required in order to provision the bundle to your NetSuite environment and make it available for installation.

Prerequisite: Create a Google reCAPTCHA Account
While you wait for access, you can begin by setting up your Google reCAPTCHA account and getting the keys needed for the installation.
When you are there you need to make sure you use the "Legacy Admin Console" before generating your keys. 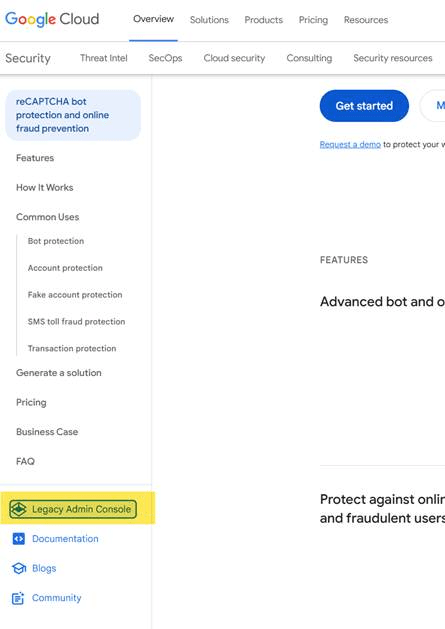

You will need the following data pieces before setting up the bundle:
typically use https://www.google.com/recaptcha/api.js which appears by default
typically use https://www.google.com/recaptcha/api/siteverify which appears by default
Compile this information in a safe location while you wait for access to the bundle. Access requests received before 12 PM CST typically will be available within the same day. Otherwise, receiving access to the bundle might take a full business day.
When you are on the website, you can select this link, which will take you to the page to set up a V2 reCAPTCHA (the version currently supported by the bundle).

Then, you can create your account. Select "reCAPTCHA v2" and the "I'm not a robot" selection. Fill in the rest of the information as required.
Troubleshooting Hint: Make sure to include your SuiteCommerce checkout domain as well if you don't use your primary domain with your checkout domain.
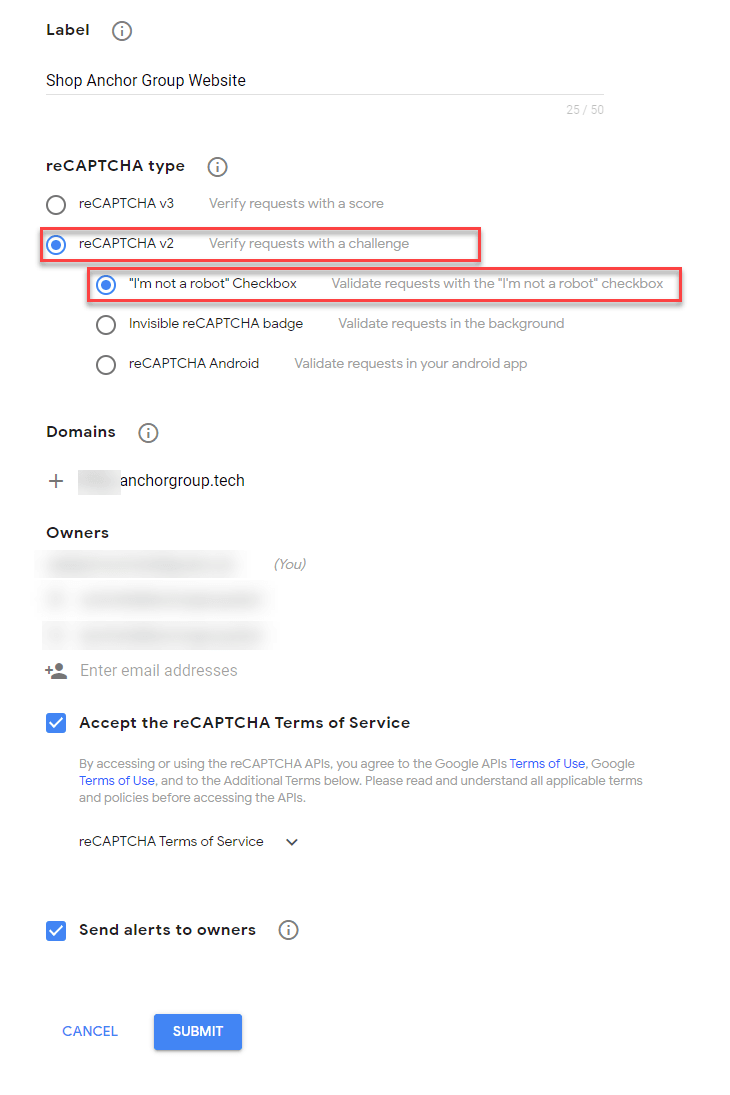
NOTE: If you plan to use V3, please select the V3 option instead.
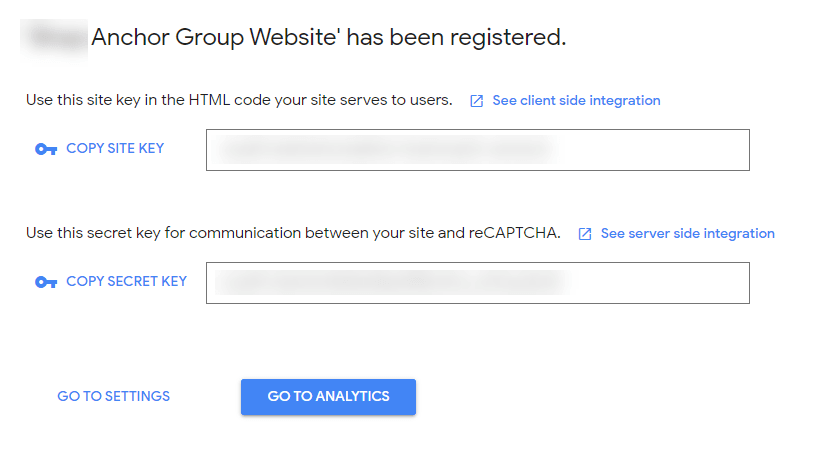
After you click "Submit," you will be taken to this page, which shows you the two fields you need to collect for the SuiteCommerce configuration at a later step.
Step 1: Installing the Bundle
The first step is to install the Bundle into your NetSuite environment. If you don't have NetSuite permissions to install a bundle, you will need to ask your NetSuite Administrator to perform this step or to provide you admin access to NetSuite.
Navigate to "Search and Install Bundles"
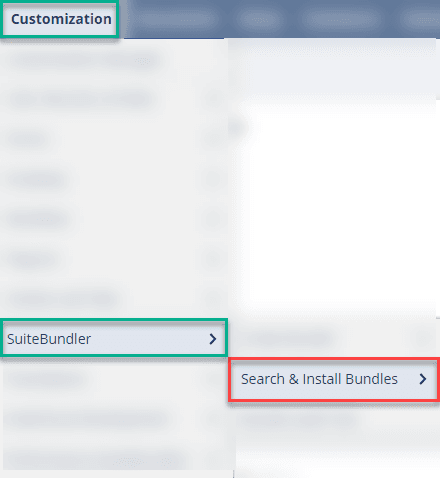
Search for Bundle ID "538790" or by searching for "Google reCAPTCHA" and select the correct result.

Click on the name of the bundle.
Click "Install"
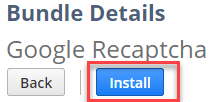
Click "Install" again after reviewing what is getting installed.

Click "OK" after the warning.

Refresh the list until you see the status switch from "Pending" to a checkmark.
Step 2: Activate the Extension
The next step is to activate the extension for the SuiteCommerce website. Navigate to Commerce > Extensions > Extension Manager.
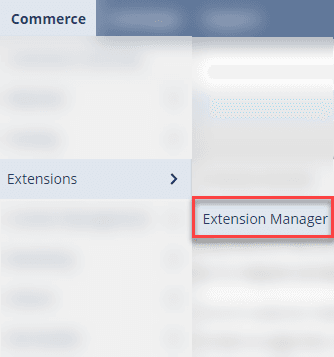
Click "EDIT" on the domain you want to activate this extension on and then navigate to the "Extensions" tab. Once you are there, you will need to "Check" the "Google Re-CAPTCHA Integration" extension and then click "ACTIVATE."
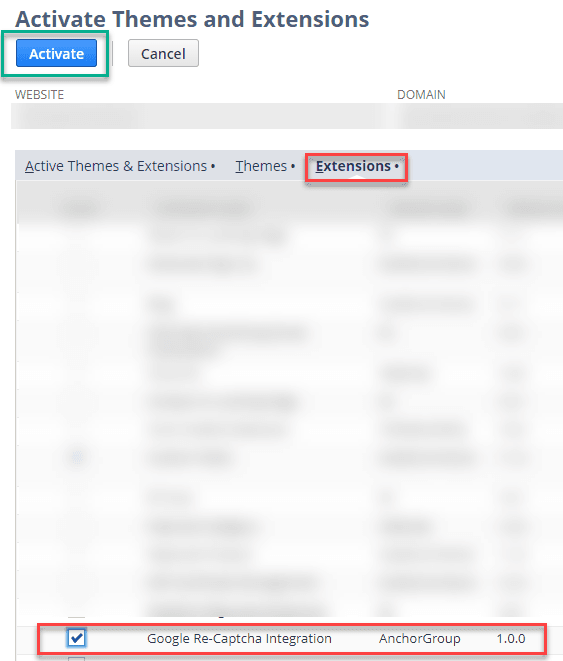
Refresh the page several times until you see that the activation has finished its progress and is completed.
Step 3: Recaptcha Configuration
For security reasons, Anchor Group placed the Google ReCaptcha keys outside the SuiteCommerce configuration record. This means that there is a record just for these keys to be configured prior to checking the boxes for where you want them displayed on the website.
Troubleshooting Tip: If you are using a customized customer center role, then can add the custom record to the permission list for AG Recaptcha Configuration.
In the global search bar, search for "Page: AG Recaptcha Configuration", then click "New AG Recaptcha Configuration."

This is where you will place the keys you captured during the prerequisite step of these instructions.
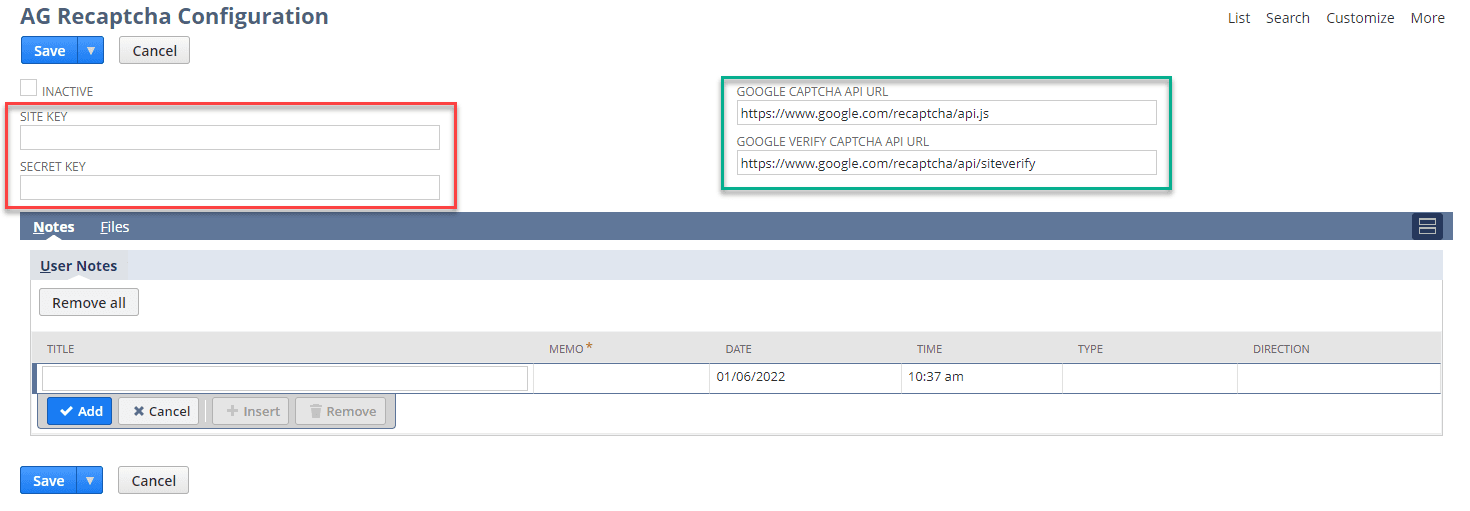
Copy/paste your site key and secret key, which you found during the prerequisite step of this process, into the appropriate fields.
NOTE: If you see the checkbox called "Subscription" then enable that checkbox.
IMPORTANT: DO NOT DELETE the configuration record as if you delete the initial record and create a new one as the internal ID is directly connected to the extension, it will create an error and you will need to reach out to Anchor Group for support.
Step 4: SuiteCommerce Configuration
Navigate to SuiteCommerce configuration to complete the Google reCAPTCHA configuration for your website.
COMMERCE > WEBSITES > CONFIGURATION
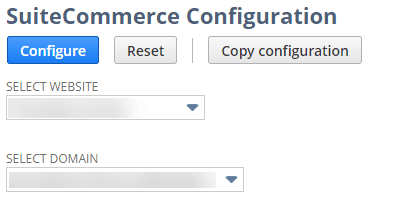
Select your website record and domain for your SuiteCommerce website and click "configure".
Then, you will need to navigate to the "Extensions" tab and then the "Google Captcha Integration" subtab.

Enter the Site Key and Secret Key from your Google reCAPTCHA account and select the checkboxes where you want the reCAPTCHA to display.

Once you have finished this configuration, you can click "Save".
Step 5: Testing
To ensure all the changes have taken effect, complete a Cache Invalidation Request before refreshing your website.
Once you have completed this, you can go to your SuiteCommerce website and press "CTRL + SHIFT + R," which will refresh your browser's cache.
Make sure the reCAPTCHA shows up in the correct places the way you want. If it does not, you may need to reach out for support from Anchor Group to have a custom installation. This may be because of an interaction with another customization/theme you have made. If this occurs, you can easily disable the extension by removing the "display" checkboxes in the configuration or by unchecking the extension in the extension manager and activating it again.
From here, if you selected to display in other areas, confirm that they all work properly and place a sample order.
Test New Customer Registration
If you enabled Google ReCAPTCHA on new customer registration, you should test that it not only appears but also can complete the new customer registration (if an internal error occurs, see "Getting an internal error?" section below). Make sure to place a test order with your nearly registered customer if you also enabled ReCAPTCHA at the checkout.
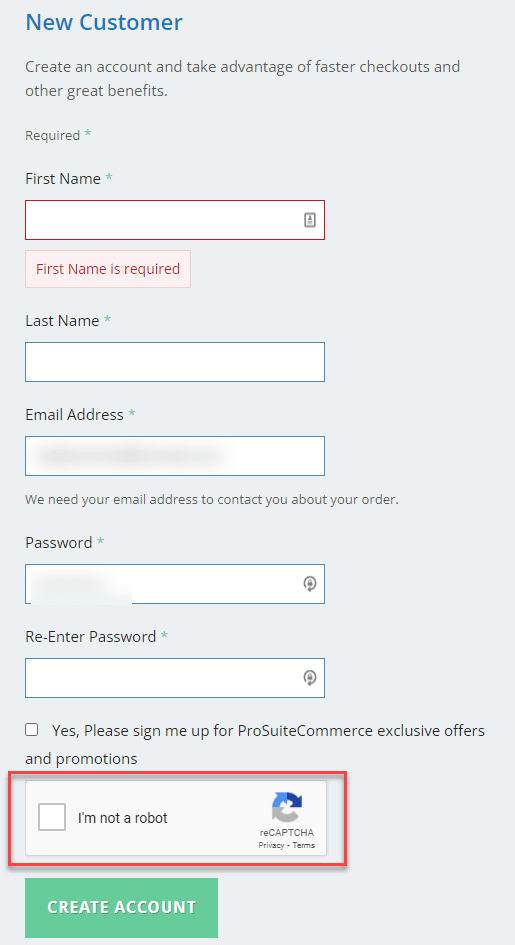
Test Order
If you enabled Google ReCaptcha for placing the order/checkout, you should test it by logging in as a test returning customer and placing a test order.
Test Guest Checkout
If you enabled Google ReCaptcha on guest checkout, you should test it.
If you have guest checkout enabled in your environment, you must add an item to the cart before being logged in. Then, you will need to proceed to checkout, where the guest checkout option appears should you have it enabled. Make sure to register as a guest here and place another test order.
NOTE: If you don't have the checkbox for "DISPLAY RECAPTCHA FOR REGISTRATION" checked, then the guest checkout will not work.
Getting an internal error?
If you get an internal error, you will need to make sure your SSP applications are using SuiteScript 2.0. You can utilize the instructions on SuiteAnswers Article 91098 to show you how to do this. This will be needed to get it to function properly. It is more common to get this error on SuiteCommerce websites that were implemented before the year 2021.
Troubleshooting Tips
- Make sure that if you are using a custom customer center role for your SuiteCommerce website that you give it access to the "reCAPTCHA" custom record (you can see this on the customer record under their access to the website).
- Confirm that SS2 for your SSP application is connected to the domain
- Confirm there is not space before or after your reCAPTCHA keys when you copy/pasted them from Google's admin page after you generated them
- Confirm the extension has fully been activated
- Confirm that the correct bundle ID was installed and not the historical bundle
Followed all the documentation and still facing an issue?
If you followed this tutorial and are facing an issue, don't hesitate to contact Anchor Group for free support to troubleshoot the installation on your behalf.
Related Article: Setting Up & Configuring Google Analytics | SuiteCommerce
Oracle NetSuite Alliance Partner & Commerce Partner
If you have general questions about SuiteCommerce or more specific questions about how our team can support your business as you implement NetSuite or SuiteCommerce, feel free to contact us anytime. Anchor Group is a certified Oracle NetSuite Alliance Partner and Commerce Partner equipped to handle all kinds of NetSuite and SuiteCommerce projects, large or small!

We are a premium SuiteCommerce agency that creates powerful customer portals. Unlike our competitors, we have already solved your problems.
Feedback & Get a Free Copy of Our SuiteCommerce Book
Our team loves to hear feedback on how we can improve our instructions or add enhancements to our solutions. Please reach out to our team through our contact page with any suggestions on how we can improve our documentation or products.
If you haven't yet, snag a free copy of our SuiteCommerce book. We will ship it for free to any address on the mainland of the United States!
