Sezzle NetSuite Integration Installation Guide
Before beginning this self-install process for Anchor Group's Sezzle NetSuite Integration, make sure that you have already completed the prerequisite tasks outlined here.
- Date
- December 15, 2025
- Read
- 13 min

If you're a company looking to expand your reach or increase your market share, customer payment plan tools like Sezzle can be incredibly valuable! But, because you've already invested in NetSuite, you know that the power of your NetSuite system lies in the fact that all of your information is easily accessible from a single location... inside of NetSuite.
So what's a business to do when there's an awesome tool like Sezzle that you want to use alongside NetSuite without creating a mess of disjointed data? Well, this is when you will want to purchase an integration that enables you to take full advantage of the Sezzle platform, while ensuring that all the information you need can be accessed from inside of NetSuite!
If you haven't purchased the Sezzle/NetSuite integration yet and would like to learn more about it, visit our Sezzle NetSuite Integration page. This integration comes with a 7-day FREE trial, and you can cancel your subscription at any time if you are unsatisfied, so it's risk-free!
If you've already purchased licensing for this Sezzle NetSuite Integration, that's awesome! Go ahead and follow along with the steps below to install and set up the integration for your NetSuite Account.
Prerequisites
Before beginning this self-install process for Anchor Group's Sezzle NetSuite Integration, be sure to check that you have already completed the following:
- Company has purchased licensing for Anchor Group's Sezzle NetSuite Integration.
- Company has account with Sezzle that can be linked to NetSuite configuration and has provided login information to Anchor Group
- Company has given Anchor Group their NetSuite Account ID or admin access to their account so that Anchor Group can provision the bundle to that account (you probably submitted these detailsthrough a form on the purchase thank you page
If you have questions about how to find/submit any of this information, please use our website contact form to get in touch with our support team.
Search and Install Bundle
After the bundle is provisioned to your NetSuite account, the next step is to install the bundle into your NetSuite environment.
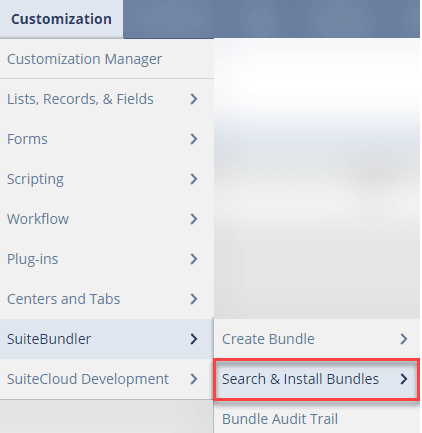
In NetSuite, navigate to Customization > SuiteBuilder > Search & Install Bundles
Search for the Bundle ID in the Keywords Field: 420240
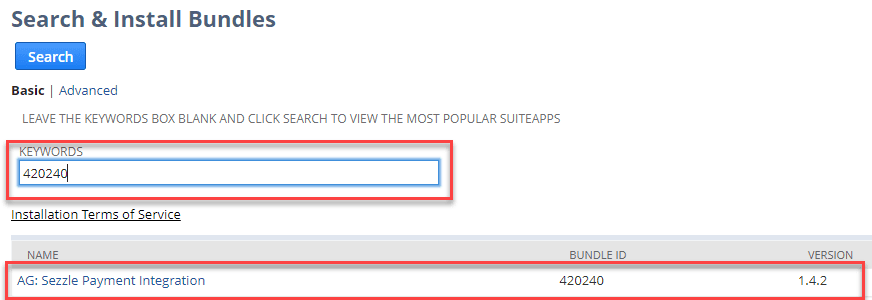
Select the hyperlink for the AG: Sezzle Payment Integration which will bring you to the bundle overview page to prepare for an installation.
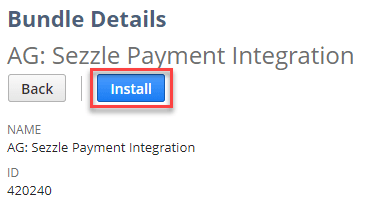
Click the Install button.
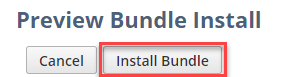
This will bring you to the Bundle Preview where you can click on the Install Bundle button.
Click Okay on the confirmation popup to install the bundle into your account. At this point, the Sezzle bundle will begin installing into your NetSuite environment. You will be brought to a list of your installed bundles that will show the status of the Sezzle bundle installation. Click Refresh until a check mark displays in the STATUS column, indicating that the bundle has been successfully installed.
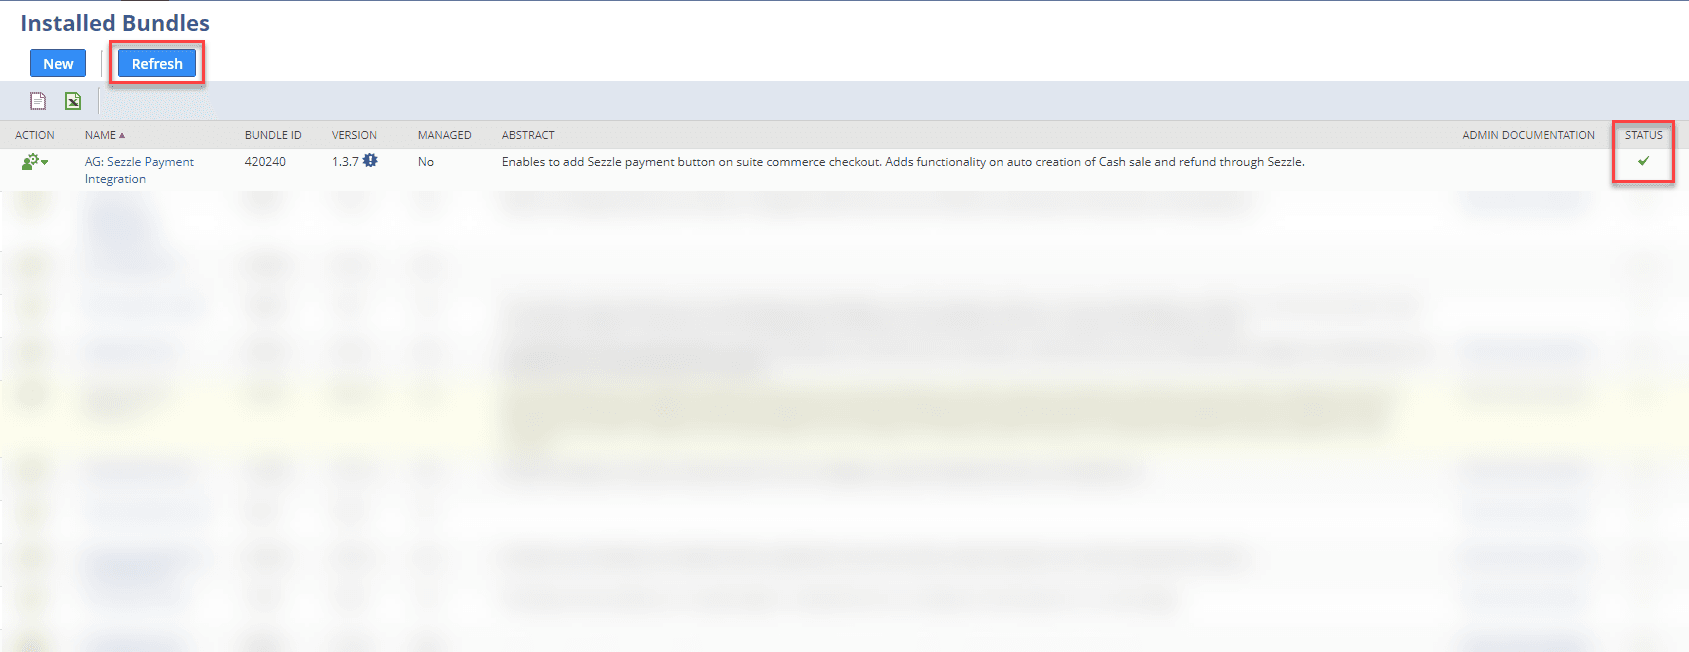
If you do not see a checkmark within 10 minutes please contact Anchor Group for support.
Congratulations! The bundle has now been installed into your NetSuite environment.
Sezzle Sandbox vs Production
When setting up your Sezzle integration for the first time, we recommend that you use a sandbox Sezzle account to test the integration. You may use the Sezzle sandbox account in your NetSuite production environment if you do not have a NetSuite Sandbox, however, if your website is already live you may need to cancel any non-test orders that may be placed by customers through Sezzle while you are using the sandbox account to test, otherwise the customer's card will not be charged.
For instructions on how to set up your Sezzle sandbox account, either in NetSuite sandbox or productions, see Sandbox Setup. If you do not have a Sezzle sandbox account, reach out to Sezzle and they will create one for you.
Creating Sezzle Payment Method and Credentials for Production
Creating a Sezzle Payment Method
The next step is to create a Sezzle payment method to be used in transactions/sales order creation from the web store. Go to Set Up > Accounting > Accounting Lists > New > Payment Method
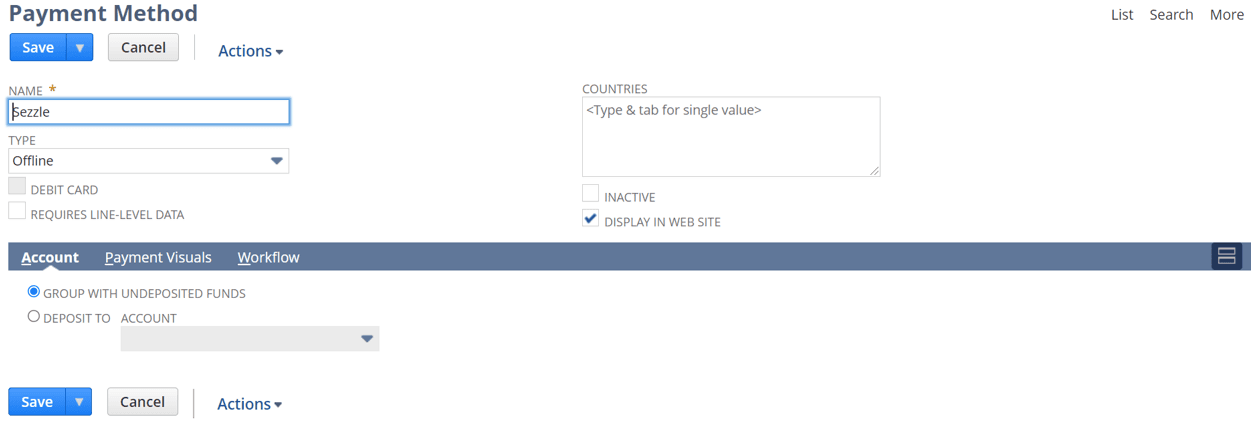
Enter 'Sezzle' in the NAME field, select 'Offline' for the TYPE, and make sure the DISPLAY IN WEB SITE box is checked.
Under the Payment Visuals tab enter 'Web/Standard' in the FLAGS field and copy the following url into the URL field:
/images/SezzleBNPL_145x51.png
Then click Add.
After you have added the payment visual, you can go ahead and click Save on the Payment Method. Next, you'll need to create new Sezzle Credentials in your NetSuite Account.
Creating Sezzle Credentials
In your NetSuite account, type Sezzle Credentials into the search bar and click New Sezzle Credentials.
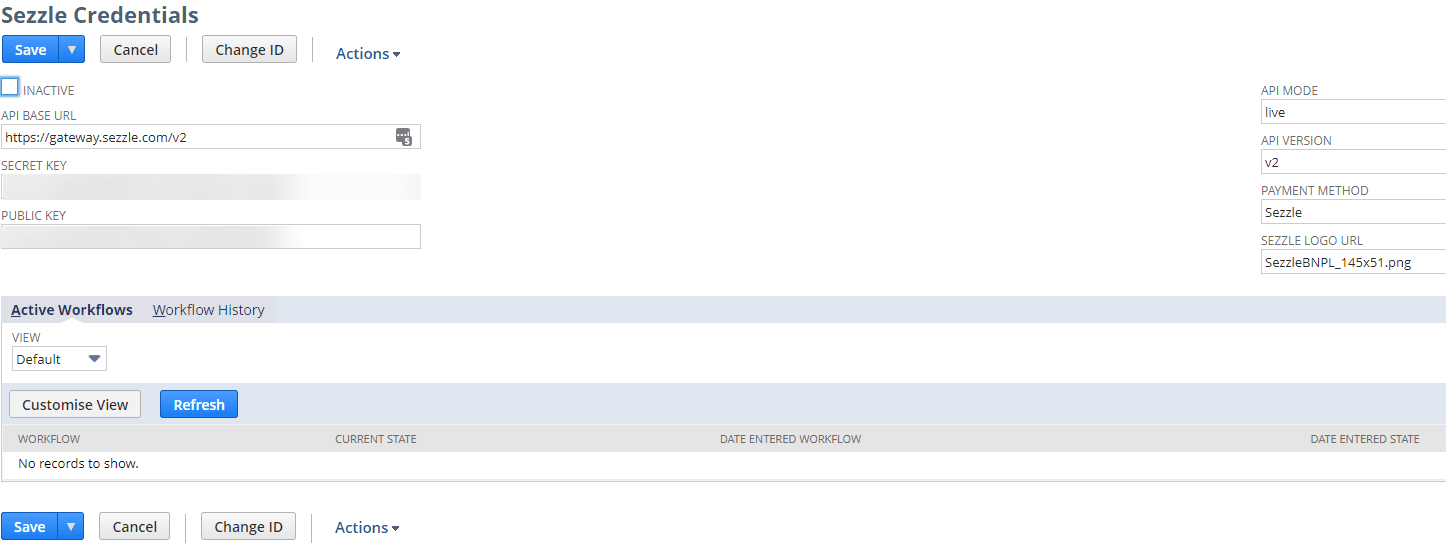
Enter the following values into their respective fields:
- API BASE URL - https://gateway.sezzle.com/v2
- API MODE - live
- API VERSION - v2
- PAYMENT METHOD - Sezzle (This value will only appear if you have already created the Sezzle payment method)
Sezzle Logo URL
The Sezzle Integration Bundle uploads some images into your NetSuite File Cabinet. The Sezzle Logo URL field will require you to download an image from the bundle and upload it into the Live Hosting Files of your File Cabinet. Navigate to Documents > Files > Live Hosting Files. In the search bar type 'Sezzle' and click Search.
![]()
Select the Sezzle Logo folder located in SuiteBundles > Bundle 420240. Then click the download button next to the SezzleBNPL link.
![]()
Once you have downloaded the image onto your computer, you will need to to upload it into the Live Hosting Files section of the File Cabinet. Click Website Hosting Files > Live Hosting Files > Site, and click Add File. Now locate the image that you just downloaded, and select it for upload.
![]()
Once the image has been uploaded, copy and paste the link into the SEZZLE LOGO URL field on the Sezzle Credentials record.
Secret and Public Key Fields
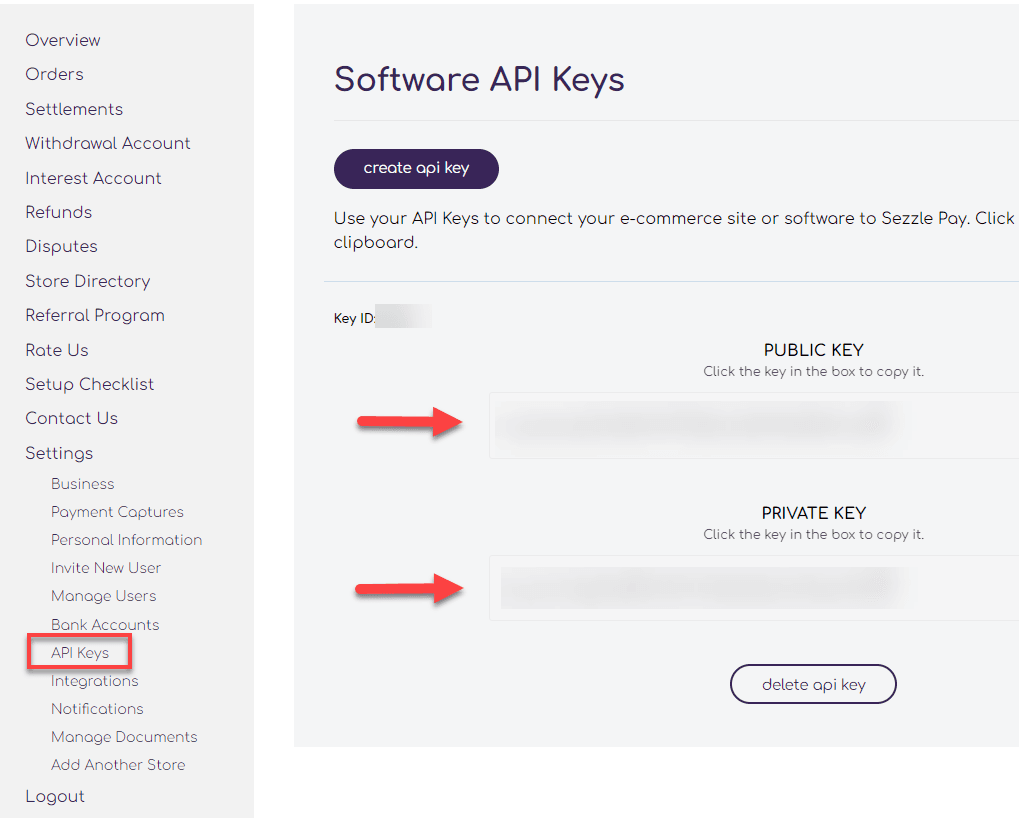
To find the Secret and Public Keys you will need to login to your Sezzle Merchant account. If you do not have a Sezzle account, contact Sezzle to set one up. Once you have logged into your Sezzle merchant account, go to Settings > API Keys, then copy and paste the public and private keys into their respective fields on the Sezzle Credentials record.

After entering the keys into the record, click Save. There are just a few more things to do before your integration is ready for use!
Activating the Sezzle Extension
You'll now need to activate the Sezzle Payment Method Integration extension. Go to Commerce > Extensions > Extension Manager, and click New Activation. Select the website and domain in which you want to use Sezzle and click Next.
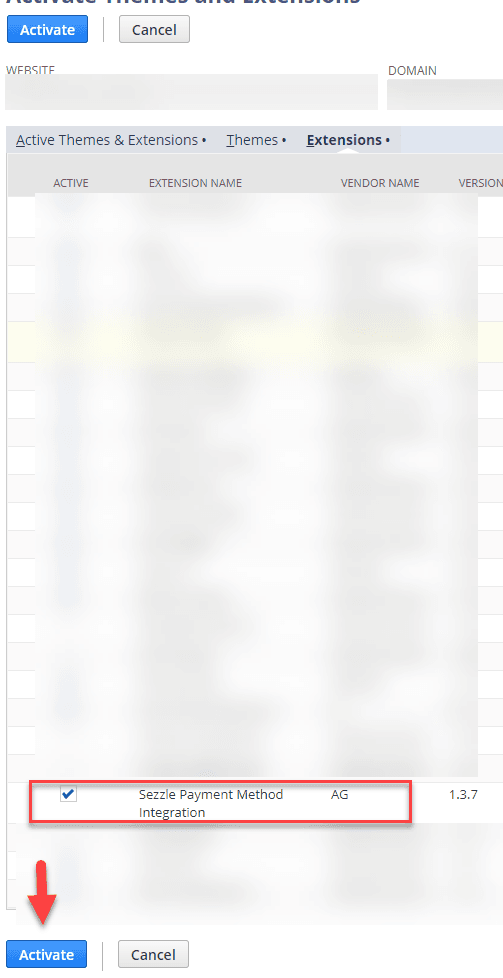
Under the Extensions tab, click the checkbox next to Sezzle Payment Method Integration, then click Activate.
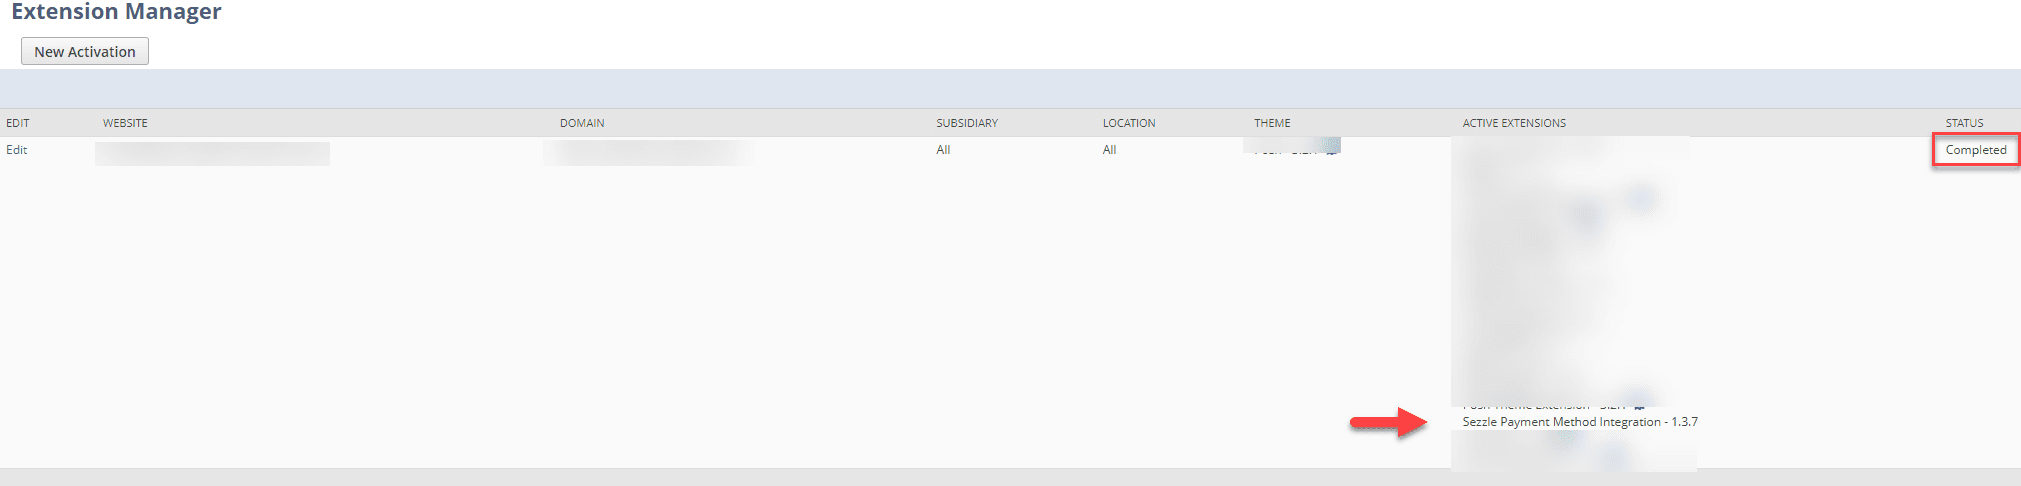
Refresh the page until you see the status of the activation show Complete, you should also see the Sezzle extension under Active Extensions.
Sezzle Widget SDK
In order for the Sezzle widget SDK to display on the product detail page you will need your Sezzle Merchant ID. Once you have activated the extension, you will be able to put your Sezzle Merchant ID into your website configuration in NetSuite.
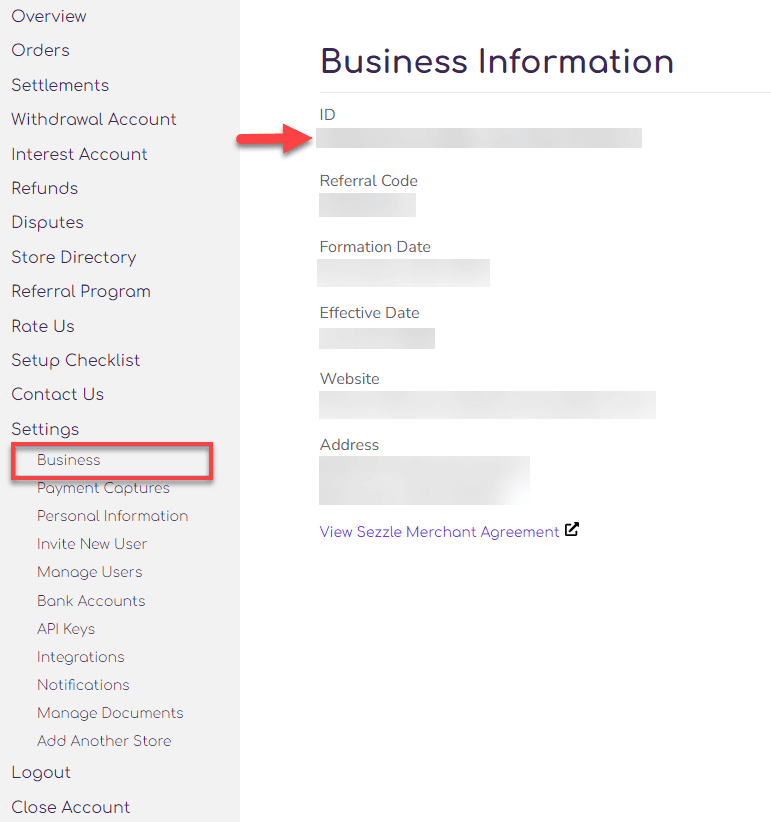
To find you Sezzle Merchant ID, go into your Sezzle Merchant account, navigate to your settings and select Business. Here you will see a field marked ID; copy this value.
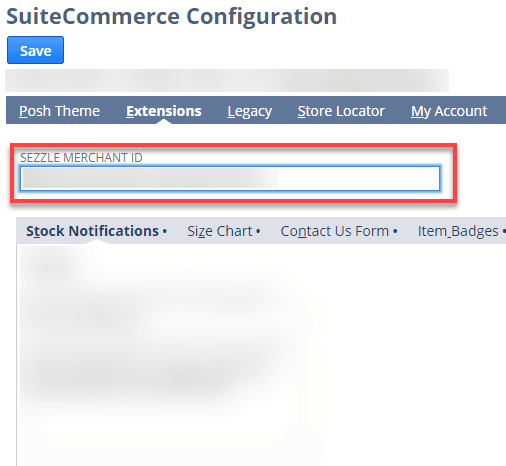
Once you have copied your Sezzle Merchant ID, in your NetSuite account go to Commerce > Websites > Configuration. Select the website and the domain in which you will be using Sezzle and click Configure.
Under the Extensions tab, paste your Sezzle Merchant ID into the field labeled SEZZLE MERCHANT ID, then save the configuration record.
After you have saved the configuration record, go to Commerce > Websites > Website List, click Edit next to the correct website. Under the Shopping tab, check the following boxes:
- Display Purchase Order Field on Payment Info Page
- Allow Non-Credit Card Payment Methods during Checkout
Save the website setup record.
Congratulations! You have finished the configuration for the Sezzle-NetSuite integration. Now all that is left to do is verify whether the integration is working appropriately!
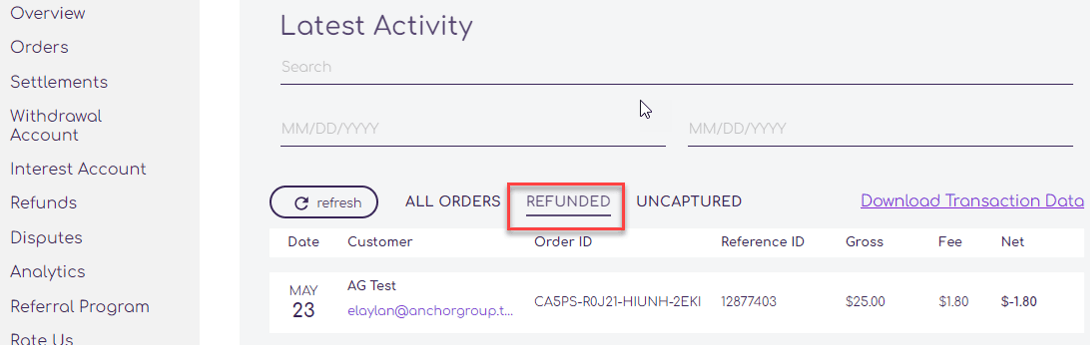
Refunds/Returns
To create a full or partial refund, create a refund record from the Cash Sale in NetSuite.

Once you have saved the refund record in NetSuite, confirm that the order displays as refunded in the Sezzle Merchant dashboard and that the refund amount is correct.
Sandbox Setup
To set up a Sezzle sandbox account in your NetSuite sandbox environment, you will need to go through the exact same process as outlined above for production while ensuring you make the following changes:
On the Sezzle Credentials, enter the public and private API keys from the Sezzle sandbox. The Keys can be found in the same location in which they were located for the production account but in your sandbox account.
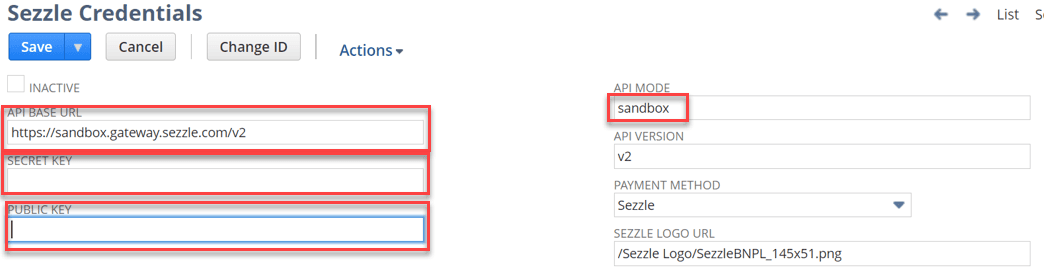
Change the API Base URL to https://sandbox.gateway.sezzle.com/v2 and the API Mode to sandbox. Save the Sezzle Credentials. The rest of the setup is exactly the same, including the Merchant ID, this will be the same in your Sezzle sandbox and your production.
If you are using your Sezzle sandbox in your NetSuite production account all you need to do is change the Sezzle Credentials as explained above, and when you are ready to start using production on your website simply change the Sezzle Credentials back to production.
Testing
Note: It is recommended that you test the Sezzle integration in a sandbox Sezzle account, this will allow you to place orders with fake card information, see below for more details.
The Sezzle banner should display on each PDP just below the item price.
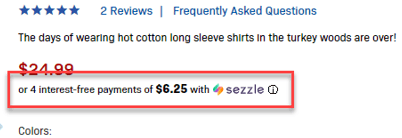
Navigate to your website to verify whether or not the banner displays on the PDP in the correct location.
Add at least one item to the cart and navigate to the checkout. The Sezzle payment method should be available for use along with the other payment methods.
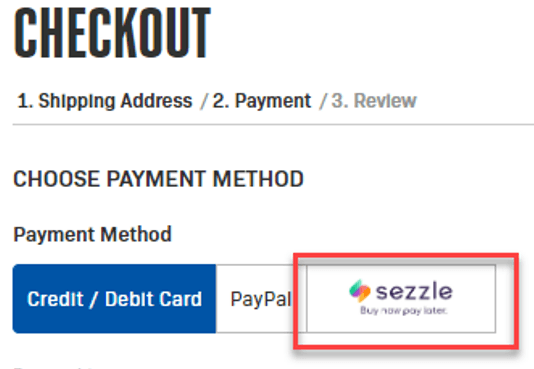
Click on the Sezzle payment method and a popup should appear with in which the user can create an account or login, add a payment method and place the order. To place a test order without charging a card you can use the following test information:
Note: This test information will only work if you are testing in a sandbox Sezzle account.
You can login using a fake phone number, the test 0TP is 123123.
All personal information does not need to be real including email.
Card Number: 4242 4242 4242 4242
CVV/CVC: Any 3 numbers
Expiration Date: Any date
Name: Any name
Address: Any address
The full checkout process should happen through the popup window and, upon completion, the user should be directed to the order confirmation page of your website.
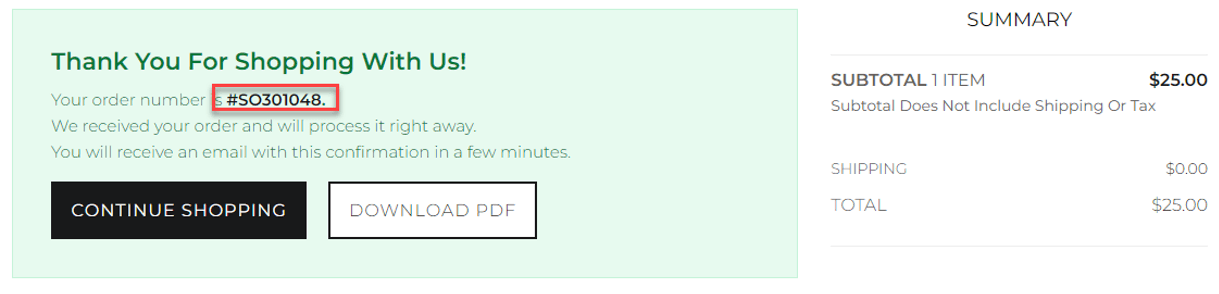
The confirmation page should display as normal, take note of the order number and search for it in NetSuite. Navigate to the sales order in NetSuite and go to the Billing tab, you should see the Sezzle Transaction UUID, transaction status, SO ID Updated on Sezzle Transaction = T, Sezzle Order ID, sezzle Payment Captured = T, and the bill to information. You should can also see the Sezzle Refund fields as well as the sale with relevant information under the Payment Events subtab.

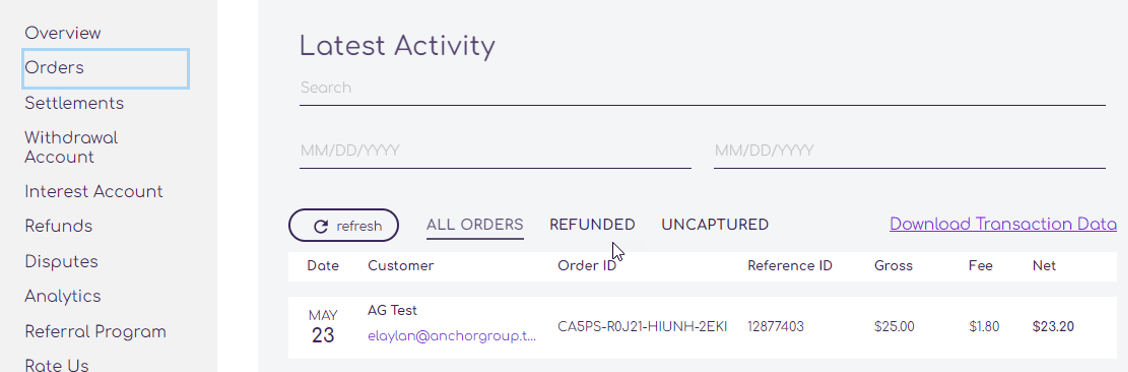
In your Sezzle Merchant account, confirm that the order has arrived under the orders tab
The Sezzle deposit should arrive in bank within 3 business days. At that point a deposit can be created off of the Cash Sale record in NetSuite to reconcile the payment.
Troubleshooting
Sezzle images and widget not displaying in Website: If Sezzle is not displaying in your website and you have double checked your setup and everything is correct you may want to try deleting your Sezzle Merchant ID from the website configuration and repasting it. This may sound silly, but if you have done a thorough check of your setup and Sezzle still isn't displaying, you may want to try this, it has worked before. See the Sezzle Widget SDK section of the installation guide for instructions on how to do this.
Purchasing the Sezzle-NetSuite Integration
That's it! If you already purchased licensing for this Sezzle-NetSuite Integration and have been following along with the article step-by-step to install and test it in your NetSuite account, then congratulations! You're all done, and you can start using this amazing Sezzle + NetSuite integration to increase your company's reach and market share!
If you haven't yet purchased licensing for our Sezzle NetSuite Integration, hopefully this article eased any worries you might have had about taking on the self-install process! If you're ready to learn more, or are interested in purchasing the integration, visit our Sezzle logo image page! Remember, this integration comes with a 7-day FREE Trial, and you can cancel your plan at any time if you are unsatisfied, so you can checkout confidently knowing that your purchase is risk-free!

Get stuck in a step during this article?
We like to update our articles to make sure they help resolve any difficulties you are having. If you are having trouble with this self-install process, or if you are experiencing any issues with your Sezzle integration, please contact Anchor Group via the website contact page, or call our direct sales team at (608) 575-9053.