NetSuite Advanced PDF Source Code Deep Dive
Learn how to use the power of Source Code to build out your templates.
- Date
- September 18, 2025
- Read
- 11 min

NetSuite Tutorial | Advanced PDF/HTML Templates | Source Code Deep Dive
Enabling Source Code Mode
In this blog, you will learn how to use the power of Source Code to build out your templates.
To start, we'll toggle the Source Code switch to green, opening the source code editor.


When switching the toggle, a warning will appear letting us know that transitioning from Source Code mode to WYSIWYG mode can cause formatting issues in your template:

So, be aware not to transition back to WYSIWYG mode after opening Source Code mode. If you wish to proceed and open Source Code mode, click Yes.
Now that the Source Code mode is open, click the Preview button on the right-hand side of the blue bar. This will open a template preview in a new tab.
Logo Adjustments
Looking at the preview, you can see our company logo is taking up almost the whole page.
To fix this, we'll go back to our source code and we will find the line with our logo. Hit the F3 button or Ctrl+F/Command+F to search for the word "logo." On line 19 we have this BFO (Big Faceless Organization) expression sourcing our logo from our file cabinet:
Let's change this line's default styling:

Let's get rid of that margin, and add a width of 160px and a height of 95px (you may need to adjust these differently for your specific logo).

Now that styling changes have been made to the logo, click the preview button to see what your logo looks like now.
Looking good.
Printing
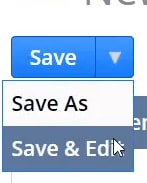
Let's print our invoice template via an invoice record to ensure the logo is rendering correctly there as well. For this, go back to the source code editor and hover over the blue save button, and select Save & Edit.
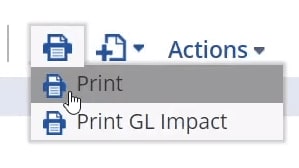
Next, open an invoice record, navigate to the print icon, hover over it, and select Print.
Code Reformatting
Next, let's clean up the code readability by using a code formatter. A convenient option is Pretty Diff, though if you have access to it and/or have the time to download it and learn how to use it, Visual Studio Code is a better option.
Download Visual Studio Code to better leverage your template code.
To start, select all your code and copy it. Next, paste your code into the left-side text box in Pretty Diff.
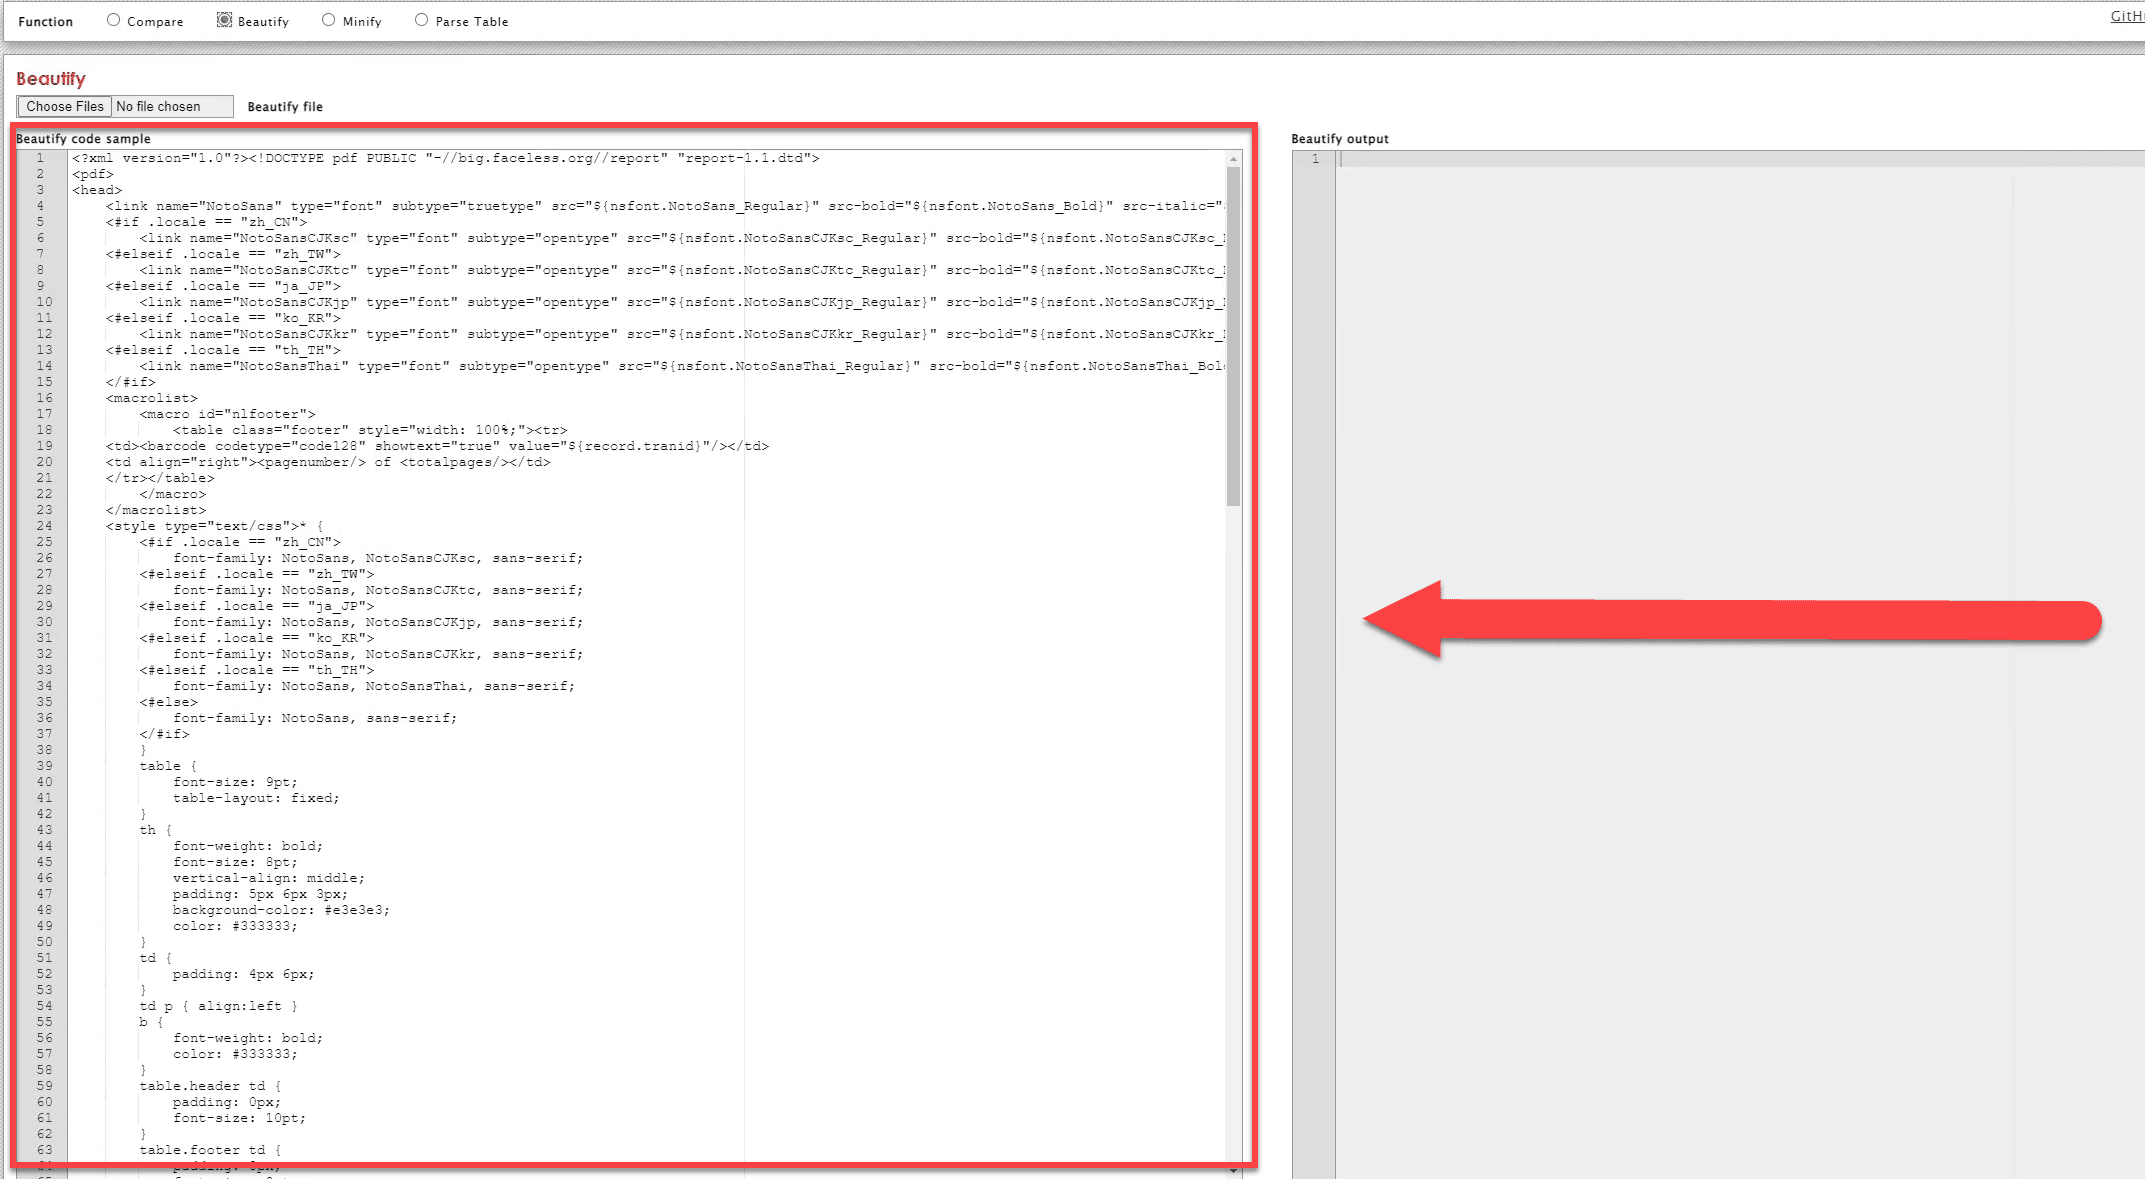
Make sure the Beautify button is clicked.

Then hit Execute below the text box.

In the right-hand side text box, you will find your reformatted code. Copy this code, return to your Source Code interface in NetSuite, and paste it in.
The one con of using Pretty Diff is that it can throw some of the code off, but we will go over how to fix that later in this blog.
Editing the Layout
We will start editing the template layout in the macrolist signified by the opening <macrolist> and closing </macrolist> tags. In the first <table> tag, add a height styling of 100%.

Next, add the styling of vertical-align: top, text-align: left, and width: 230px to the first table data <td> tag.

Next, we will move these two <span> tags:

Make opening <td> and closing </td> tags, then select and cut the span tags (shown in the image above) and all the content in and between them, and paste everything between the opening <td> and closing </td> tags.
Inside the opening <td> tag you just made, add a rowspan and set it to 3. Next, give the <td> a styling width of 206px.

Immediately after the ">" of the opening <td> tag, add 2 breaks <b/>. Adding these breaks will drop the data down 2 lines on the template.
Adding a Hyperlink
Next, we're going to add a hyperlink to the company name field text. For this, add an anchor <a> tag and insert an href attribute inside the <a> tag. Next, add your URL and set the target to "_blank." That <td> tag should now look like this:

Next, grab the first span tag and put it on the line below the line with the anchor tag, then add a closing anchor tag on the end. That will look like this:

Moving on to the next section, we have another opening <td> tag that we will add some styling to. Let's give this tag, and the rest of the table data tags below it inside the macrolist, a width of 366px.

Troubleshooting Errors
From time to time, you may encounter errors in your template that you want to debug. For example, when we use Pretty Diff's formatter, it can sometimes remove spaces in our code that we want to keep. So when we click preview or save, an error alert will pop up, like in this example:
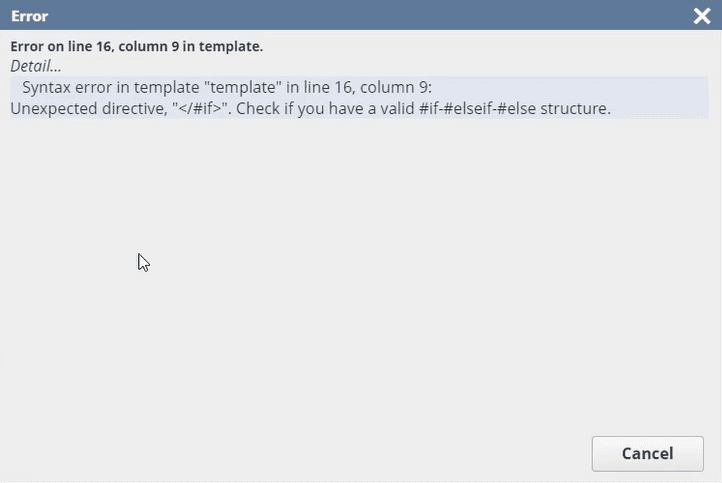
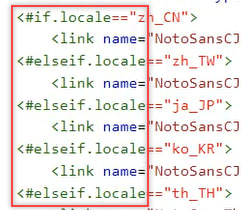
For this scenario, we want to review the template, looking for instances where particular spaces in the template, which we want to keep, have been removed by the Pretty Diff formatter. The best way to do this is to do a word search. For this scenario, we will do 4 word searches, one for "if", one for "esleif", one for "item", and one for "list." These four words will be tied to the code that has the spacing error. To start a search, hit the F3 button or Ctrl+F/Command+F, then type in the word you want to search for on the page. To ensure you are searching over the whole template, open any closed tabs of code:
Closed tab:

Open tab:

In the examples below, we want to put a space after every "if" and "elseif":
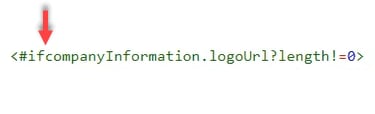


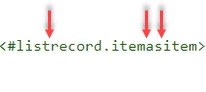
In the example below, we want to put a space after "list", the first instance of "item", and a space after "as":
Great, you just debugged your template's code. This experience will serve you well when you run into template code bugs/errors in the future. Go ahead and check your progress via the preview button.
As you can see, we now have the company name with the hyperlink attached to it, signified by the underline of the company name.

If we right-click and hit the open link in a new tab, it brings us to our company's website, whose URL we added to that field text. You can add links to other field text, but this is a prime example. To remove the link, simply undo the changes you made to implement the link.
Aligning Text
Looking at the updated template preview, it is obvious that the company name and address are too far to the right. We want them lined up with the "Ship To" text just below it.

We can also see that the number to the far right under the word "Invoice" is being pushed to another line, and we want all these numbers to be on the same line.

In this case, the logo image's <td> width is too big, pushing everything to the right of it over, making the number under "Invoice" go to a second line. To fix this, find the <td> that has the company logo in it, and change the width from 230px to 190px.
Now that you have made that change, hit preview. Now you can see that the text is now aligned, and the number underneath "Invoice" is not getting pushed to a new line:

Next, we have a few pieces of data throughout this template with text alignments that are not consistent within their sections. We want to fix that. For this, we're going to be working in the body of the template, which is everything inside the opening <body> and closing </body> tags.
The first thing we're going to do is add an alignment to the body's first opening <table> tag and set it to "left."

Next, we are going to go inside that table and add some styling to the <td> tags that have the "addressheader" class and the <td> tags that have the "address" class. That styling will be style="text-align: left"

After that, we will go inside the next table and add that same chunk of code inside the <th> tags below:
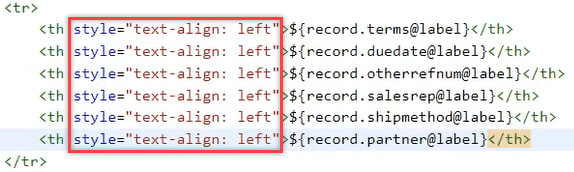
Next, we will go into the next table down and add the same code chunk to the following <th> tags (Note: we won't add the code chunk to all the <th> tags):

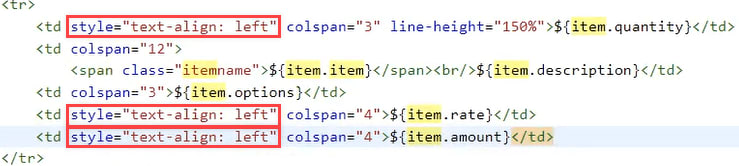
After that, we will go into the <tr> tags immediately following the ones we were just in and add that same code chunk to the following <td> tags (Note: we won't add the code chunk to all the <td> tags):
Now, if you look at your template preview, your text should be aligned appropriately.
Adding Fields
Lastly, we're going to demonstrate how to add fields to the source code. In this example, we will add the subsidiary field just above the company name. Start by finding the company name field within the <head> tag. As we went over earlier, the company name will be within a <span> tag. Copy those opening <span> and closing </span> tags, everything in between, and paste it above itself. The syntax for the subsidiary line is similar, so copying the company name line will save us some keystrokes. All we need to do to the line is replace "companyInformation.companyName" with "record.subsidiary" and add a <br/> tag after the closing </span> tag.

For reference, you can find field Ids by viewing this NetSuite Help Center ID list or by clicking on the field label on the record you are working with and copying the ID from the field help popup.
Now that our final changes have been made, hit save, go to an invoice record, and click print. You should now see all your changes.
That wraps up this blog and the blog series. Check out our previous Advanced PDF/HTML blogs for more helpful insights.
Related Article: Parsing JSON in Freemarker
Got stuck in a step during this article?
We like to update our blogs and articles to make sure they help resolve any troubleshooting difficulties you are having. Sometimes there is a related feature to enable or a field to fill out that we miss during the instructions. If this article didn't resolve the issue, please use the chat and let us know so that we can update this article.
Tagged with Training