How to Deactivate Sub-Customer Records | NetSuite
Let's look at how to deactivate ONLY the sub-customer record in NetSuite, without deactivating either the parent record or other sub-customer records when there are multiple.
- Date
- June 17, 2025
- Read
- 3 min

Let's say your company utilizes a hierarchical customer structure. You have parent customers with sub-customers (children) underneath. Sometimes, you may need to deactivate (set to inactive) some of the sub-customers for a given parent customer.
You could go into each sub-customer record and check the box for 'Inactive' under System Information, but there will likely be some undesired consequences. In particular, when you set a sub-customer to inactive on the customer record, NetSuite will also automatically set the parent customer record to inactive.
Native NetSuite Functionality
Here is the native functionality in NetSuite when you deactivate or reactivate the parent or sub-customer record from the record page.
- When deactivating a parent record, NetSuite asks if I want to deactivate child records.
- When reactivating a parent record, NetSuite asks if I want to reactivate child records.
- When deactivating a sub-customer record, NetSuite ALWAYS deactivates the parent record. When there is more than 1 sub-customer, NetSuite will prompt you if you want to deactivate all dependent records (the other sub-customers). If there is ONLY 1 sub-customer, NetSuite will NOT give the prompt.
- When reactivating a sub-customer record, NetSuite will prompt you if you want to reactivate the parent record, too.
Note: NetSuite will NOT reactivate the other sub-customers.
Deactivating Only the Sub-customer in NetSuite
So, how do you deactivate ONLY the sub-customer record you wish to deactivate without deactivating either the parent record or the other sub-customer records when there is more than one? Let's walk through the process.
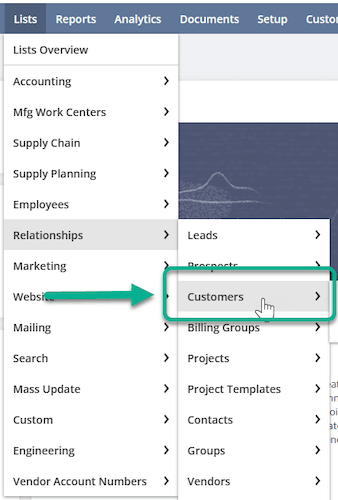
Step 1: Go to the List view of Customers.
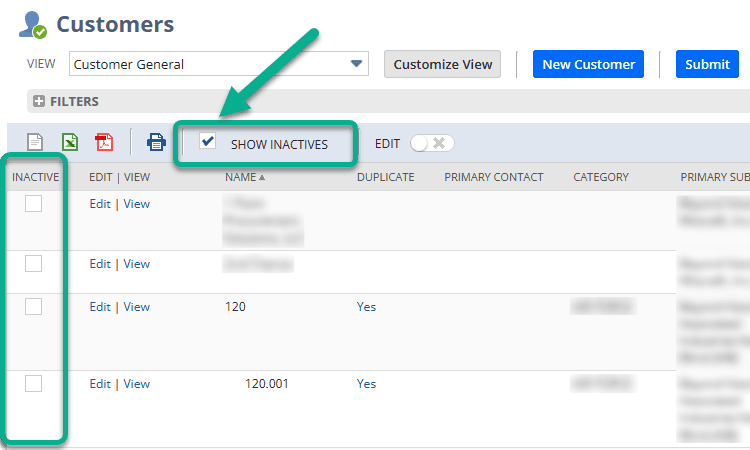
Step 2: Check the 'Show Inactives' checkbox (this will display a column called Inactive)
Step 3: Find the specific customer record you wish to deactivate.
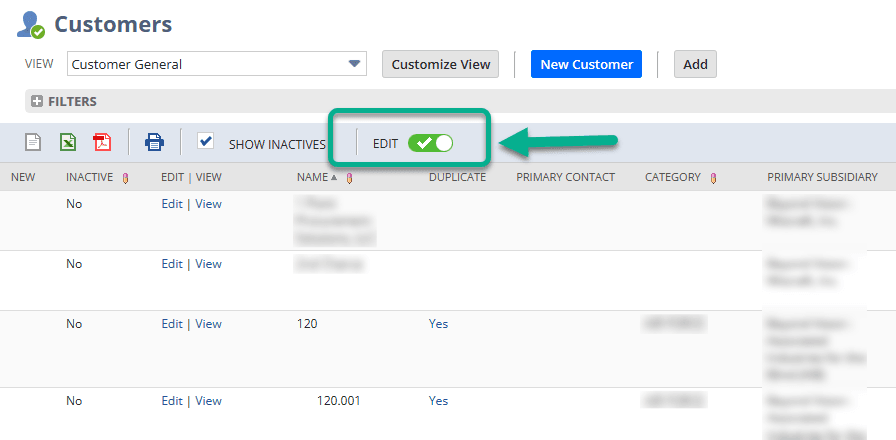
Step 4: Switch the Edit toggle to turn on inline edit mode. (Note: once in edit mode, the Inactive column will display as Yes/No).
Step 5: Click Yes/No for the record you wish to change. This will change the field to display a checkbox.
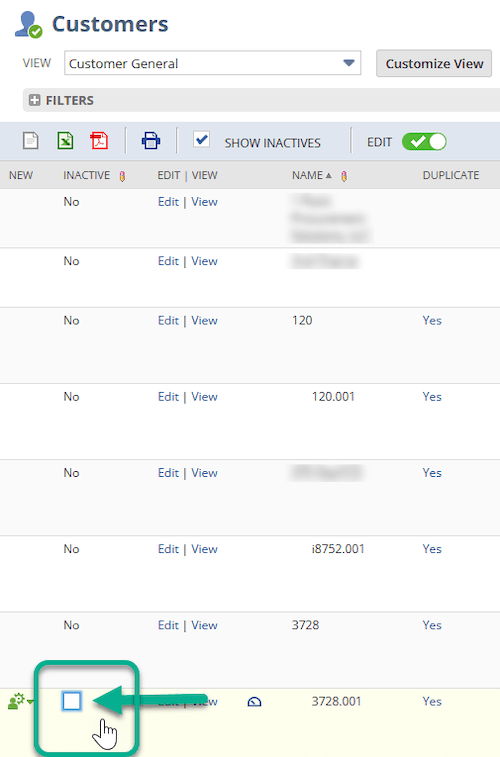
Step 6: Check/uncheck the box. Then click in any blank area on the page. (NetSuite will automatically update the value to Yes/No).
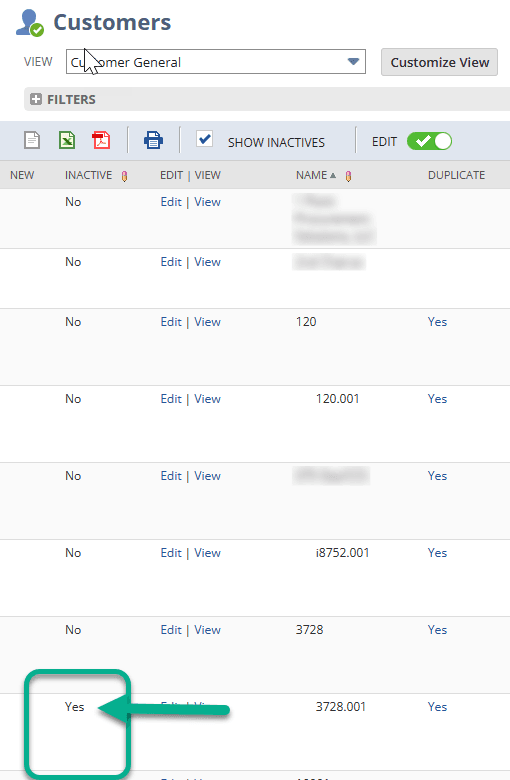
Optional: Once you are done updating what you need, you can turn off edit mode.
Got stuck on a step in this article?
We like to update our blogs and articles to make sure they help resolve any troubleshooting difficulties you are having. Sometimes, there is a related feature to enable or a field to fill out that we miss during the instructions. If this article didn't resolve the issue, please use the chat and let us know so that we can update this article!
Tagged with Training