How to Customize the P&L Tab on Project Records | NetSuite
The best practice is to configure the P&L tab on your project record in NetSuite so that it shows all transactions that can be coded to the project level.
- Date
- November 22, 2025
- Read
- 4 min

This article is relevant if the reader wants to know how to change the configuration of the P&L sublist on NetSuite project records.
Customizing the P&L subtab allows you to change the way that information is displayed as well as which information appears. It is best practice to configure your P&L tab so that all transactions that can be coded to the project level are shown.

Project record’s P&L subtab with Standard Project Profitability configuration
Identify the Default P&L Project Profitability Configuration
First, you must identify the Project Profitability configuration that is used as the P&L default.
Step 1: Navigate to Setup > Accounting > Project Profitability
Step 2: Under the Configurations tab, check the value listed in the P&L Default field - this is the configuration that is populating the P&L tabs on your projects.
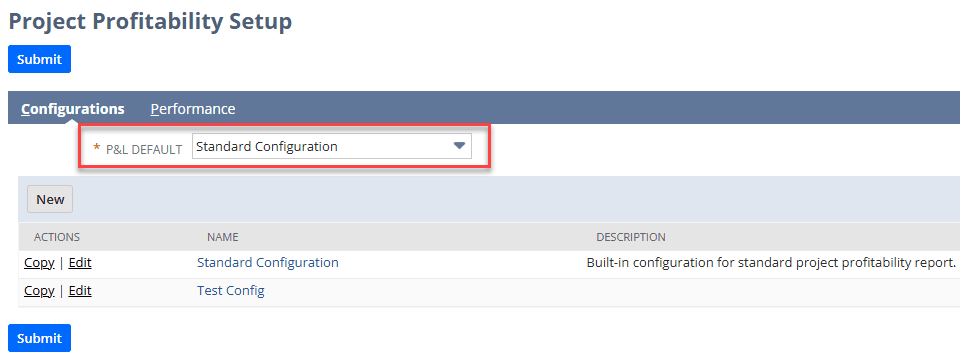
Project Profitability Setup page with the P&L Default field highlighted
Step 3: If you have already created a new configuration for the P&L subtab, select it in the P&L Default field, or you can edit the configuration listed as the default and make your desired changes.
Customizing Your Project Profitability Configuration
When you customize your project profitability configuration, you are guided by a setup assistant that takes you through the process step by step. Here are some notes on what goes into each step.
Step 1: Simply fill out the fields provided to you for basic configuration information.
Step 2: This step allows you to change which items are included in particular rows.
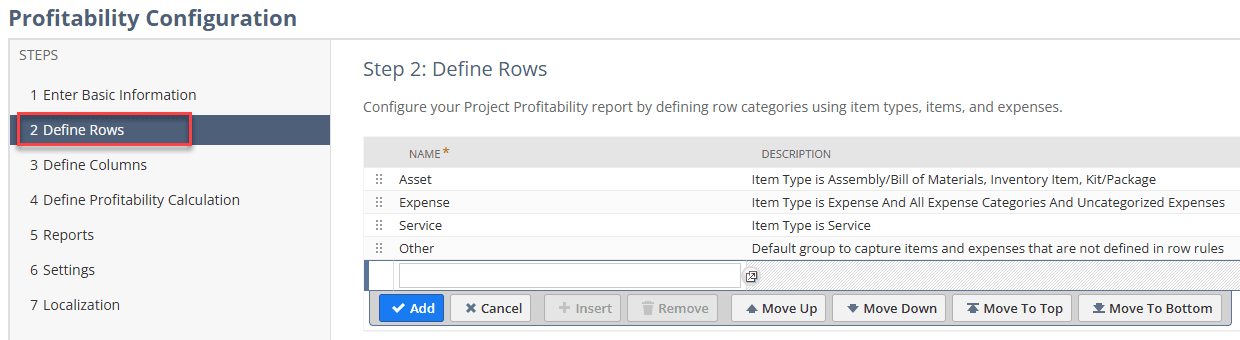
Define Rows section of the Standard Project Profitability configuration
Step 3: You can change the labels of each column and how transactions are segmented into those columns, whether they are Actual, Committed, or Actual + Committed.
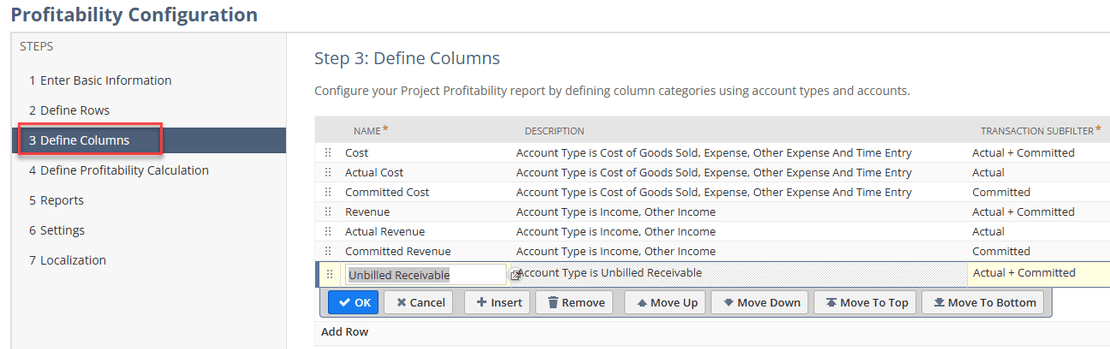
Define Columns section of the Standard Project Profitability configuration
Step 4: Change which column’s values are used for the calculation of Project Profitability. You will need to select both a Cost value and a Revenue value.
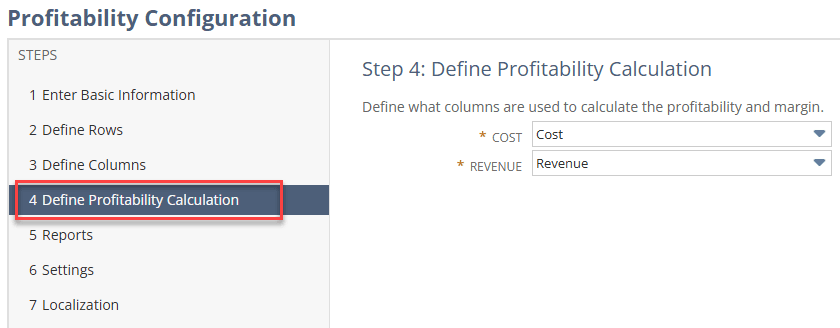
Image shows Define Profitability Calculation section of the Standard Project Profitability configuration
Step 5: Choose which related reports are affected by your modifications. If you need guidance on which reports should be included, contact our team for support!
Step 6: In this step you are provided with a list of additional transactions. Here you can select or deselect additional transactions that you want to be included in the calculation of project profitability.
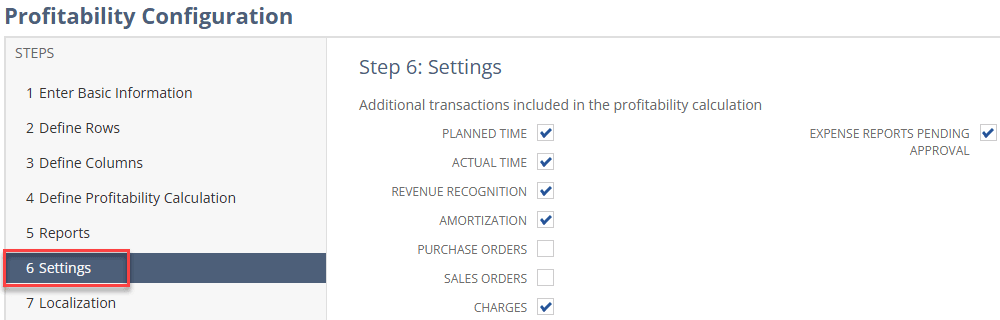
Settings section of the Standard Project Profitability configuration
Step 7: Establish translations for localization, if applicable to your business. If you need help with this process, contact our team for support!
Related Articles
- Sourcing Project Manager Onto the Project Task Record | NetSuite
- Resolved Error: "Resource is not set to be a project resource"
Got stuck on a step in this article?
We like to update our blogs and articles to make sure they help resolve any troubleshooting difficulties you are having. Sometimes, there is a related feature to enable or a field to fill out that we miss during the instructions. If this article didn't resolve the issue, please use the chat and let us know so that we can update this article!
Oracle NetSuite Alliance Partner & Commerce Partner
If you have general questions about NetSuite or more specific questions about how our team can support your business, contact us! Anchor Group is a certified Oracle NetSuite Alliance Partner and Commerce Partner equipped to handle all kinds of NetSuite and SuiteCommerce projects, large or small.
Tagged with Training