How to Create a NetSuite Workflow
Learn how to create a NetSuite Workflow. This example workflow utilizes a saved search condition.
- Date
- April 21, 2026
- Read
- 7 min
This blog gives you step-by-step instructions on how to create a NetSuite workflow. Our example workflow utilizes a Saved Search condition. This workflow assigns a task (due in 5 days) to the sales rep on the corresponding customer record. The assigned task is to follow up with the customer because their Master Service Agreement (MSA) expires in one week.
Our particular workflow demonstration utilizes the custom field feature in NetSuite. For more information on working with custom fields in NetSuite, check out this training article on Creating Custom Fields.
Step 1: Create the Saved Search
1) Log in to your NetSuite Administrator Role and go to Reports > Saved Searches > All Saved Searches > Select New

2) In the New Saved Search list, select "Customer"

3) Type in your desired search title, such as "Customer won status"
4) Under Criteria > Filter > Select "Status" > Select "Customer-Closed Won" > click "Set"
5) Under Criteria > Filter > Select "MSA expiration (Custom)"*> "on" "same day next week" > click "Set"
6) Under Criteria > Filter > Select "MSA Signed (Custom)"* > Select "Yes" > click "Set"
*Note: "MSA expiration" and "MSA signed" are two custom fields created for our customer record. To learn how to setup custom fields in your own NetSuite account, check out this training article on Creating Custom Fields.
At this point, your Saved Search form should look like the image below:

7) Under Results > Select "Sales Rep" > Click "Add"
8) Under Results > Select "Status" > Click "Add"
9) Under Results > Select "MSA Expiration (Custom)" > Click "Add"
10) Under Results > Select "MSA Signed (Custom)" > Click "Add"
At this point, your Saved Search form should look like the image below. The fields you add here will be the columns you see when you view your saved search. So, add the fields you want to see in your saved search results.

11) Click "Save & Run" in the top left corner to test that your saved search is working correctly.

The Saved Search Runs and finds three customers matching our criteria. It should display all the customers that match all the criteria you filtered (i. customer closed-won status, ii. MSA expires one week from today, and iii. MSA is signed). In other words, after you click "Save & Run" it will generate a list of customers with customer-closed won status, MSA expiring in one week, and MSA signed.

If your Saved Search is working properly, you can move on to Step 2.
Step 2: Create the Workflow
1) Go to the Customization tab > Workflow > Workflows > Select "New"

2) In the Name field, type your desired name, such as "Customer follow up"
3) In the ID field, type your desired ID, such as "_customer_follow_up"
Tip: We often prefer to put an underscore in the ID fields manually because NetSuite automatically will put a prefix to the internal ID and this makes it easier for developers to insert and read during their development.
4) For Record Type > Select "Customer" and for subtypes > select "Customer"
5) For the Description type, an optional description of the workflow, such as "This Workflow assigns a task (due in 5 days) to the sales rep to follow up with a customer that has a Master Service Agreement expiring in exactly one week."
6) For now, set the release status to "Testing" and keep instance and history as "only when testing"
7) Check the box for "enable logging"

8) For Initiation, we will select "scheduled" to set the workflow to run automatically every night at midnight.
9) For the Saved Search Filter, select your saved search filter (customer-won status).
10) Check the Repeat box (if not already checked).
11) Set Frequency to "daily"
12) Scheduled from date, select today's date
13) Set Execution time to 12:00 am

14) Click "Save"

At this point, your workflow should look like the image below.
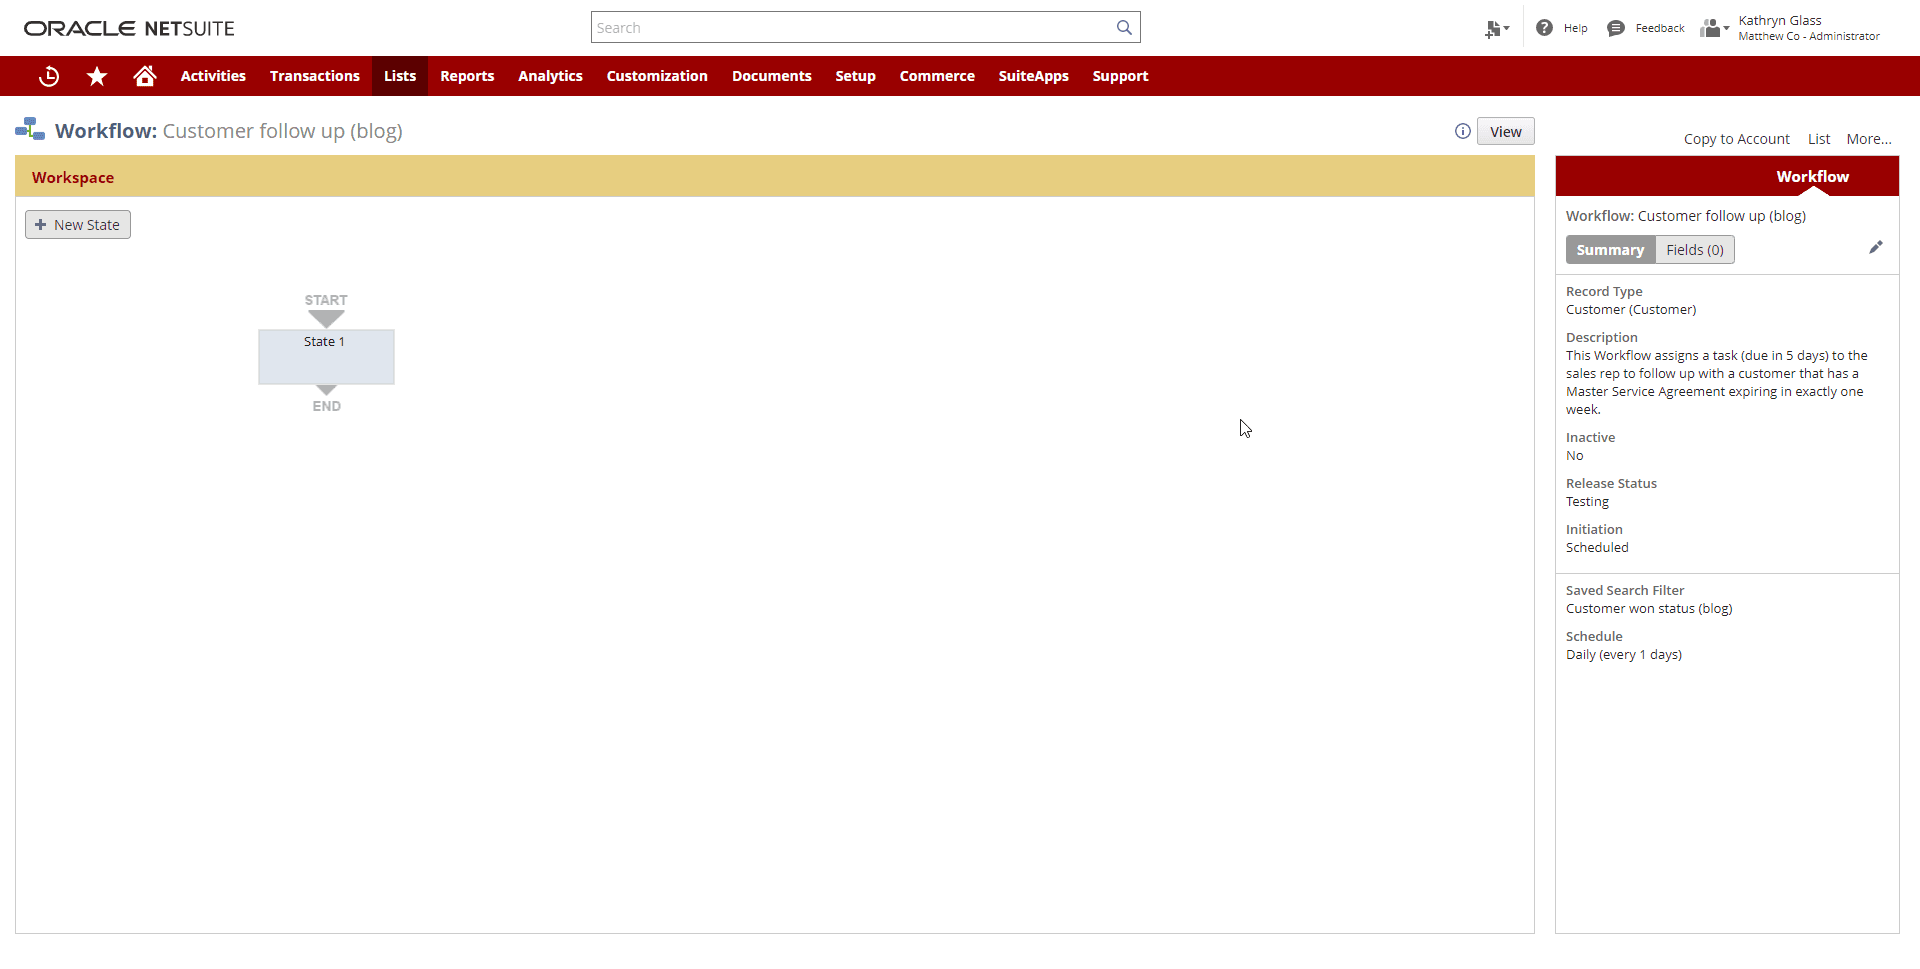
1) Click on the gray box titled "State 1"
2) Click on "+ New Action" in the bottom right corner (pictured below)

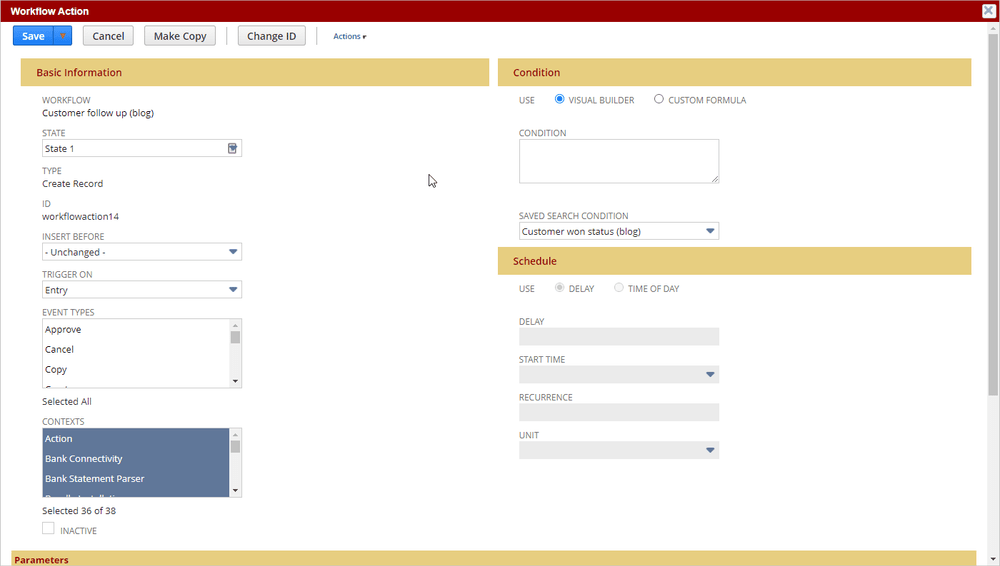
3) Select "Create Record"

4) Under Parameters > Record Type > Select "Task"
5) Under Field > Select Title > In the Text field, type tour task title such as "Follow Up with Customer (MSA Expiring in 7 days) > Click Add
6) Under Field > Select "Due Date" > for the date, select "five days from now" > Click Add
7) Under Field > Select "Assigned" > for Formula type in "{salesrep.id}" > Click Add
8) Under Field > Select "Company" > for selection select "current record"> for join select "company" > Click Add

9) Select your saved search condition, "customer won status"

At this point, your workflow action should look like the image below.


10) Go ahead and click that "Save" button. Now, we are ready to test the workflow.
Step 3: Test the Workflow
1) In the Workflow Edit mode, click the pencil icon (indicated in the picture below)

2) Click "Execute Now" to test run your Workflow

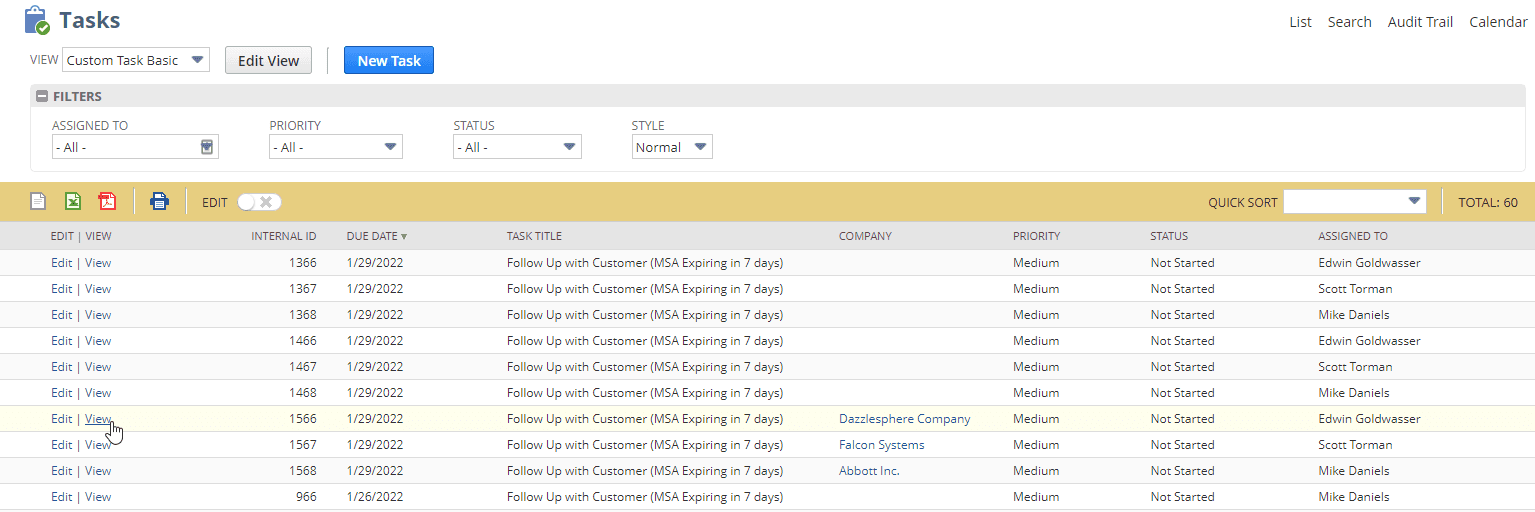
3) Go to the Activities tab > Scheduling > Select Tasks

4) Here, you can see if the workflow assigned a task when we clicked "Execute Now". Click View on the task.
5) In the Task record, click the "Related Records" subtab to see the company the sales rep needs to follow up with.

6) In the Task record, click on the "System Information" subtab to view the system notes. Here, you should see that your workflow created the task.

Conclusion
That's it for our NetSuite Workflow tutorial. We hope you found this helpful and can now use workflows to manage your business processes. If you have any questions or feedback, please get in touch with us at Anchor Group. Thanks for reading.
Related Articles
Check out these articles to learn more about NetSuite workflows.
- Customer Record Approval NetSuite Workflow
- Adding "Save and..." to a Custom Workflow Button in NetSuite
- NetSuite Workflow "Execute now" Doesn't Run On All Records
- Resolved: Customer Workflow in NetSuite Does Not Trigger
- Using the "Old Record" Condition in a NetSuite Workflow
- NetSuite for Wholesale Distribution
- SuiteFlow | NetSuite Workflow Automation & Custom Workflows
Request a free book on SuiteCommerce

Request a free copy of our SuiteCommerce book, and we will ship you a paperback version.
Tagged with Training