SuiteCommerce Facet Fields Setup | NetSuite Tutorial
Here you will select all of the fields you previously added in website Setup. Notice that you are referencing the field ID, not the name. You have to put the exact field ID in for it to work, so if you're running into problems that's the first thing to check as you troubleshoot.
- Date
- December 23, 2025
- Read
- 9 min
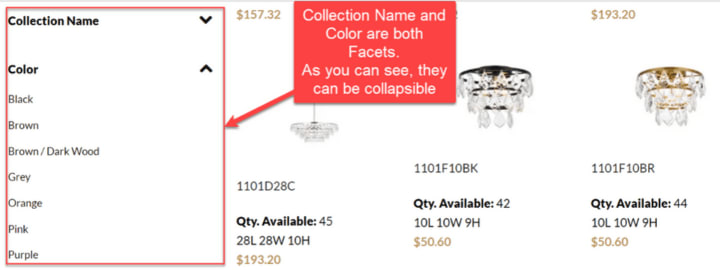
Purpose: add filter options that will display on the PLP in the webstore and allow users to refine their search results.
Create Item Fields
If the item fields that you want to use as facets don't already exist, you will need to begin by creating these.
NetSuite Tutorial | Creating a Custom Item Field
Navigate to Customization > Lists, Records, & Fields > Item Fields > New, and begin by filling in the necessary fields:

- Label: The name of the field that will be displayed on the Item Record and in the Custom Item Fields List.
- Type: In this case, you will want to choose multiple select, and you will notice that this will unlock the List/Record Option.
- List/Record: Choose the list you would like to use. If you want to leverage a custom list and you haven't created it yet, you will need to navigate to Customization > Lists, Records, & Fields > Lists > New and create the custom list first.
Best Practice: Be sure to add a description so other people working with your custom fields can know what this one is intended for. Then copy your description, navigate to the Display subtab, and paste the description into the "Help" text area to make it available as a quick reference for anyone using the field on a form.
Next, use the other options provided in the subtabs to add additional rules and parameters around the item field according to your preferences/needs, and then click "Save".
Add Fields as Facets in Website Setup
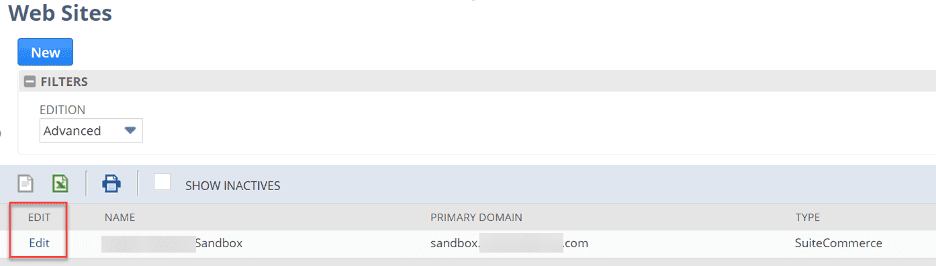
Step 1: First, you will need to navigate to your website list by going to Commerce > Websites > Website List.

Step 2: Click the Edit option on your SuiteCommerce site.
Step 3: Now that you have the website setup record open, go to the Search Index tab and click on the Facet Fields sub-tab.
Step 4: From the Facet Field Name dropdown, select the fields that you would like to use as facets and click Add.
Note: If you want to delete a Facet Field from the list, you can select the field and click Remove.

Step 5: Once you have finalized the Facet Fields, remember to Save the website setup record.
Configure Facets in Website Configuration
Step 1: Navigate to your website configuration by going to Commerce > Websites > Configuration.

Step 2: Select the site you want to configure from the Select Website list. Select the specific domain that you want to configure from the Select Domain list.
Click Configure.

Step 3: On the SuiteCommerce Configuration record page, click the Shopping Catalog tab. Click the Facets subtab and configure your facet options as required.

Step 4: Add the same fields you added in the website Setup. Notice that you are referencing the field ID, not the name. You have to put the field ID in exactly for it to work.
- The Name field is what you want to display on the PLP above the facet options. If you don’t click “Show Heading”, this will not display.
- The Brand Name one above should be able to serve as a template for most of your facets – choose the same options as we did here. You can also look at the reference documentation below for more information on facet properties.
Step 5: Click Save on the Configuration record to save your changes.
Reference Documentation: Facet Properties
Each facet contains the following properties:
1. Item Field ID (string)
Specifies the internal identifier of the facet being customized. The value must match the URL Component of the associated facet field as set up in NetSuite. If not specified in the object, the default is the facet field’s URL Component. If the URL Component is not set up in NetSuite, the default is the facet field’s Field ID.
2. Name (string)
Specifies the display name for the facet as it appears in the browser. If not specified, the default equals the value of the id property.
Related Article: Facet Displaying as Field ID Name | SuiteCommerce
3. URL (string)
Specifies the URL fragment that identifies the facet in the URL. If no value is defined, SuiteCommerce web stores use the NetSuite list record ID. This property only applies to the pre-Vinson release of SCA.
4. Priority (string)
Sets the display order for the list of facet choices. Facets display in descending order of the priority value (the largest priority value displays on top, followed by smaller values). The priority value must be between 1 and 10. Default value is 5.
5. Behavior (string)
Sets the type of facet editor as it appears in the browser. If not specified, the default is single. Possible values are:
- Single (string) – displays a list from which users select a single choice.
- Multi (string) – displays a list from which users select multiple choices.
- Range (string) – displays a double slider from which users select a start and end value.
6. Template (string)
Specifies the template that defines the HTML source code for the facet. If not specified, the default is facets_faceted_navigation_item_tpl.
- facets_faceted_navigation_item_color_tpl (string) – defines the template for a color facet.
- facets_faceted_navigation_item_range_tpl (string) – defines the template for a ranged facet.
- facets_faceted_navigation_item_tpl (string) – defines the template for any other facet.
7. Color Palette (string)
Sets the HTML color values displayed for the facet.
Related Article: Creating Color Palette Facets for SuiteCommerce
8. Collapsed (boolean)
Sets the default state of the facet. If selected, the facet renders in a collapsed state.
9. Non Collapsible (boolean)
Specifies if the facet is collapsible and expandable. If set to Yes, the user can collapse or expand the facet by clicking an up/down arrow icon. If set to No, the facet cannot be collapsed or expanded.
10. Show Heading (boolean)
Specifies if the facet heading displays in the browser. If set to Yes (checked/enabled), a heading matching the value set in the name property displays. If set to No (unchecked/disabled) or if left blank, the facet values display without a heading.
11. Title Format (string)
Specifies the format for the facet title displayed when the facet is selected. This can be a string such as from $(0) to $(1) for a range behavior or $(0) bar for others. Also, it can be a function that accepts the facet object as a parameter.
12. Title Separator (string)
Specifies a string used to separate facets in the page title. If not specified, the default is , (comma space).
13. Parser (string)
Includes the user’s currency symbol ($, £, etc.) in the price range. If this value is not set, SuiteCommerce web stores do not display a currency symbol.
14. Is URL Parameter? (boolean)
Specifies if the facet is treated as a parameter or as part of the URL path. If Facets as URL Parameters is checked for all facets, any individual facet with Is URL Parameter? set to false (unchecked) acts as part of the URL path. Likewise, if Facets as URL Parameters is unchecked, any individual facet with Is URL Parameter? set to true (checked) acts as a parameter. This property is available in SuiteCommerce and on the Elbrus release of SCA and later.
Learn More: URL Components for Facets Setup | SuiteCommerce Tutorial
15. Max (number)
Specifies the limit of options available for a facet. After this options limit is reached, a see more link appears. This applies to mulit behavior. This is particularly useful for facets with a large amount of options to render. This property is available in SuiteCommerce and on the Elbrus release of SCA and later.
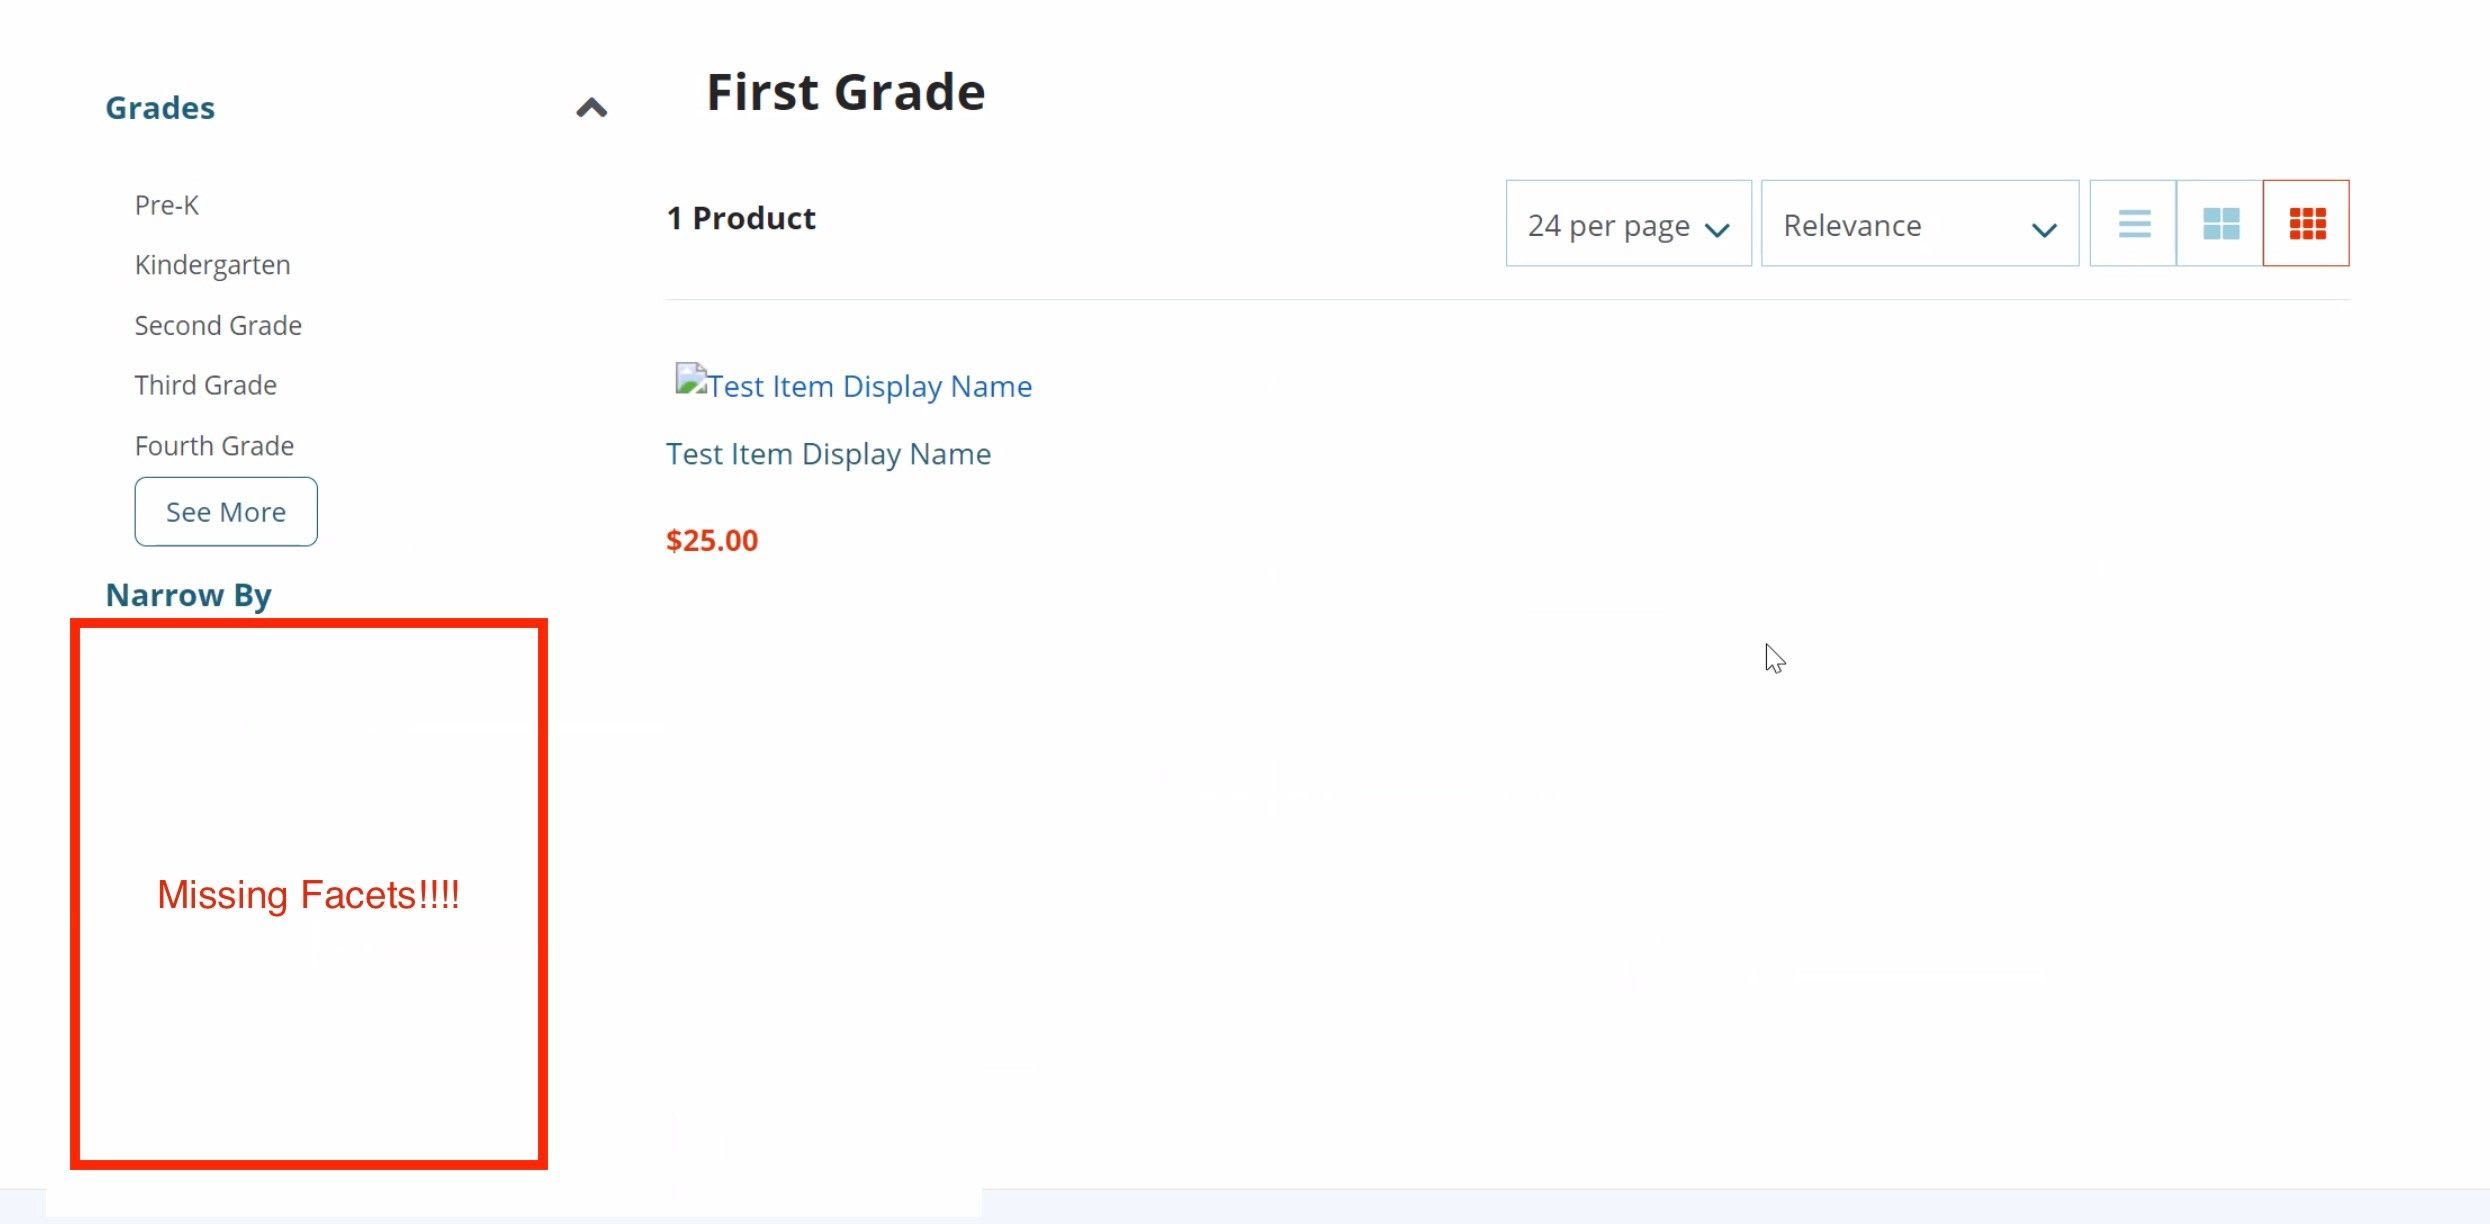
Facets Not showing up after initial setup
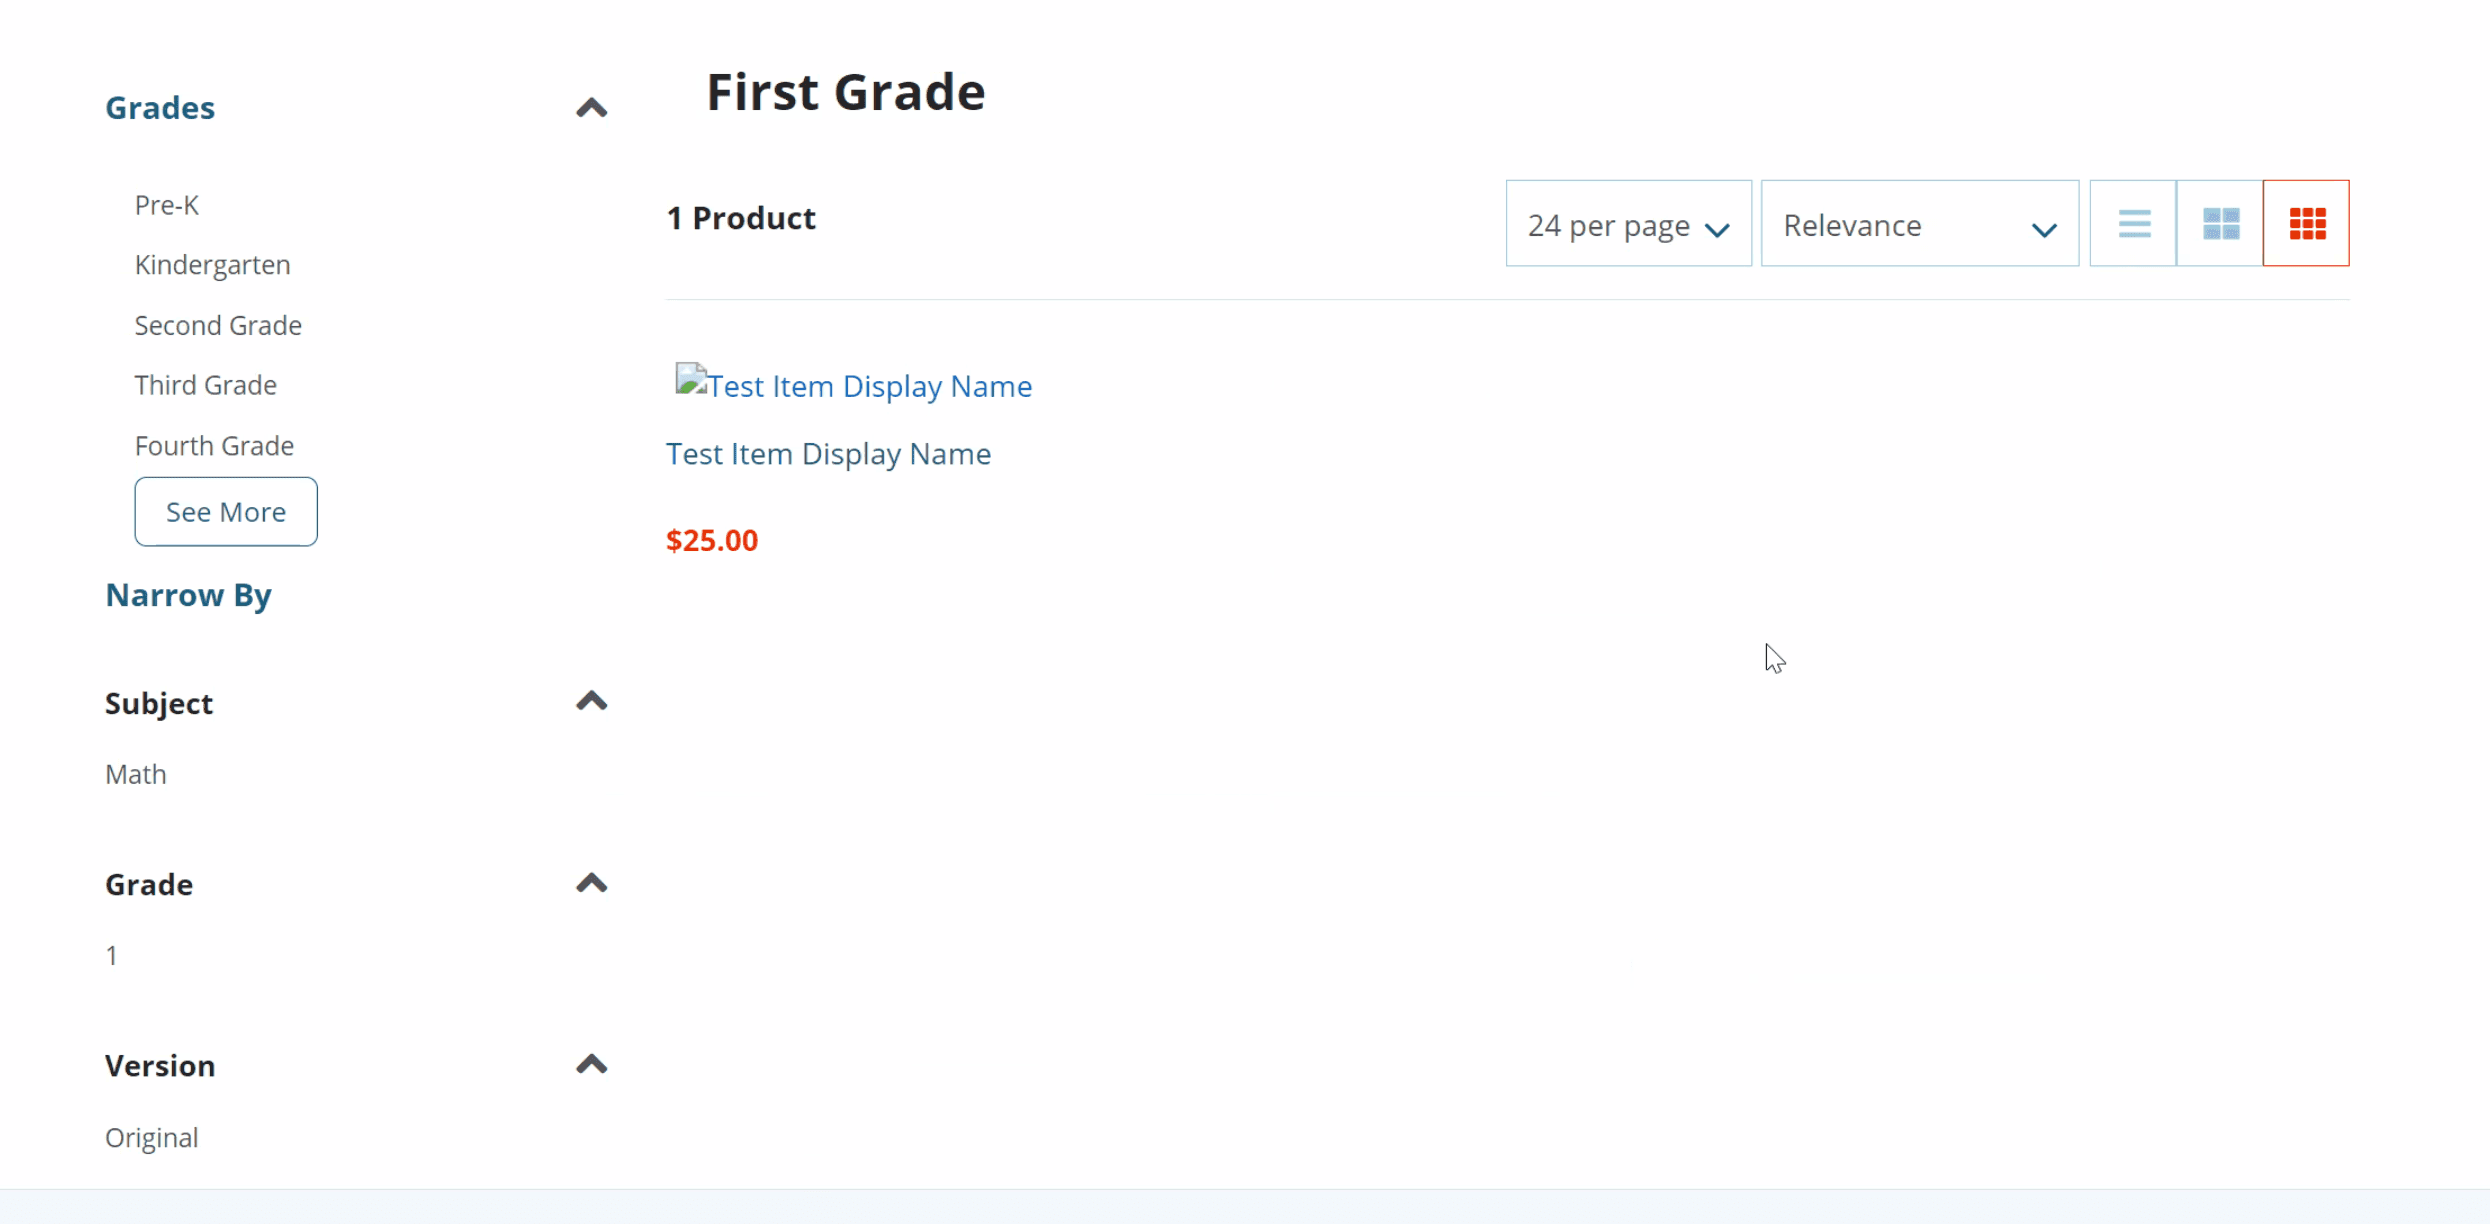
Sometimes, if you set your facets according to the suite answers pages, you may not be able to see them. See the below image for an example:
If you cannot see your facets, then, in the website setup, go to Commerce > Websites > Configuration record, then click 'edit' on the website
Shown below is the location of the behavior values inside the facets tab.
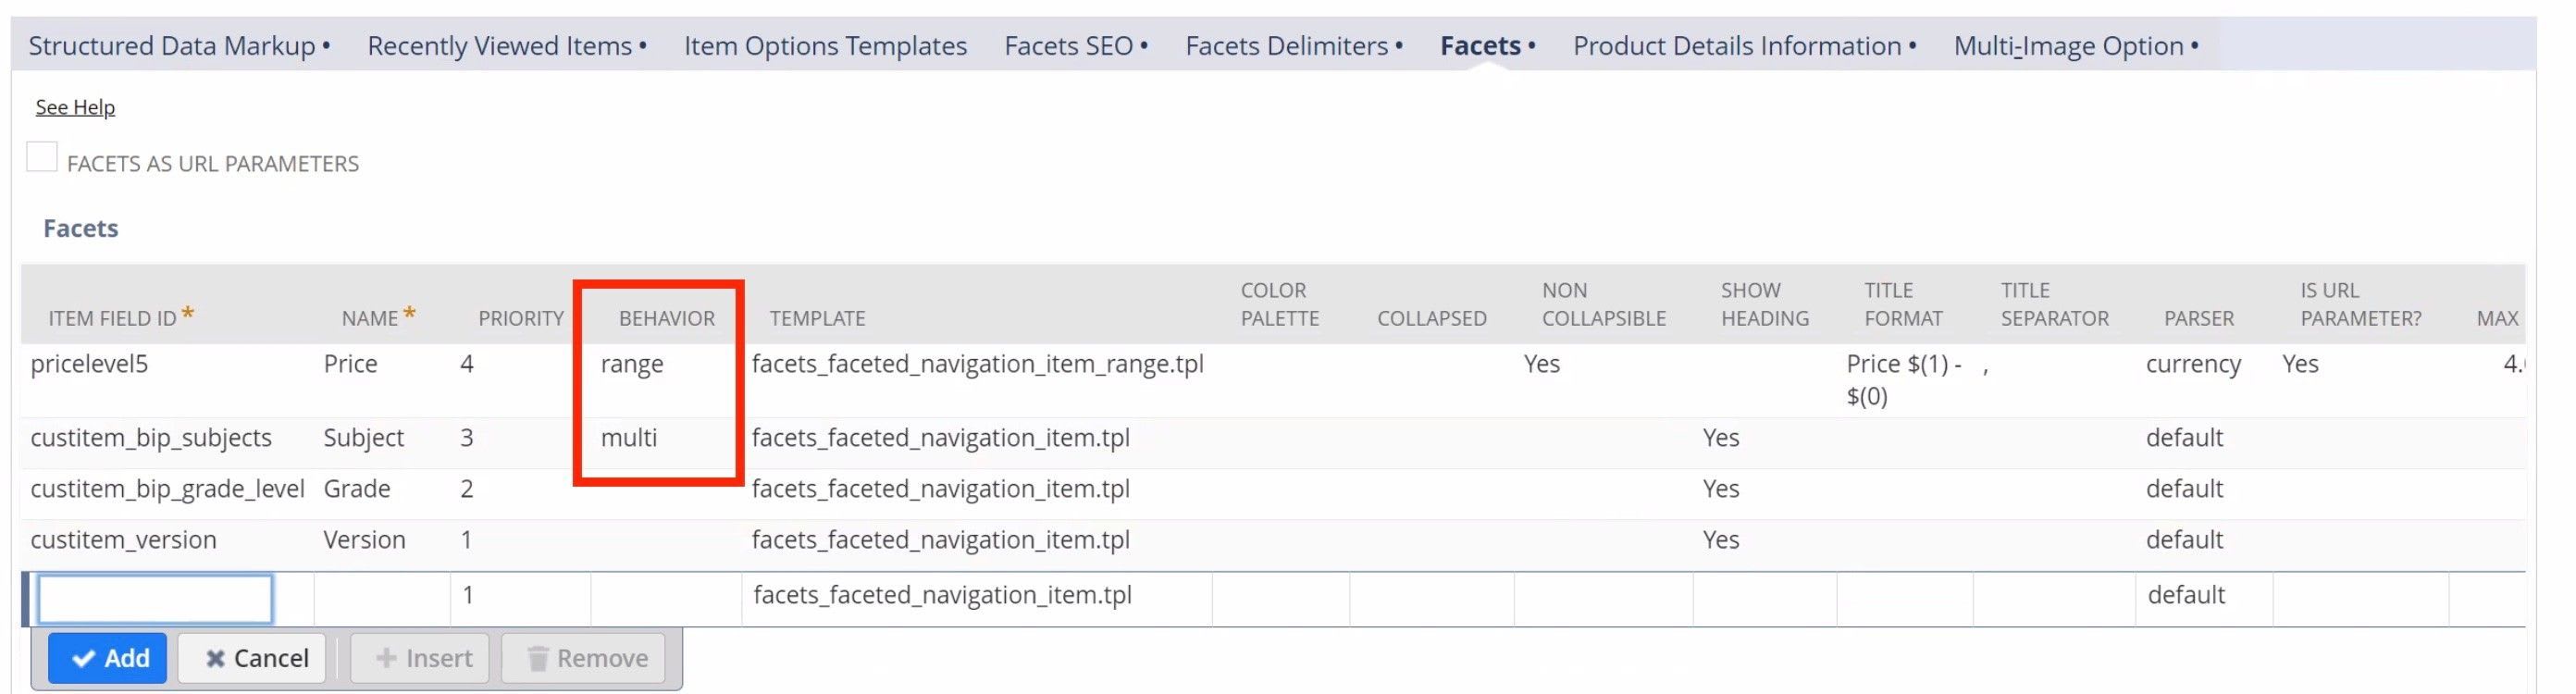
The prices are ok to be set at range, but because the subject is set to multi, none of the facets show up.

By changing the selection to -null- for the other facets, they should then become visible to you. See the below image with the facets now being displayed:
Hopefully, this post helped you set up your SuiteCommerce website and become more useful to customers.
Get stuck in a step during this article?
We like to update our blogs and articles to make sure they help resolve any troubleshooting difficulties you are having. Sometimes, there is a related feature to enable or field to fill out that we miss during the instructions. If this article didn't resolve the issue, please use the chat and let us know so that we can update it.
Oracle NetSuite Alliance Partner & Commerce Partner
If you have general questions about SuiteCommerce or more specific questions about how our team can support your business as you implement NetSuite or SuiteCommerce, feel free to contact us anytime. Anchor Group is a certified Oracle NetSuite Alliance Partner and Commerce Partner equipped to handle all kinds of NetSuite and SuiteCommerce projects. We offer services across the United States and beyond, so whether you are located in Huntington, West Virginia, Burlington, Vermont, or somewhere in between, we've got you covered.
We are a premium SuiteCommerce agency that creates powerful customer portals. Unlike our competitors, we have already solved your problems.
FREE SuiteCommerce Book for Continued Learning
Want a free paperback copy of this NetSuite e-commerce book? We even pay for shipping... Order the free SuiteCommerce book today.

Tagged with Training