Onboarding Vendors | NetSuite Advanced Entity Portals
Discover how you can onboard vendors using the Advanced Entity Portal solution for NetSuite. Plus, get a preview of the vendor portal functionality!
- Date
- December 19, 2025
- Read
- 8 min
Vendor Onboarding | Demo | Advanced Entity Portals for NetSuite
Discover how to onboard vendors using the Advanced Entity Portals solution for NetSuite. Plus, get a preview of the vendor portal functionality!
To begin, create a new Vendor Record in NetSuite.
Levels of Approval
If you have the Advanced Entity Portals solution for NetSuite, you will see a Vendor Management tab on your vendor record. Navigate to that tab and locate the Assessment section.

Advanced Vendor Portal allows you to set up different levels of approval and assign different employees as different types of approvers that you might need when onboarding a vendor. You can assign a different person as the Compliance Approver, Finance Approver, Operational Approver, Legal Approver.
You can also assign the vendor a Relationship Manager, who will be the employee handling the entirety of your relationship with this vendor.
Giving Vendors access to the portal New Vendor Welcome Email
The process for giving a vendor access to the Advanced Entity Portals is similar to giving someone access to NetSuite. On the vendor record in NetSuite, navigate to the Vendor Management tab and locate the Assessment section.
Check the Vendor Portal External Access checkbox and assign them an initial Vendor Portal Password. The password will be hashed so that nobody can view it. Once the vendor logs in, they can change their password.

When you give a vendor access to the portal, you can check the Welcome Email checkbox to email them their access credentials using a template of your choice.
Risk Assessment Details
Still, on the Vendor Management tab, scroll down to the Risk Assessment Details subtab. You can set up other aspects of this onboarding, such as the Assessment Type, Security, Processing Integrity, Confidentiality, select what Compliance Documents you want this vendor to upload, etc.

You can also select a Questionnaire Template and check Send Questionnaire. Then, when you save the vendor record, the questionnaire will be sent out to the vendor in an email, in addition to the welcome email providing the vendor with their credentials to log in to the Portal!
Don't know how to set up a Questionnaire? Check out our article on Creating Vendor Onboarding Questionnaires in NetSuite!
New Vendor Portal View
When the vendor receives your welcome email, they can open up the login screen for the portal. The login screen is fully customizable to match your branding.
After the Vendor logs in with the credentials you provided, they will be taken to the Vendor Onboarding screen. This onboarding screen is one of the two tabs that a new vendor will see in the restricted view of the Vendor Portal. The only other page a new vendor can view in the portal before being onboarded is the Upload Documents screen. We will look at both.
Vendor Onboarding Screen

This questionnaire is the template you selected to send out to the vendor. The different questions are listed front and center. The vendor can scroll through and complete the questions, as well as upload the files you decided to request from them.
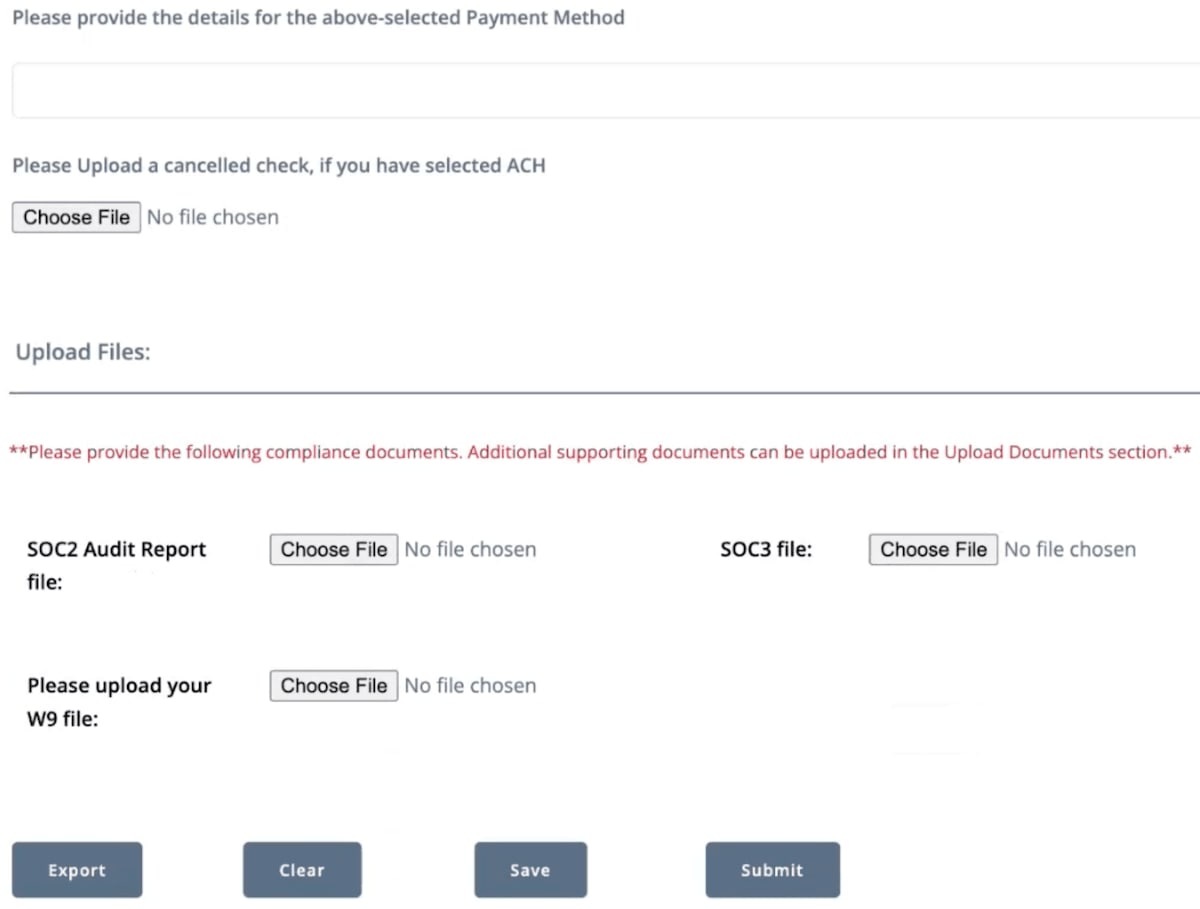
The vendor can Export the questionnaire, Clear their answers, and start over, or answer the questions partially and Save their progress without submitting the questionnaire. Once they've completed it, they can click on Submit.
Once they click on submit, the responses are recorded within NetSuite, and depending on what you've chosen, whether it is auto-approval or manual approval, it either gets automatically approved, or a member of your team can go in, manually look at the answers, and then choose to approve them as a vendor or not.
Document Upload Tab
Your vendors can upload documents; they can drag and drop any additional documents you require, and this plugs into a document collaboration platform, so it doesn't take up space in your file cabinet. It goes into Amazon AWS but is surfaced within NetSuite.
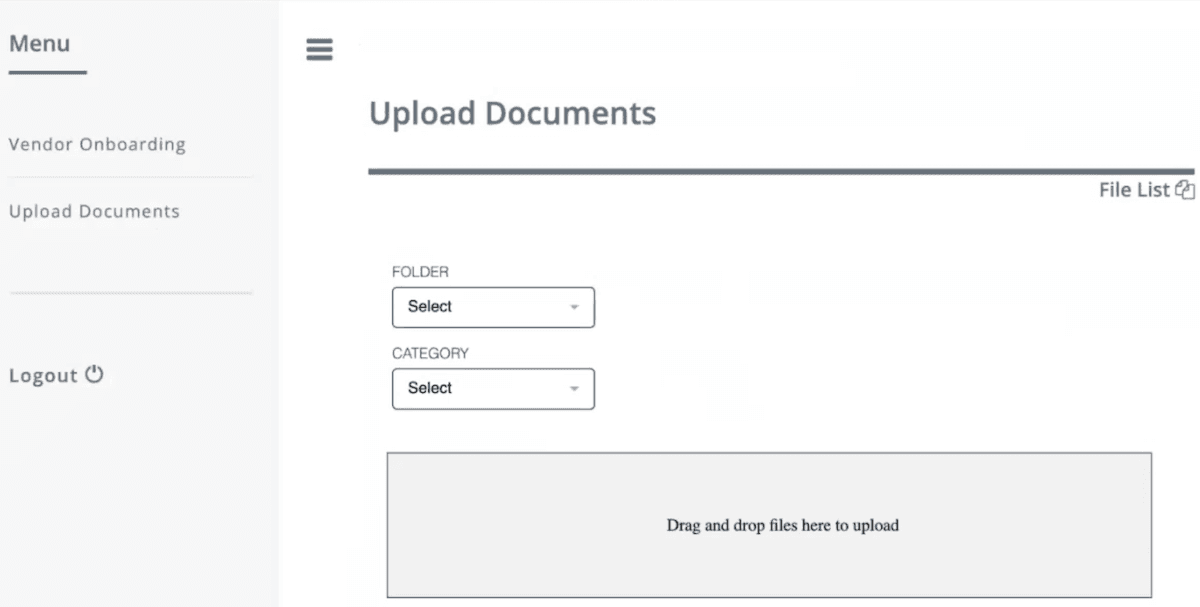
Vendors can also use the Files List button in the upper-right-hand corner of the screen to view files you have surfaced for that vendor.

You can use this functionality to share information with your vendors, such as FAQs, company policies, or a best practices guide for answering questions.
Onboarded Vendor View
As mentioned above, vendors in the onboarding process have a limited view of the vendor portal, with just two tabs: one with the questionnaire and one with the compliance documents. However, once a vendor is onboarded, they see a more detailed view in the vendor portal.
Note: Keep in mind that the portal is fully customizable. If any of the informaiton in the example below is irrelevent, those tabs or sections can be removed. Similarly if there is additional information that you would like to display to your vendors in the portal, more tabs or sections can be added as needed.
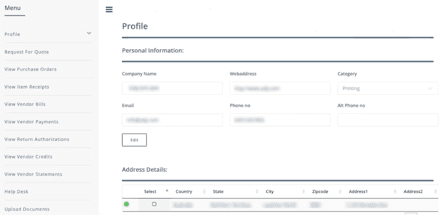
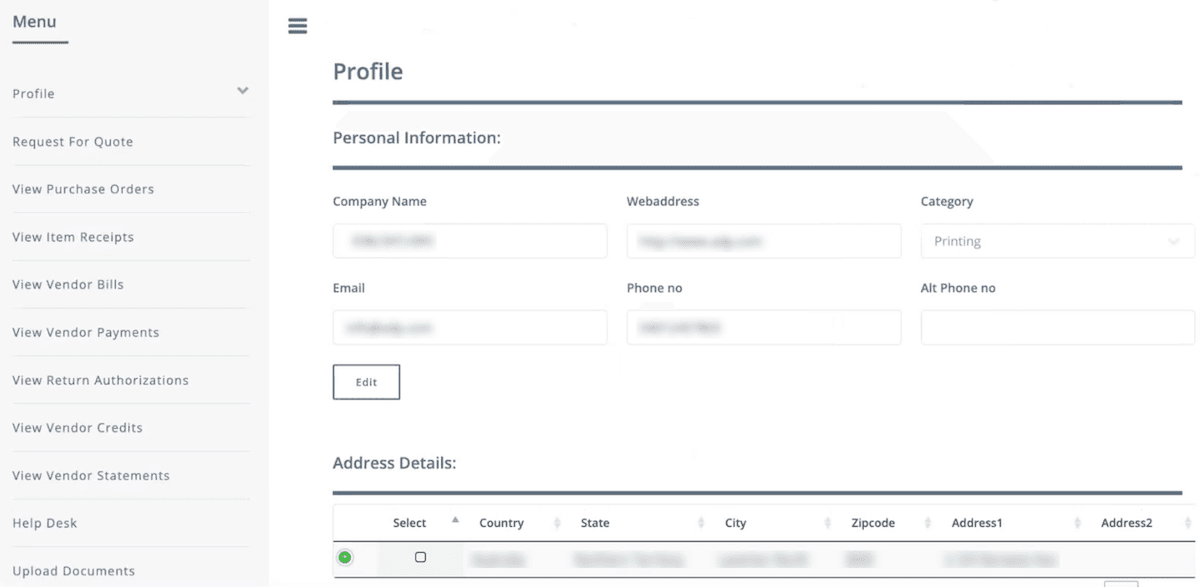
Profile Tab
A vendor who's been onboarded sees all the information you have associated with them on their Profile view, including their address details and the contacts within the vendor.
The vendor can edit these details, but the edits require approval from your company. This helps you keep vendor data clean and ensures your company is aware of any recent changes.
If you ever have to off-board a vendor, they will no longer have access to the portal.
"View" Tabs
Various tabs in the Vendor Portal allow your onboarded vendors to view detailed information on various NetSuite records. Vendors can view purchase orders, item receipts, vendor bills, vendor payments, return authorizations, vendor credits, and vendor statements.
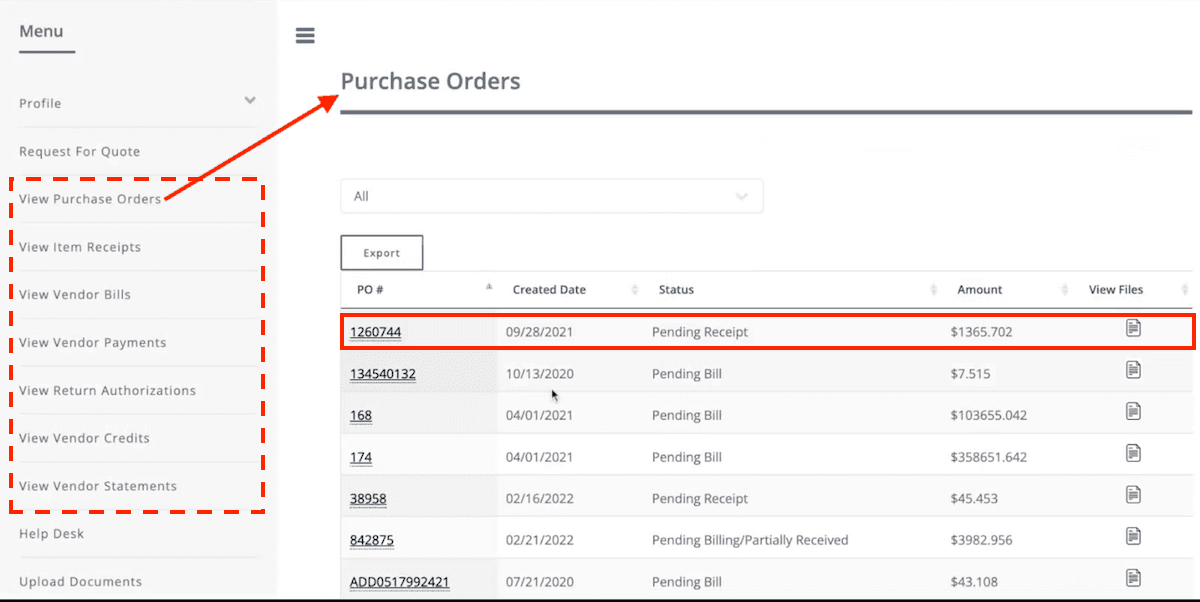
From each of these tabs, they can click to view the details of individual purchase orders, item receipts, vendor bills, etc. respectively. They can also filter and export the results on each view page.
Help Desk
A help desk feature also allows vendors to raise support cases within NetSuite and track the progress of these issues.
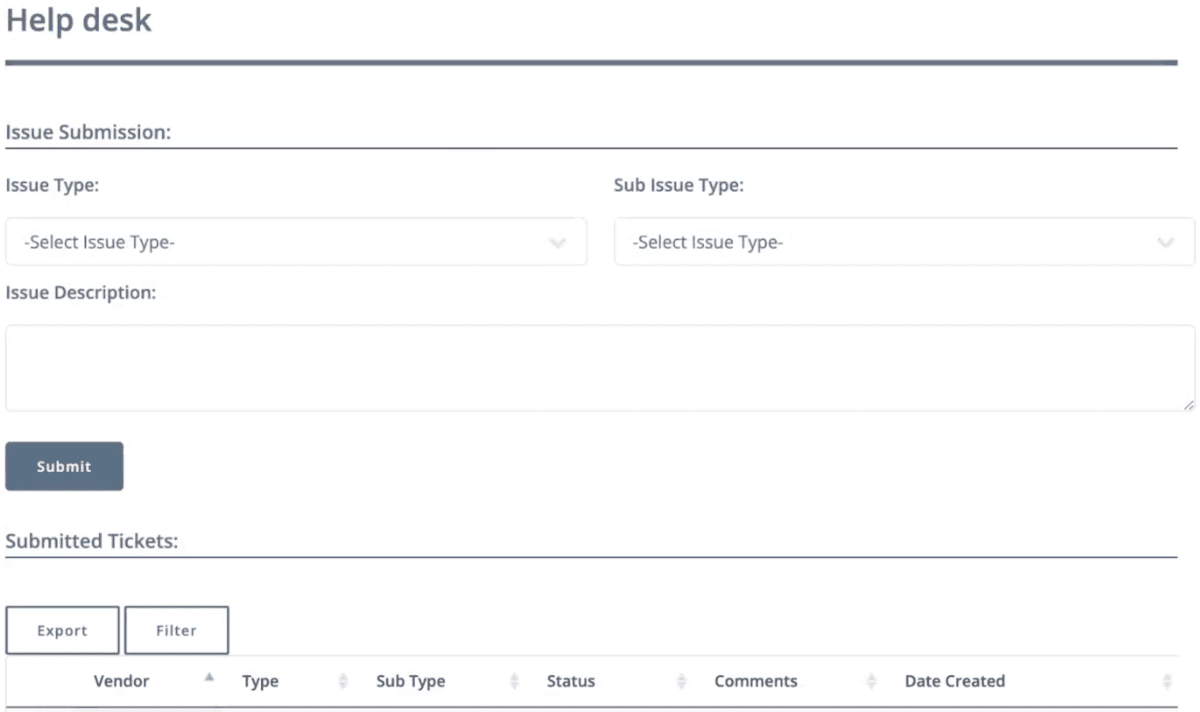
This includes the option for a live chat if you would like to make one of your employees available to respond in real time.
Other Vendor Portal Actions
Some other things that vendors can do through the portal are submit a request for quote or upload bills. Keep in mind that the portal is fully customizable. If any of the information in this example is irrelevant, those tabs or sections can be removed. Similarly, if there is additional information that you would like to display to your vendors in the portal, more tabs or sections can be added as needed.
Don't have Advanced Entity Portals?
The functionality outlined in this article is made available through the Advanced Entity Portals solution for NetSuite. Interested in learning more about the portal, including the Employee Portal and Customer Portal functionality? Check it out!

About Advanced Entity Portals for NetSuite
Oracle NetSuite Alliance Partner
Hopefully, this post gives you something to work with while trying to understand NetSuite and what it can do for your business. If you have any questions about this solution or NetSuite in general, feel free to contact our team at Anchor Group! As a Certified Oracle NetSuite Alliance Partner, we're equipped and ready to help with any NetSuite project or question you might have!
![]()