NetSuite Advanced PDF | Intro to WYSIWYG Mode
Discover the power of editing Advanced PDF/HTML Templates using the WYSIWYG mode!
- Date
- August 13, 2025
- Read
- 8 min

NetSuite Tutorial | Advanced PDF/HTML Templates: WYSIWYG Mode
In this blog, we will discover the power of editing Advanced PDF/HTML Templates using the WYSIWYG mode, otherwise known as the What You See Is What You Get mode, as well as how to print and view templates.
Setup in WYSIWYG Mode
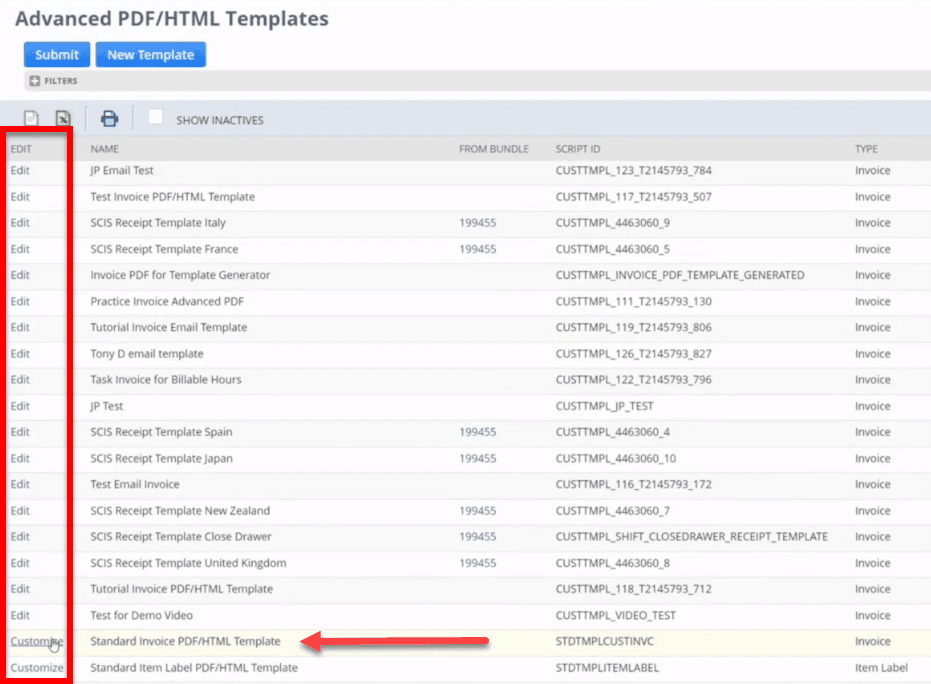
To start, we will create and set up a template. If you are creating a new template, click Customize in the Edit column on the far left side of the template's row. In this example, we will create an invoice template.
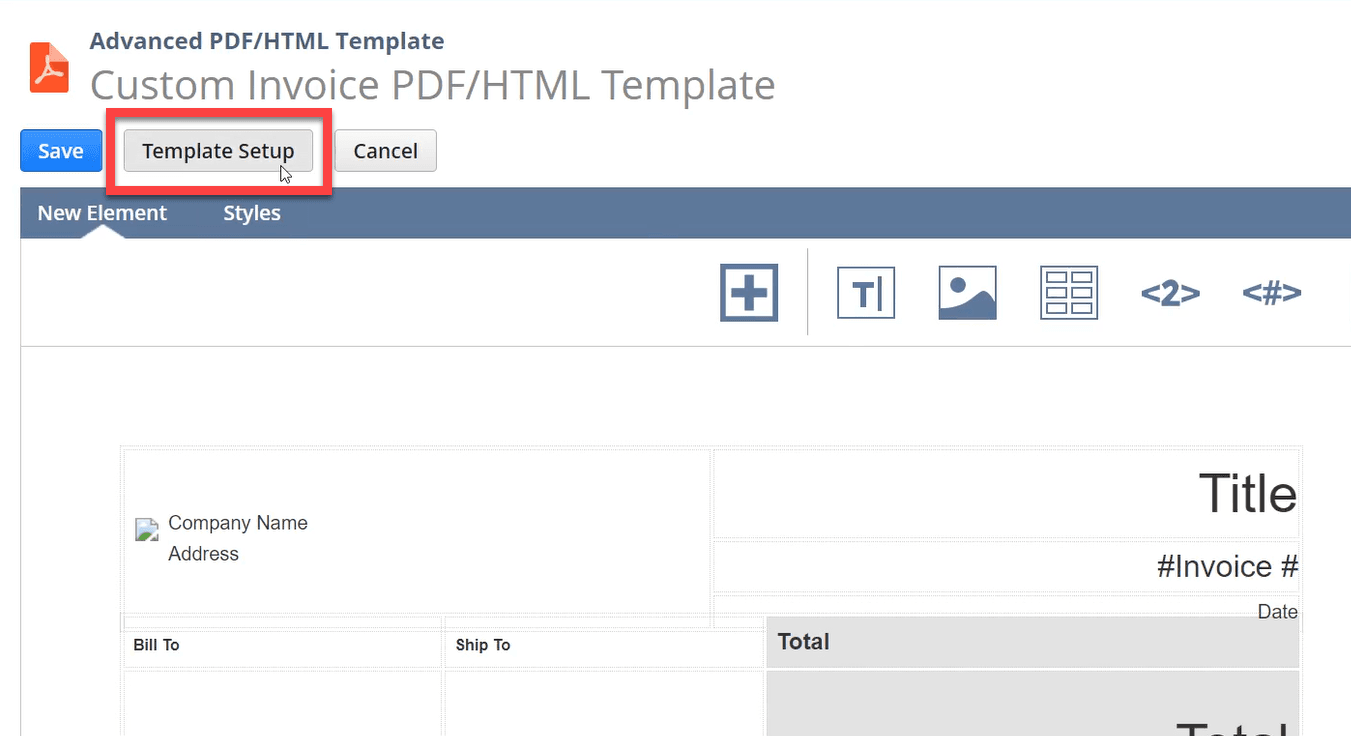
Once the template is open, navigate to and click the Template Setup button.
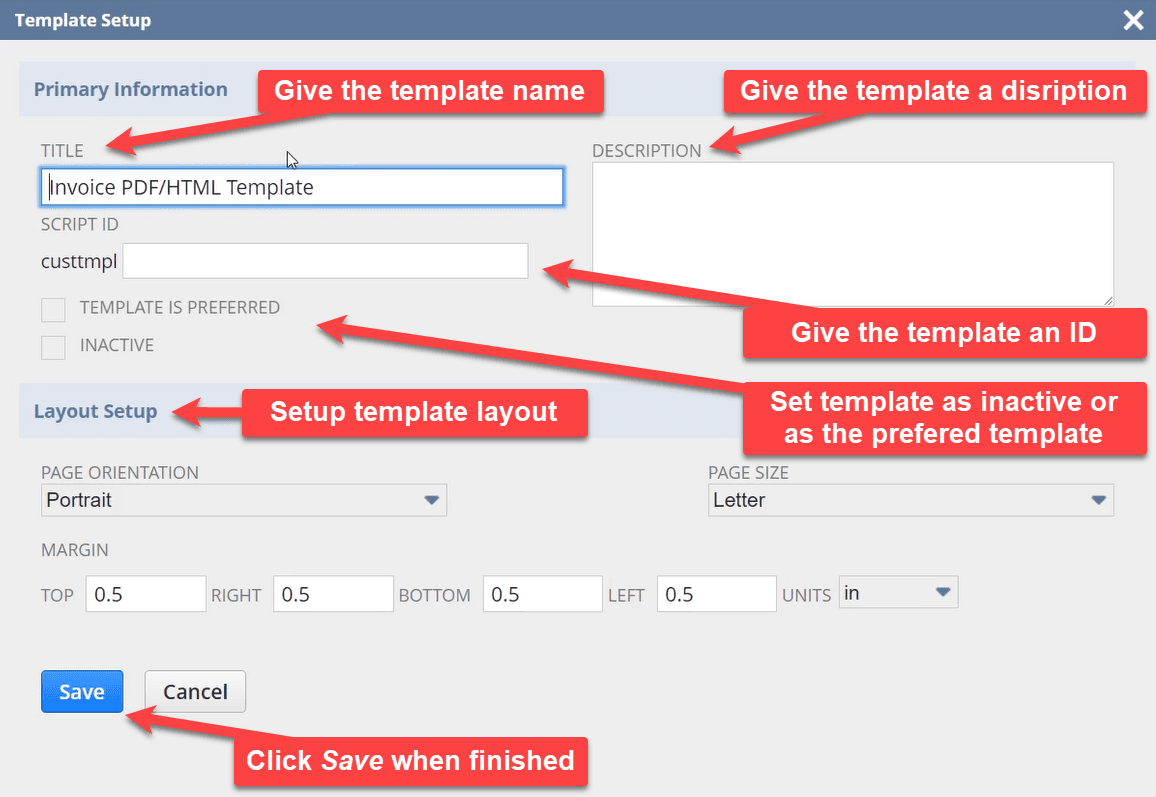
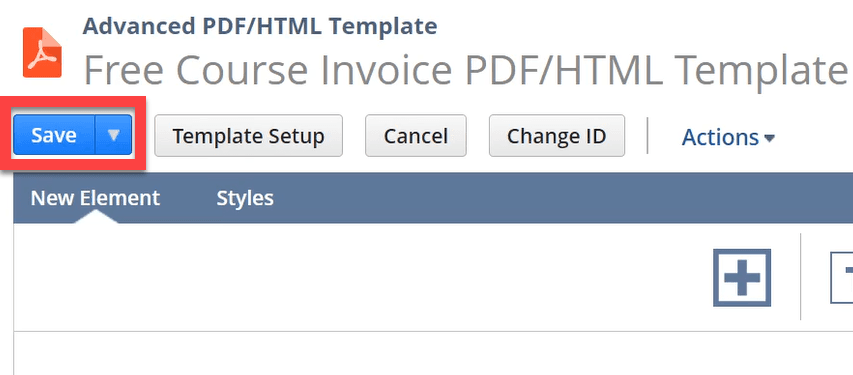
A pop-up will appear with options for setting up the template. Give the template a name, description, ID, and set it as preferred or inactive. You can also change the page orientation, size and margins. Once you have made your changes, click Save.
You will now be brought back to the template list window. Go find the invoice you just made. Once you found your template, click Edit in the Edit column on the far left side of the template's row.
Printing Your Template
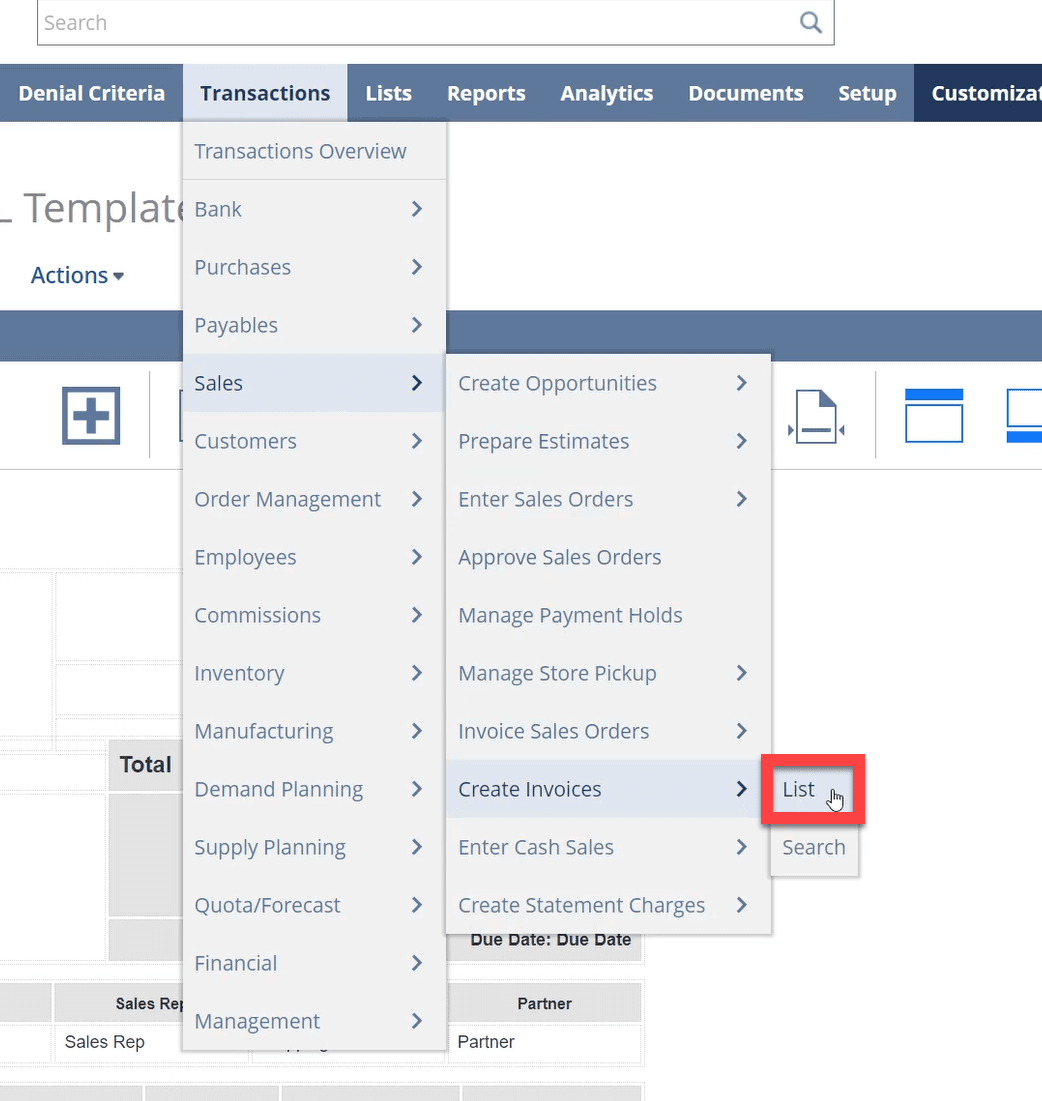
Before editing the template, you want to see what the template currently looks like. To do that, we are going to print the template using an Invoice Record. For this, go to Transactions > Sales > Create Invoices > List.
Next, find or create an invoice you want to test with. Once the invoice record is open, navigate to the right-hand corner and hover over the word Customize and then click Customize Form in the drop down.
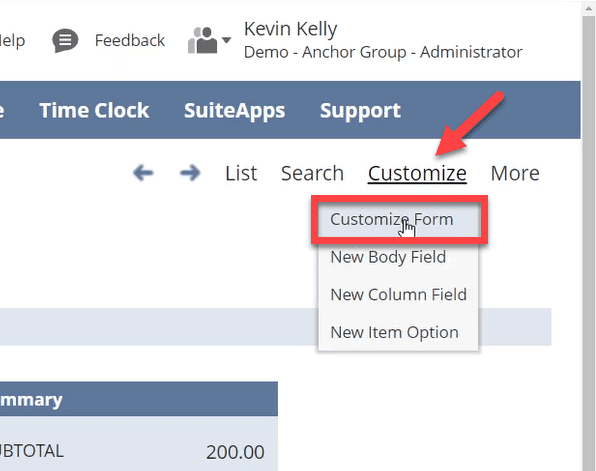
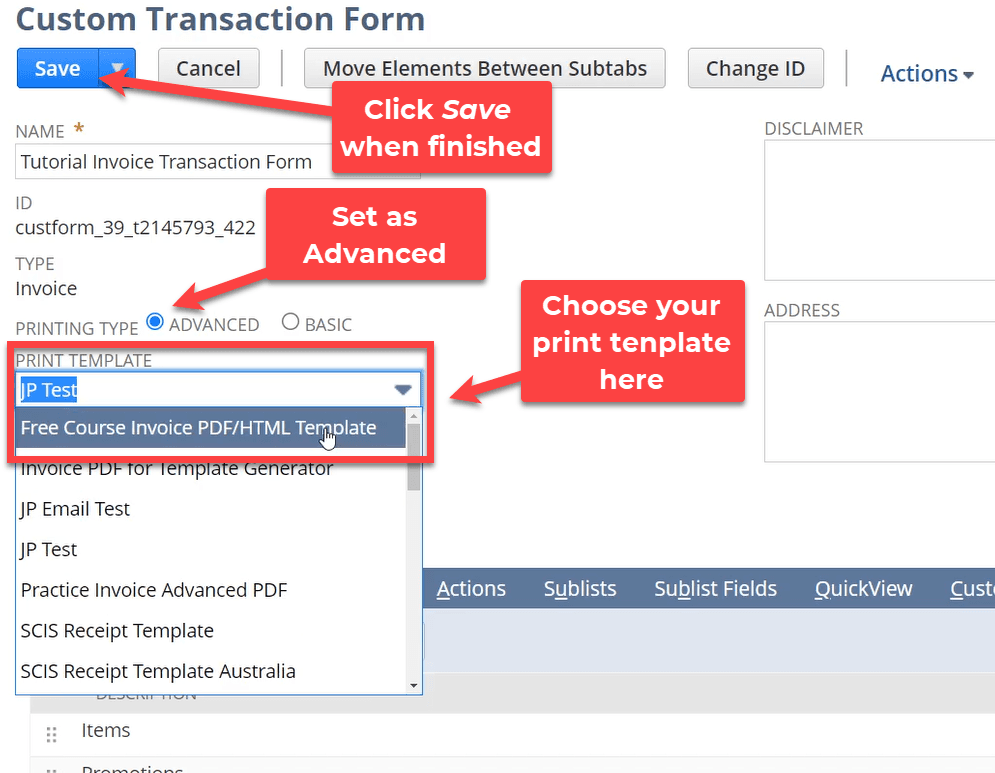
This will open up the Custom Transaction Form. Set the Printing Type to Advanced, next go to the Print Template dropdown and select the name of the template that you created and then click Save.
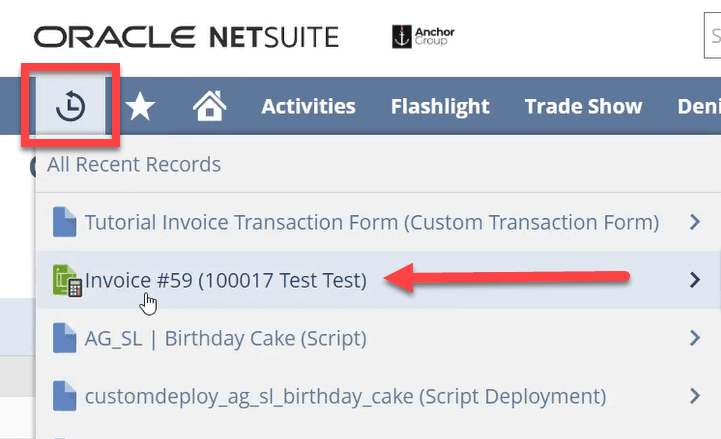
Once you click Save, you will be brought to the Custom Transaction Forms list window. To get back to the invoice that you were looking at, hover over the Recent Records Icon on the tab on the far left and click on the invoice in the dropdown.
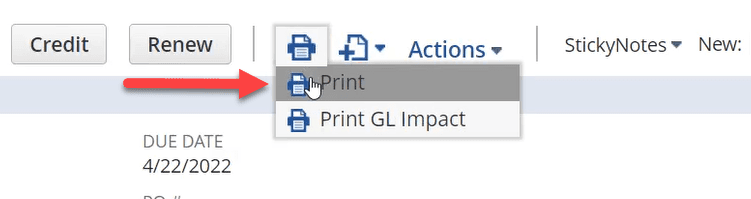
Once in the invoice record, navigate to the Print Icon on the main tab, hover over it and click Print.
After clicking print, a PDF invoice will be generated in a new tab. This PDF may not look the way you'd like it to, and this is where editing comes in.
Previewing Your Template
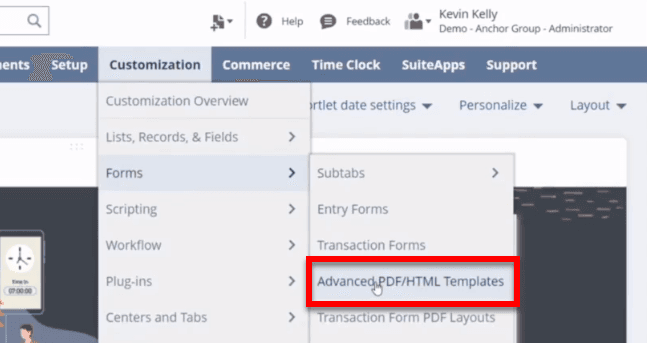
Next, navigate back to the Advanced PDF/HTML Template you created by going to Customizations > Forms > Advanced PDF/HTML Templates.
This will open the list of templates. Locate your template and click Edit in the Edit column on the far left side of the template's row.
Now that the template is open, navigate to the far right on the main tab and click Preview. This will open up a new window and will show a generic PDF preview of the template. This Preview option is another, and slightly more convenient, way to see what a template looks like.
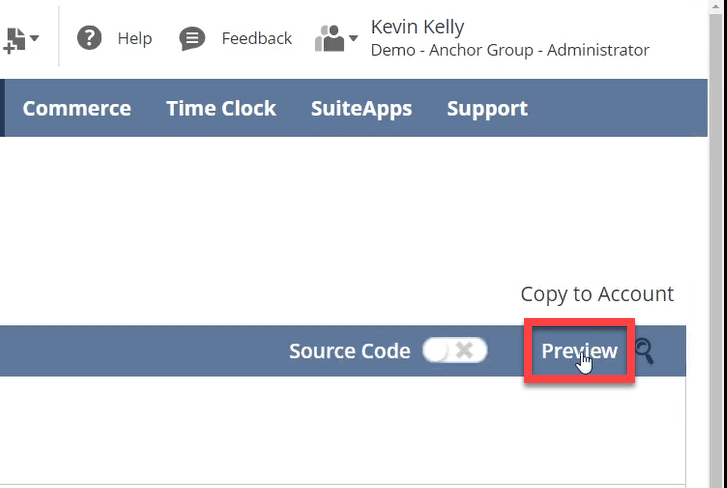
However, do not use the Preview option as your primary way of checking to see what the end product looks like, as there are a few elements that will be inaccurate, due to its generic nature. The Preview option is more suited for quick reference checks when editing small elements in the template. The printing method via the invoice record, that we walked through earlier, should be used to see the most accurate view of the template end product.
Note: With the invoice print method, the template must be saved every time you make changes if you want to see those changes.
Now we will look at the different tools at our disposal in the WYSIWYG mode.
WYSIWYG Tools In Your Template
There are many different tools in the WYSIWYG mode. To start, let's look at the New Elements Toolbar.

Starting on the left, we have the Fields tool.
This tool allows you to pull in record fields within NetSuite and display them on your template. It is even equipped with a search bar so you can easily locate the fields you want.
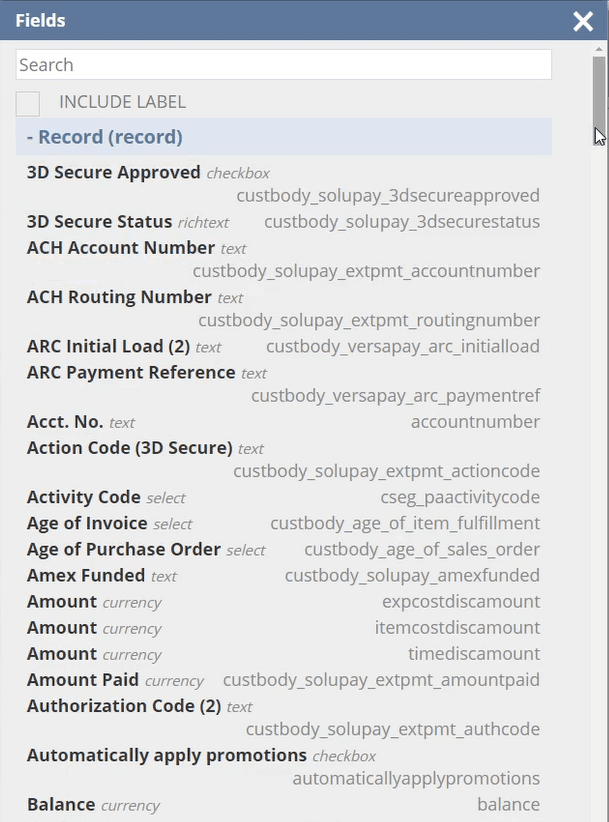
Once selected, the field will show up in the spot where you last clicked in the template, but you can move it around your template by selecting it and dragging it.
Next, is the Text tool.

Just like with the Fields tool, you want to select where you want to use this tool before you click on the icon. Once you click on the Text tool icon, a text box will appear. You can enter text into this box and manipulate the size of the box by dragging the sides.
Next is the Image tool.

This tool is used to add new images to the template. Once you click on the image icon (whether it is the creation icon or the icon of an existing image), a pop-up will appear with settings for the image. To get your logo or other images to display properly in you template, make the appropriate adjustments in these settings.
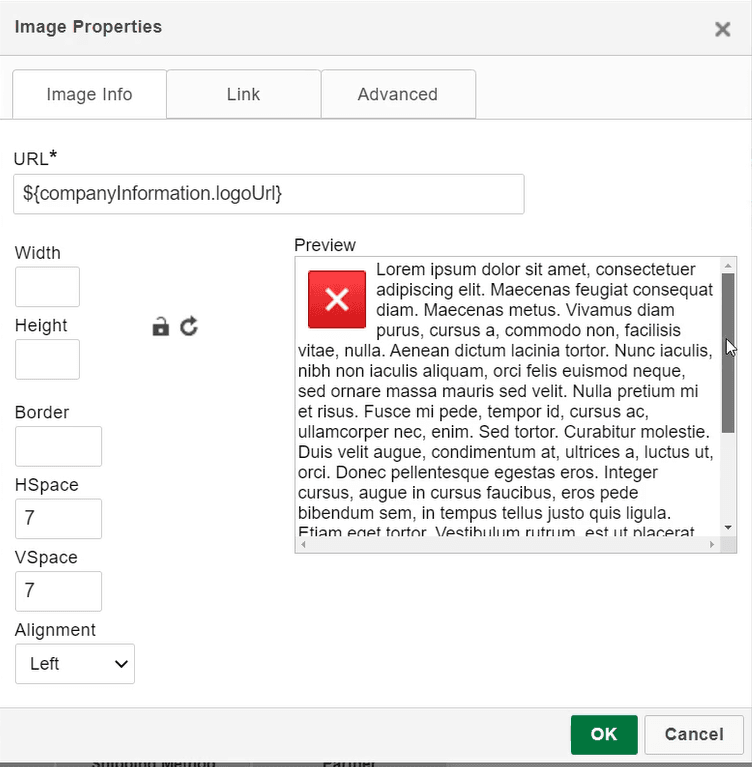
You can put the URL or field for the image you want to use and adjust its width, height, order, etcetera.
Next is the Tables tool.

This tool is used to create tables within your template. Once you click on the Tables tool icon, a pop-up will appear with settings for the properties of a table you are creating.
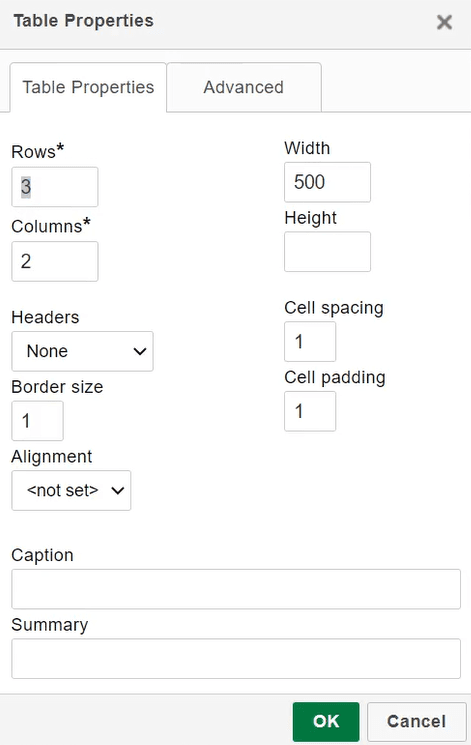
Once again, this tool will appear where you last clicked in the template.
Next is the Page Number tool.

Clicking on this page number icon will add a page number to each page, e.g., the first page will be assigned the number 1, the second page will be assigned the number 2, etc. These numbers can be moved around, but keeping them in the lower right hand corner of the template is recommended.
Next is the Page Count tool.

This tool is very similar to the Page Number tool, but it lists the total number of pages instead of the number of the page it is on.
Next is the End of Page tool.

This tool can be used to create a break in the page.
Next we have the Horizontal Line tool.

This tool is used to create horizontal lines in the template.
Up next is the Header tool.

This tool is used to create a header at the top of the template.
The final tool in the New Element Tab is the Footer tool.

This tool behaves just like the Header tool, but at the bottom of the template.
The remaining tools can be found under the Style tab.

The style tools are very similar to those found in most toolbars (like in Microsoft Office products) and contain things like font and document formatting adjustments.
Got stuck in a step during this article?
We like to update our blogs and articles to make sure they help resolve any troubleshooting difficulties you are having. Sometimes there is a related feature to enable or a field to fill out that we miss during the instructions. If this article didn't resolve the issue, please use the chat and let us know so that we can update this article!
Tagged with Training