Find SuiteCommerce Image (Bundle Installation Guide)
Every SuiteCommerce website has product images. When an image is uploaded to the file cabinet, it needs to be labeled using the naming conventions defined in the SuiteCommerce website setup record. When the file is saved, the image is automatically associated to the item record in a sublist. SuiteCommmerce administrators are unable to run a saved search on the associated image easily because it exists as a sublist on the item record. Anchor Group created a bundle that allows you to run saved searches on the item record to find the associated images on the product page. This bundle is needed by any company that uses SuiteCommerce or SuiteCommerce Advanced.
- Date
- January 8, 2026
- Read
- 12 min

Every SuiteCommerce website has product images. When an image is uploaded to the file cabinet, it needs to be labeled using the naming conventions defined in the SuiteCommerce website setup record. When the file is saved, the image is automatically associated with the item record in a sublist. SuiteCommmerce administrators are unable to run a saved search on the associated image easily because it exists as a sublist on the item record. Anchor Group created a bundle that allows you to run saved searches on the item record to find the associated images on the product page. This bundle is needed by any company that uses SuiteCommerce or SuiteCommerce Advanced.
Common Use Cases:
- Find items displayed on the website that don't have a product image
- Monitor when an associated image gets disconnected when a user changes the reference field (e.g. item name/number). This would cause the naming convention of the image file to not be correct and the image would no longer be associated.
- Create workflows to assign to SuiteCommerce administrator to ensure all new products have webstore images
- Find the URLs of the associated images
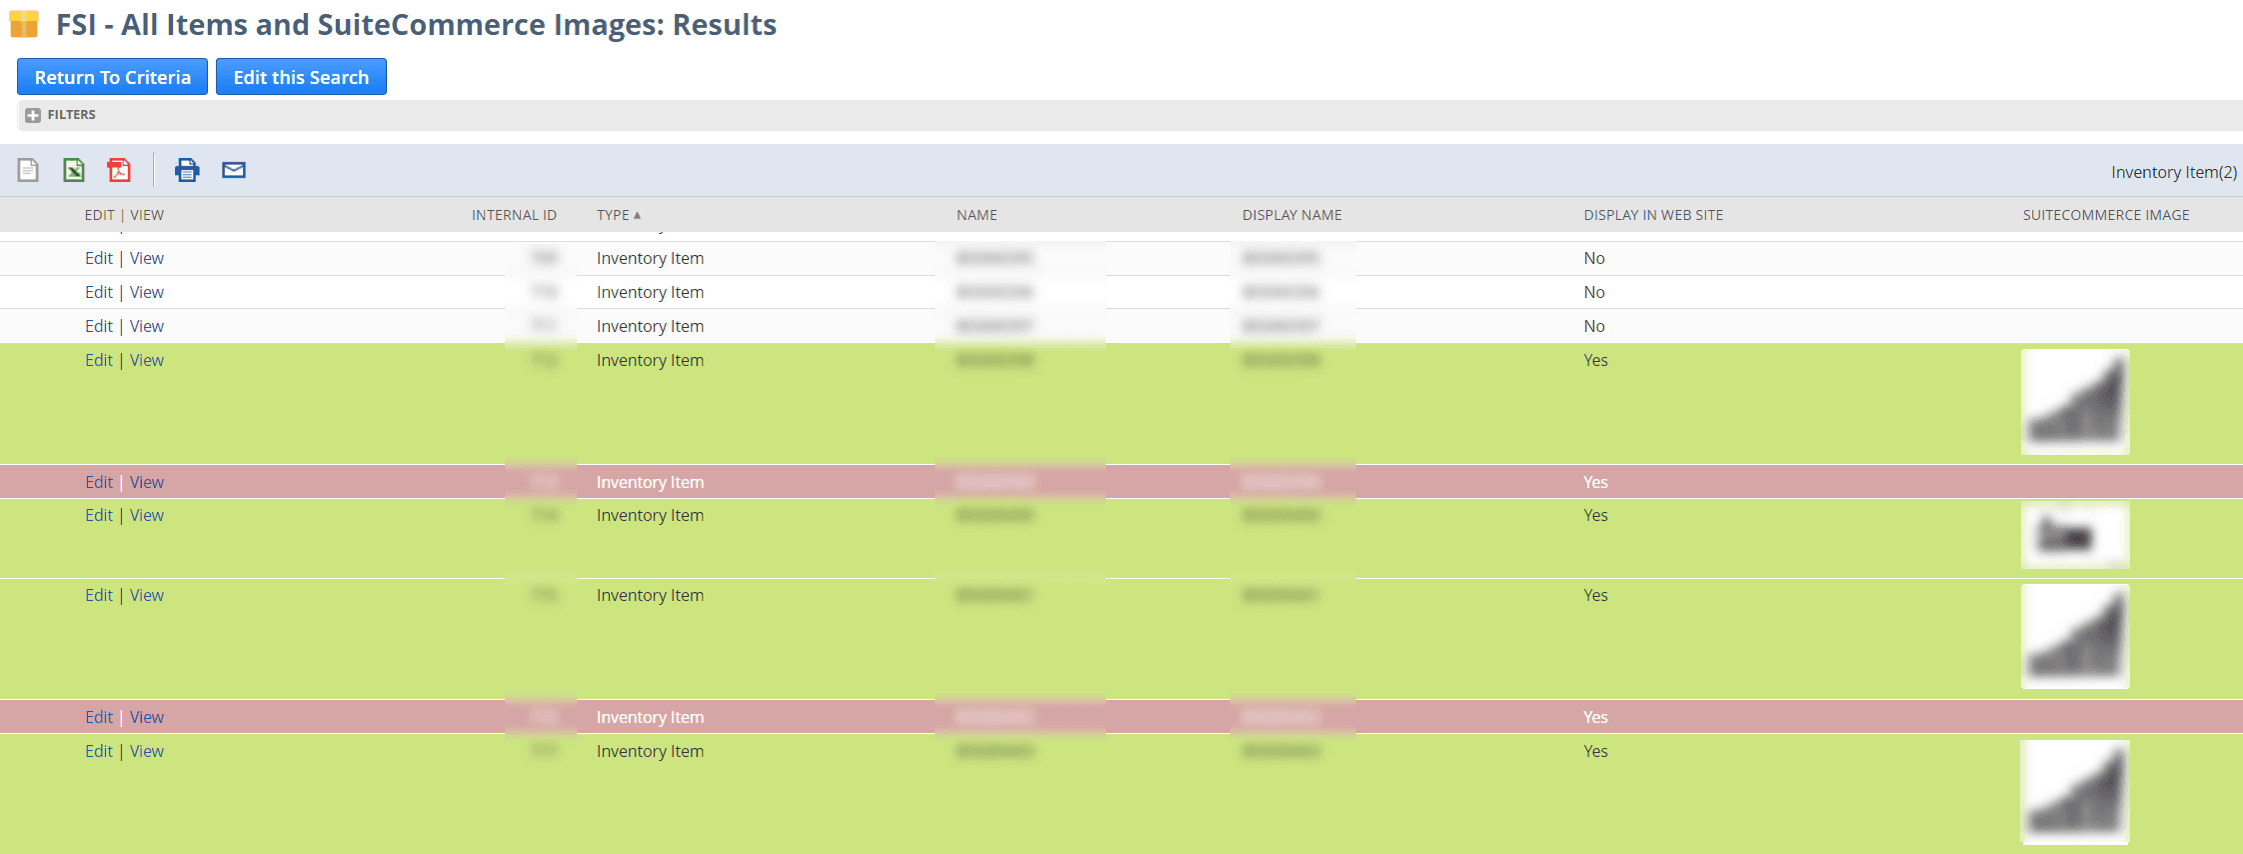
Here is a sample saved search that highlights items/products that are missing an associated image when the item is set to display to the webstore.
What is Anchor Group's Associated Image Bundle (Find SuiteCommerce Image)?
This is a bundle that Anchor Group NetSuite Consultants & Developers created for the SuiteCommerce community since it is a common data maintenance/management need in the ecosystem. The bundle is a rapid, self-installation NetSuite bundle that has been released to the community for FREE!
Why is it Free?
- Giving back to the SuiteCommerce community. We are thankful for all our clients and other developers that help build the ecosystem with us.
- We love the SuiteCommerce product because we have a large specialization in SuiteCommerce/SuiteCommerce Advanced development and would love to work with you!
- Honestly...we want you to see all the other even cooler NetSuite & SuiteCommerce solutions we have made so you can purchase those!
"I cannot thank you and your team enough for this free product, I was able to get it up and running with no issues, despite my limited experience in this area. I have already begun looking at your other bundles, they look incredibly useful." - John, Verified Customer
What does the "Find SuiteCommerce Image" bundle contain?
The bundle contains many pre-built elements including saved searches to have some SuiteCommerce administrator elements built out.
- Custom Item Field: "SuiteCommerce Image"
- Custom Center Category: "Find SuiteCommerce Image"
- File: AG_MR_FindSuiteCommerceImage.js
- Saved Search: FSI - All Items and SuiteCommerce Images
- Saved Search: FSI - Webstore Items With SuiteCommerce Images
- Saved Search: FSI - Webstore Items With NO SuiteCommerce Images
- SuiteScript: AG_MR_FindSuiteCommerceImage
All of these elements make for a fast installation with reporting built into the solution.
Here is a process flow map of the bundle for more technical NetSuite administrators or developers.
How to Install the Find SuiteCommerce Image Bundle?
Please use the following steps to install the bundle and get it into your NetSuite environment. This is a self-installation guide so you will be able to complete it on your own.
Step 1: Get the Bundle Provisioned to Your NetSuite Account (Fill out the Request Form)
You will need to fill out this form in order to get this bundle provisioned to your NetSuite account. This will notify the Anchor Group team to get the bundle provisioned to your account. Once you complete this form, it may take up to 1 business day to get provisioned. You will receive an email confirmation within 1 business day that it has been provisioned. Then you can proceed to Step 2. You will be unable to proceed to step 2 until the bundle is provisioned to your NetSuite account.
Step 2: Install the Bundle
Navigate to Search and Install Bundle.
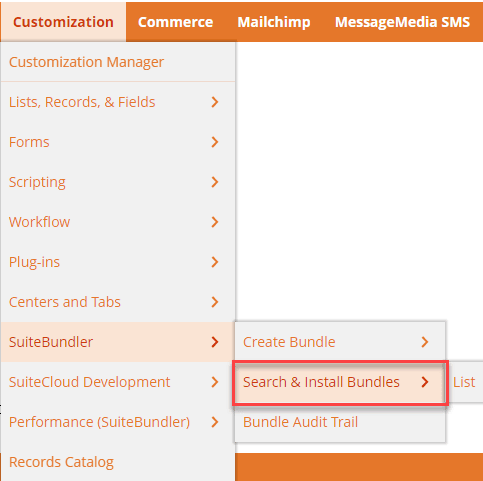
Then either search for the Bundle ID or the bundle name and press 'enter'.
Bundle Name: Find SuiteCommerce Image
Bundle ID: 455140

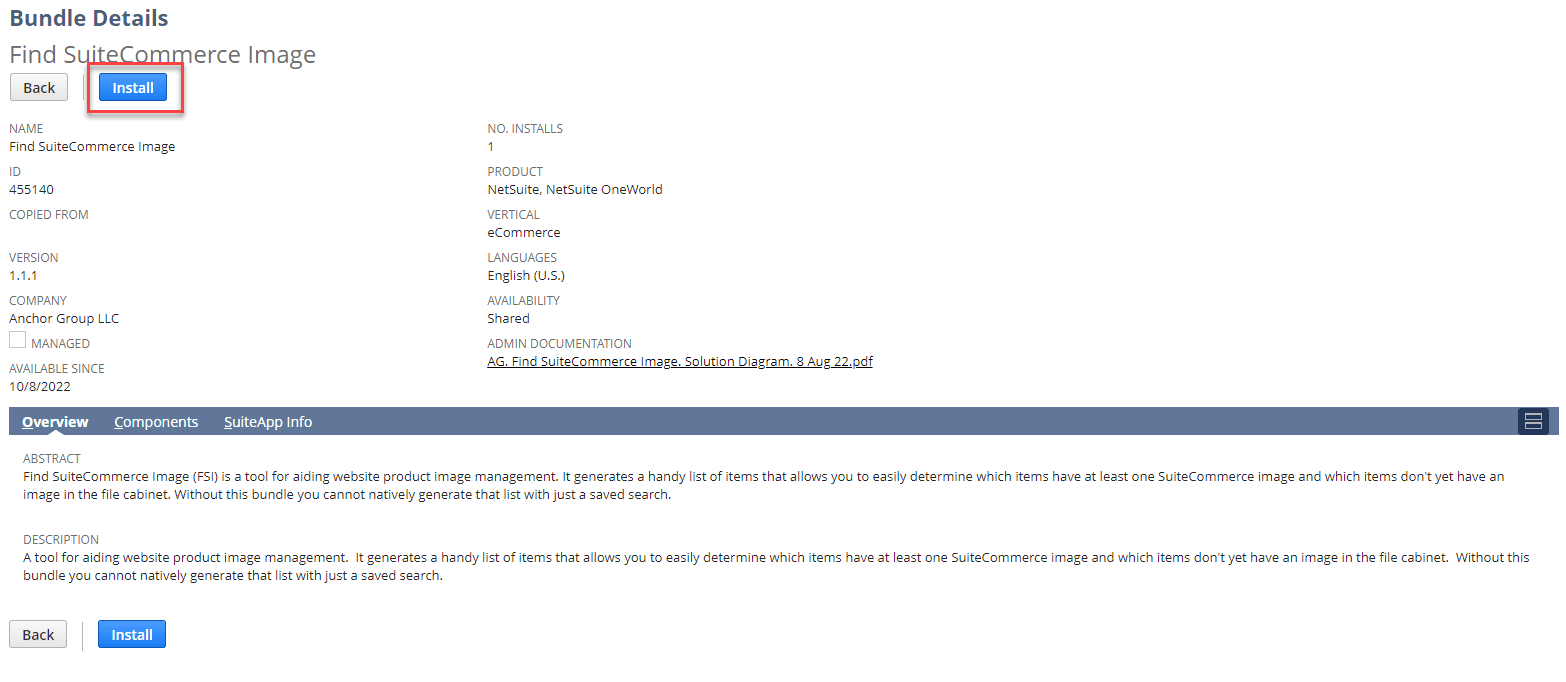
Click on the hyperlink and click 'INSTALL'
Next you will be shown a page to review the bundle one more time. Click "Install Bundle"
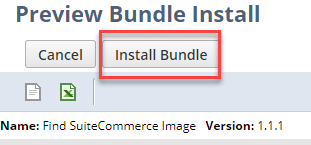
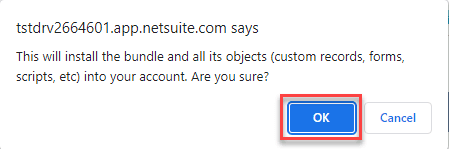
There is a pop-up notification when installing bundles in NetSuite so you need to confirm and click "OK".
The bundle may take a few minutes to finish installing. You can see the status column of the "Installed Bundles" page. Every couple of minutes, refresh this page until the status of the "Find SuiteCommerce Image" row has a checkmark. Then proceed to Step 3.
Step 3: Deploy the SuiteScript and Run Update
In the bundle, there is a SuiteScript that runs to perform a mass update in order to pull the associated image URL onto the custom item fields that were added during the bundle installation. If you go to your item record, you will see a field called "SuiteCommerge Image". The SuiteScript will run and update this field so that you can run the reports/saved searches on this data.
The SuiteScript is set to run every Sunday by default so during the initial installation, you may want to run it manually for the first time so you don't have to wait. Alternatively, you can change the frequency of the SuiteScript to run more frequently.
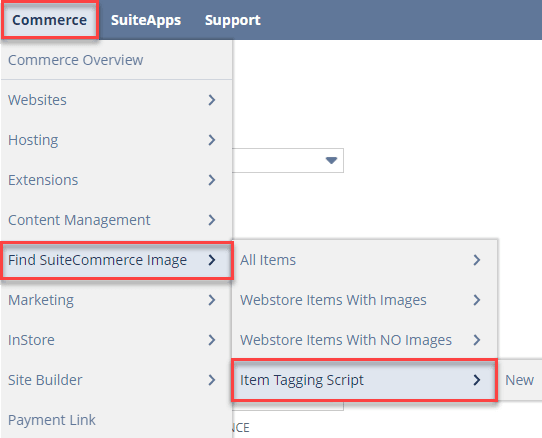
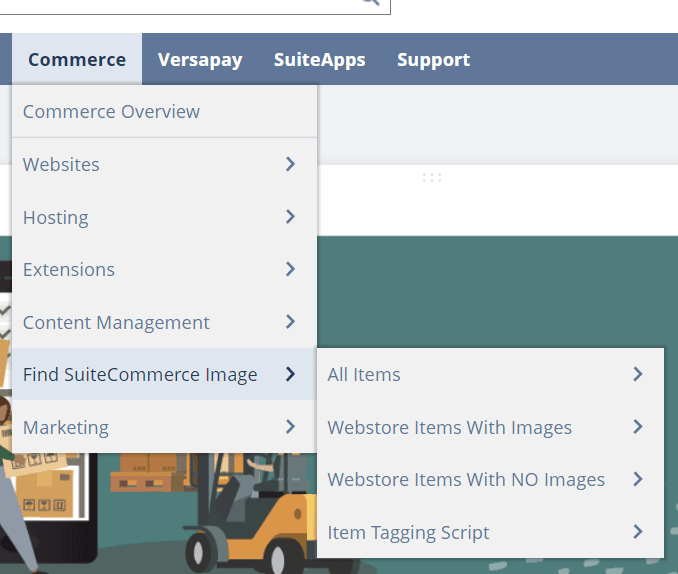
In order to manually run the Script, go to the script deployment. The easiest path is by going to COMMERCE > FIND SUITECOMMERCE IMAGE > ITEM TAGGING SCRIPT. Make sure to NOT click 'new'.
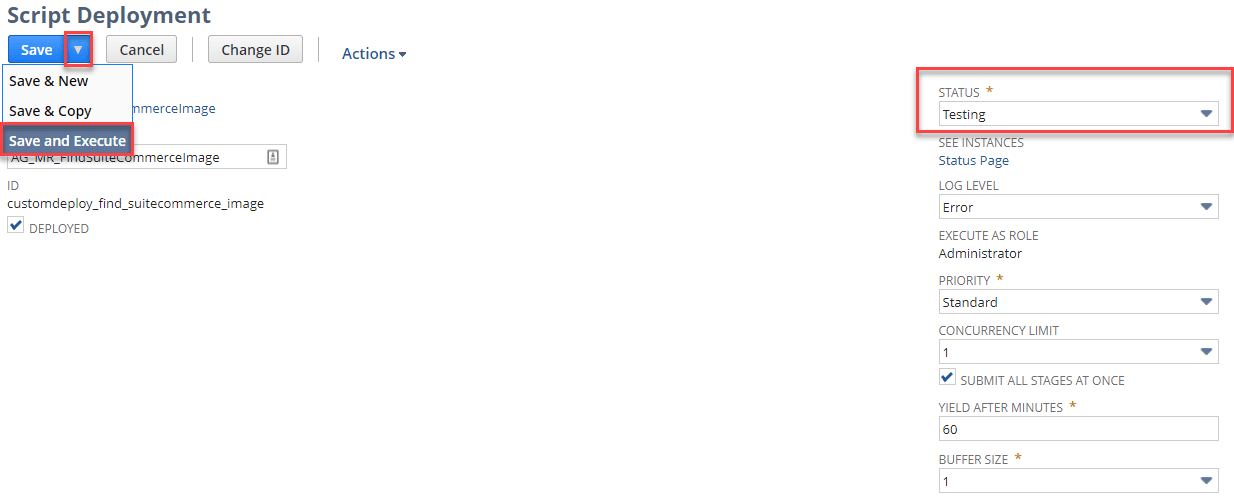
Then you will need to click "edit" and change the status from "scheduled" to "testing" which will allow you to manually trigger the script. Next hover over the "down" arrow and click "Save and Execute".
IMPORTANT STEP: After the script finishes and you confirm it is successful, you will need to "edit" again and switch the status back to scheduled. But this time, just click "Save.
In the meantime, while your items are updating you can start opening some item records to confirm it is working properly.
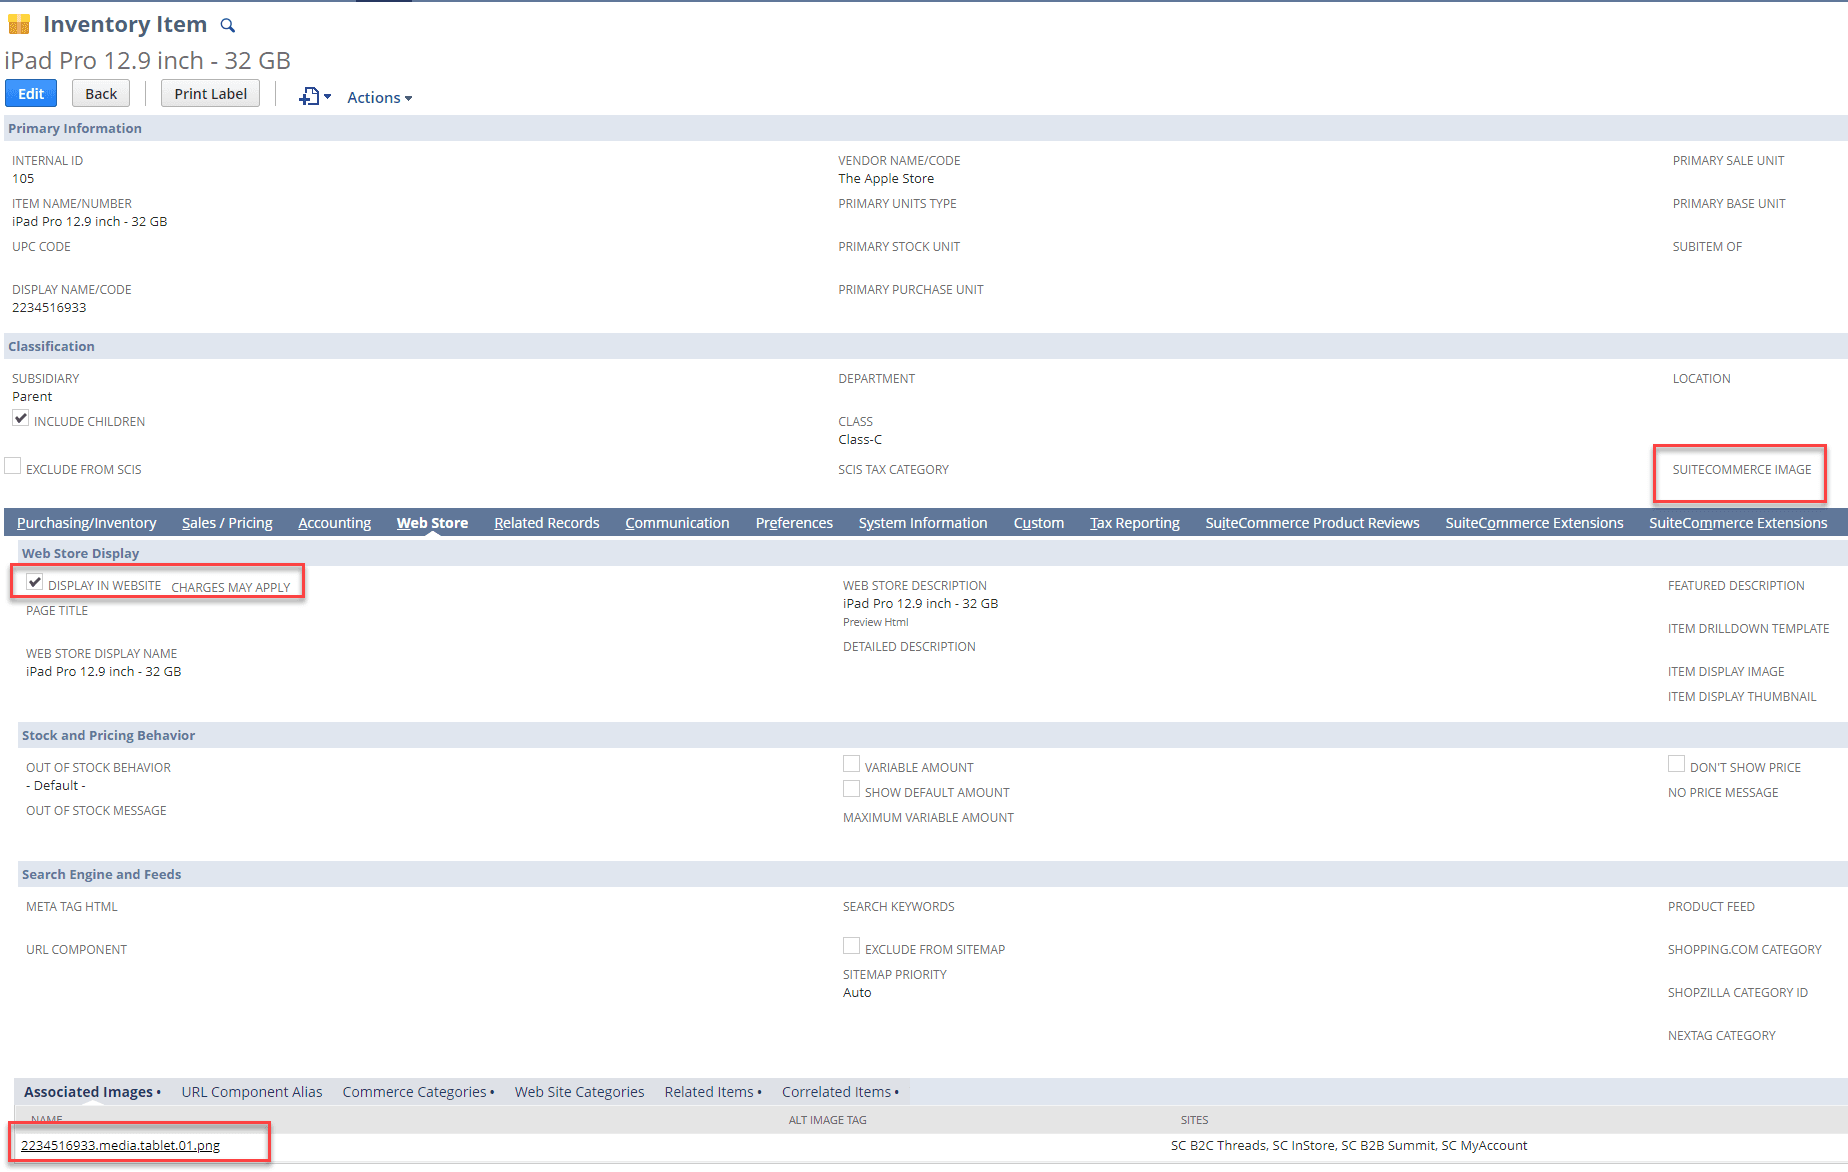
To get familiar with the new field on the item record and to begin testing, you will want to find an item that is displayed in webstore, find where the "SuiteCommerce Image" field is on the item record, and make sure to test using an item record that has an associated image on it. See the image below as an example.
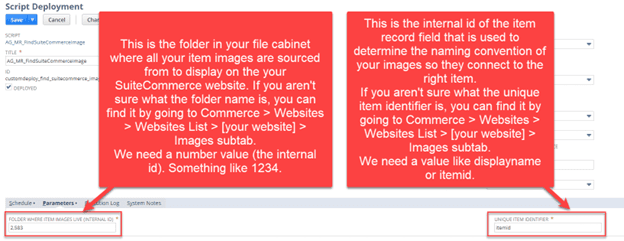
IMPORTANT STEP: Make sure to set the script parameters on the script deployment record. If you don't know how to do this, then follow the guide below to script parameters specific to the Find SuiteCommerce Image Bundle.
Guide to Script Parameters:
It is easy to update the script parameters, but most of the work is getting the information that is required to update the parameters. This guide walks you through how to get the required information to update the script parameters specifically for this bundle.
There are two main steps:
- Get the correct internal IDs.
- Apply the internal IDs to the script parameters.
Now let's get the correct internal IDs needed for the Find SuiteCommerce Image bundle script parameters.
Go to the website setup record and make note of both "Image Folder" and "Item Identifier" fields.
- Navigate to COMMERCE > WEBSITES > WEBSITE LIST
- Select your SuiteCommerce website and click edit
- Navigate to the IMAGES tab
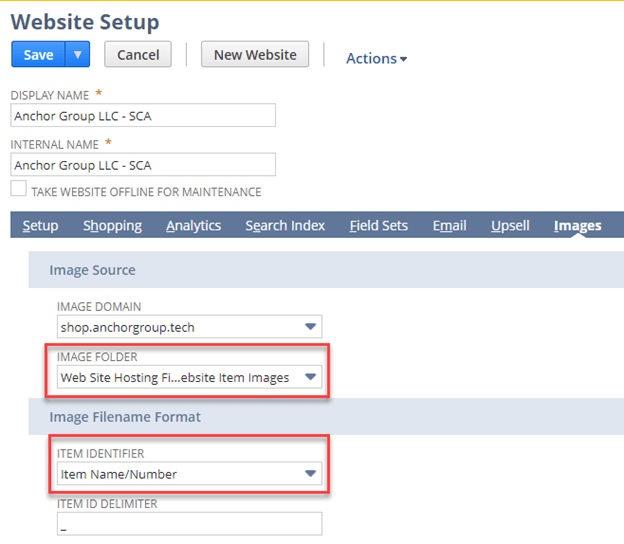
Now we need to get the internal ID that corresponds to each of these values.
The first one we need is the internal id of the image folder, which you can find in the file cabinet.
Navigate to DOCUMENTS > FILES > FILE CABINET
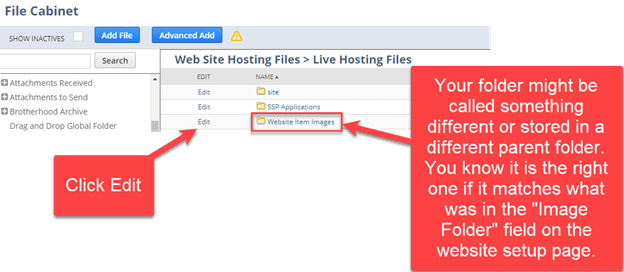
We can now pull the internal ID of your folder that was used in the website setup record.
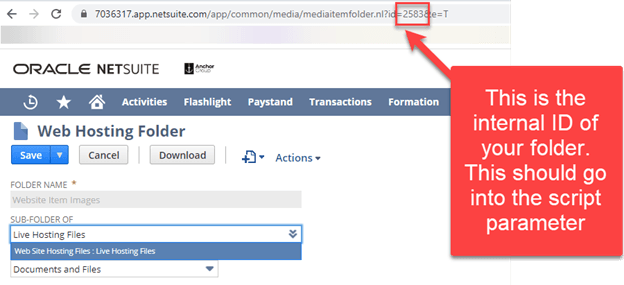
Great! You have the first script parameter, the internal id of the folder where item images live.
Now we need to get the internal id of the item record field that is used to connect images to items.
Start with the value that was in the “Item Identifier” field in the website setup. If this is “Item Name/Number”, then you don’t need to do anything, as the default script parameter of “itemid” will be correct. However, if you are using some other item field, you will need to hunt down the internal id of that field.
Navigate to LISTS > ACCOUNTING > ITEMS and file the "item identifier field on the item record. If this examples, it is the "Item Name / Number" field on the item record. Click on the field label to find the field internal ID.
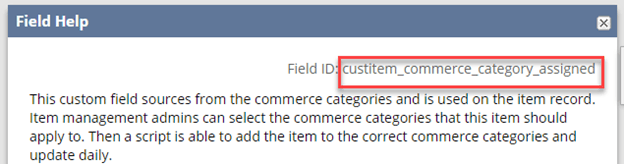
This should display the field help as well as the internal id of the field. Copy the Field ID of the field – this is your second script parameter, the “Unique Item Identifier”.
If you don’t see the Field ID, you may need to set your user preferences to allow you to see the internal ids of fields. Here is how to do that:
Hover over the "House" icon in your NetSuite Navigation bar and click SET PREFERENCES.
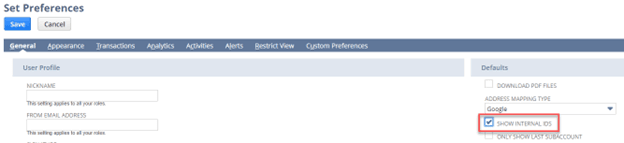
Enable the "Show Internal IDs" by checking this box. Now navigate back to the item and get the internal ID.
Last step is to actually update the script deployment record parameters.
Step 4: Review Navigation and Saved Searches
After the map reduce SuiteScript has been completed (runs on a scheduled basis), you can run your saved searches and begin leveraging the built-in saved searches and navigation.
If you hover over the COMMERCE tab, you will now see there is a new center category called "Find SuiteCommerce Image" with links to the built-in saved searches. You can use these saved searches or edit them to your preferences.
Here is one example that is built in which runs a saved search on the associated image with items displayed on the website. You will notice that there is highlighting built into the search to make it easier to identify items that are displayed on the web store but are missing a product image.
Related Article: Product Comparison SuiteCommerce Bundle Configuration
Step 5: Finish Testing in Sandbox and then Perform the Installation in Production
After you complete this installation process in your sandbox account, you will want to perform it again in your production account. Back to Step 1!
Once you have completed the installation process for your production account, that's it! You've finished setting up the Associated Image SuiteCommerce Bundle and can begin resolving missing item images.
Want an easy way to add item images in NetSuite? Check out the Drag-and-Drop Item Image extension for SuiteCommerce!
Other SuiteCommerce Data Management Solutions we think you will love!
This associated image data management solution is one of many solutions we have created for SuiteCommerce administrators to better maintain their website product data and SEO practices. Here are just a few more examples of SuiteCommerce Data Management solutions built by our team of NetSuite Developers here at Anchor Group:
- Drag-and-Drop NetSuite Item Images (Drag an image into an upload field on an item record to be automatically named and associated with the item)
- Commerce category management (Add/remove commerce categories directly from the item record)
- Automated Image Alt Tag (never forget this important SEO step again)
- Automated Meta Description (never forget this important click-through rate step again.)
Contact us to learn more about these and other SuiteCommerce data management solutions!
Get stuck in a step during this article?
That's all for now! Hopefully, this post successfully guided you through setting up the Associated Image Bundle for your SuiteCommerce website.
We like to update our blogs and articles to make sure they help resolve any troubleshooting difficulties you are having. Sometimes, there is a related feature to enable or a field to fill out that we miss during the instructions. If this article didn't resolve the issue, please use the chat and let us know so that we can update it!
Oracle NetSuite Alliance Partner & Commerce Partner
If you have general questions about SuiteCommerce or more specific questions about how our team can support your business as you implement NetSuite or SuiteCommerce, feel free to contact us anytime. Anchor Group is a certified Oracle NetSuite Alliance Partner and Commerce Partner equipped to handle all kinds of NetSuite and SuiteCommerce projects, large or small!
![]()
We are a premium SuiteCommerce agency that creates powerful customer portals. Unlike our competitors, we have already solved your problems.
FREE SuiteCommerce Book
If you liked this article, you'll LOVE our book on SuiteCommerce! It's full of tips and tricks for getting the most value from your SuiteCommerce site. So, what are you waiting for? Order the free SuiteCommerce book today, and we'll even pay for shipping!
Tagged with Training, Troubleshooting